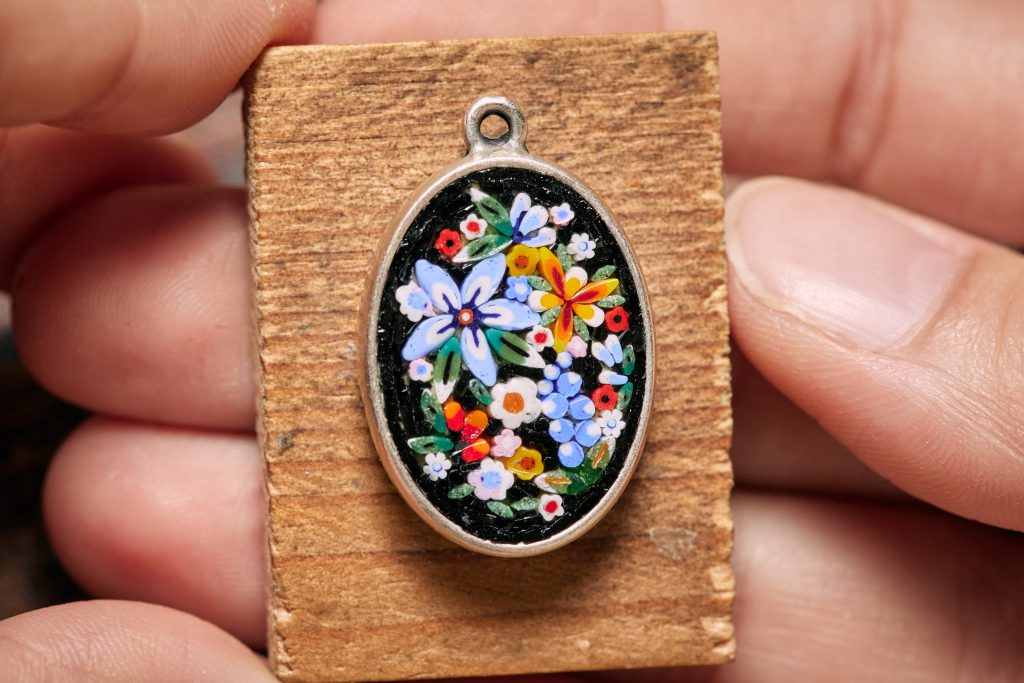
Have you ever wanted to create a micromosaic? With this simple and clear guide prepared by Rebecca Di Filippo, you too can make a colorful and unique pendant. Here’s how to do it!
Materials Needed
Before you start, make sure you have the following materials available:
- Pendant base
- Mortar
- Boiled linseed oil
- Raw linseed oil
- Roman Stucco
- Spatula
- Diamond needle files
- Tweezers Straight
- Widia Nippers
- Squeeze bottle
- Filato mosaic – Flat black
- Filato Mosaic – Leaves Mix
- Filato Mosaic – Petals Mix 2
- Filato Mosaic – Flowers Mix
- Black stringers (optional)
- Set of 10 wax carvers tools
You will also need:
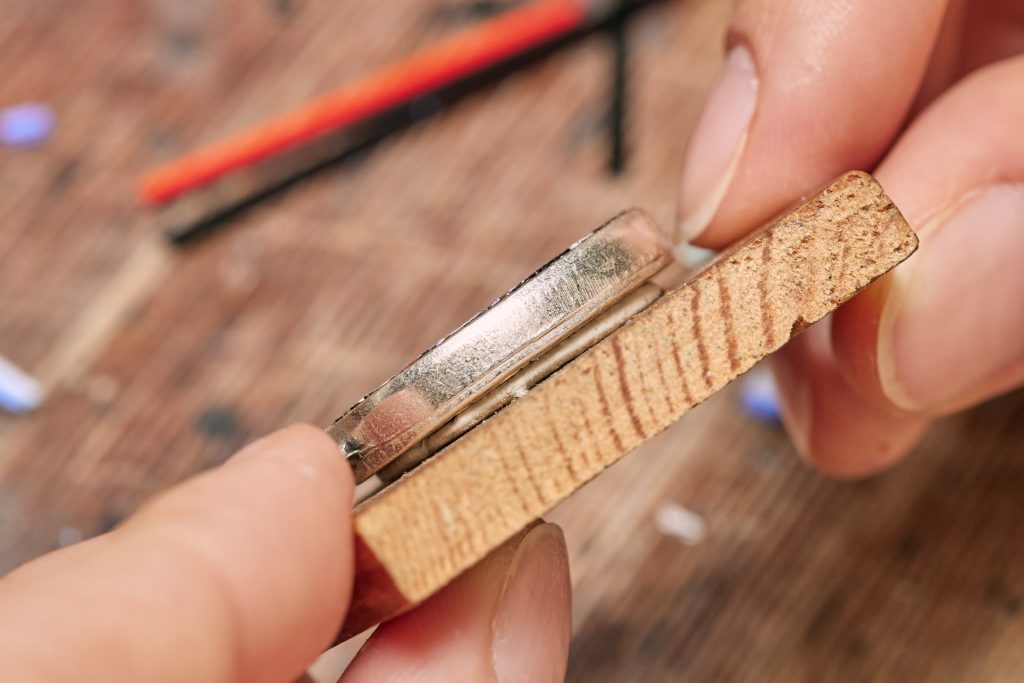
- Three pieces of wood (one to mix the putty, one to rest your piece on, one to flatten the tiles)
- Some Patafix
Step 1: Preparing the Stucco
Mixing the oil: fill the squeeze bottle with equal parts raw and boiled linseed oil, and shake it to mix the two oils well.
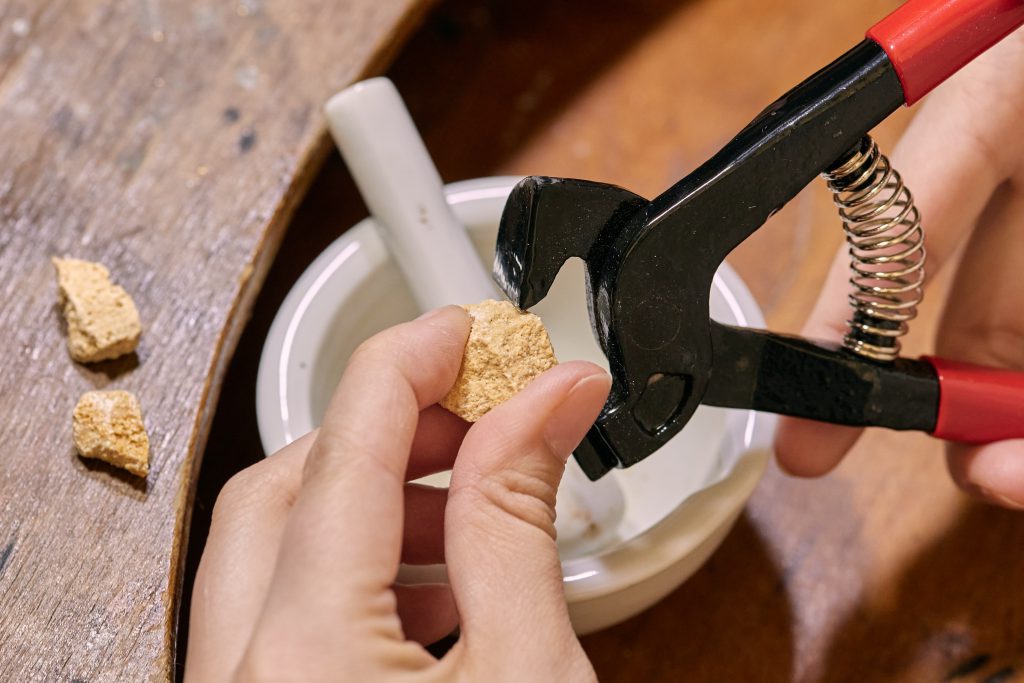
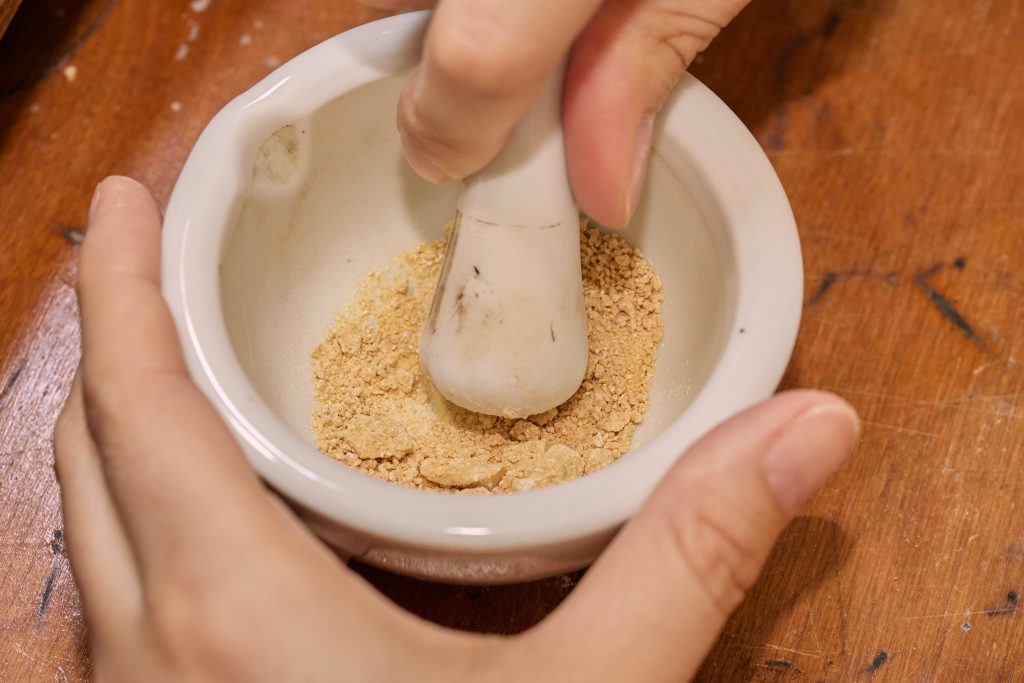
Crush the stucco: using bolt cutters, break 2-3 grams of Roman stucco into small pieces and put them in the mortar. Grind the stucco to a fine, flour-like powder.
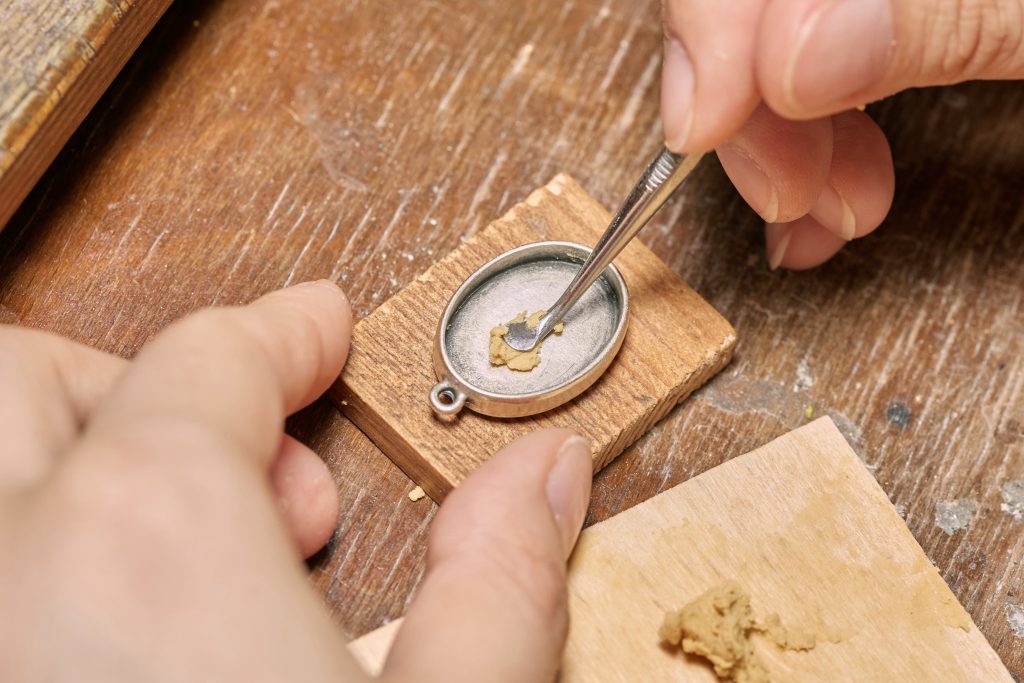
Create the mixture: once you have ground the Stucco, with the spatula take some and put it on a piece of wood to mix it. Here you see about 0.60 grams of Stucco powder, to which 2-3 drops of the previously mixed oil have been added. Add the oil gradually and, using the spatula, begin to combine it with the Stucco until it reaches a consistency similar to plasticine. If the mixture does not blend or crumbles, add a few more drops of oil, one at a time. If the mixture is too runny, add more powder, until the desired result is achieved.

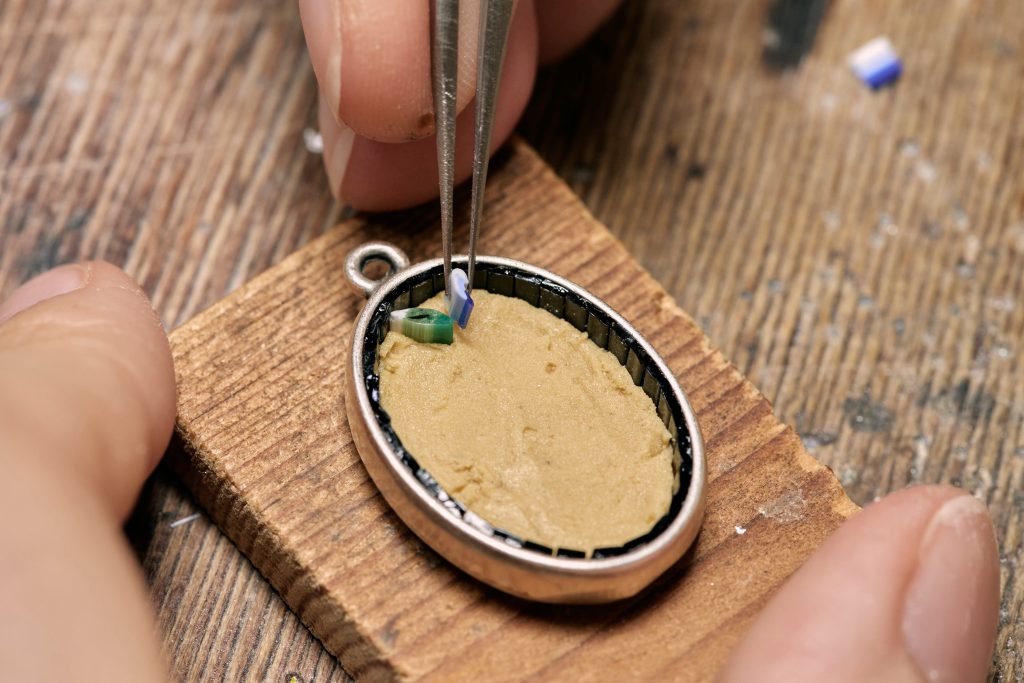
Step 2: Application of Stucco
Prepare the bezel: put a layer of Stucco in the bezel using a wax carving tool. The layer should be at least 1 mm high. Bend the tip of the tool slightly with pliers to get a better angle between the handle and the flat part. This will make it even easier to spread the Stucco.
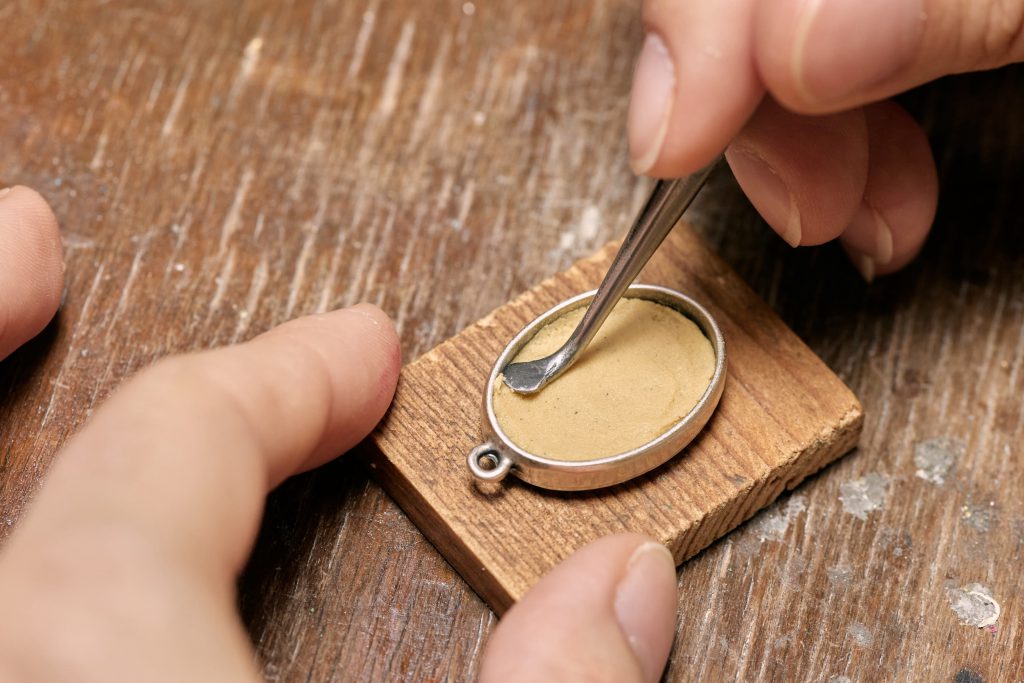
Use the correct tools: do we really need all these tools to put Stucco on? The answer is yes! Choose the right tool based on the shape of the bezel you have chosen for your micromosaic. For large surfaces, prefer large tools; for edges, use the pointed tools found in the wax carving set.
Step 3: Cut and Place the Tiles
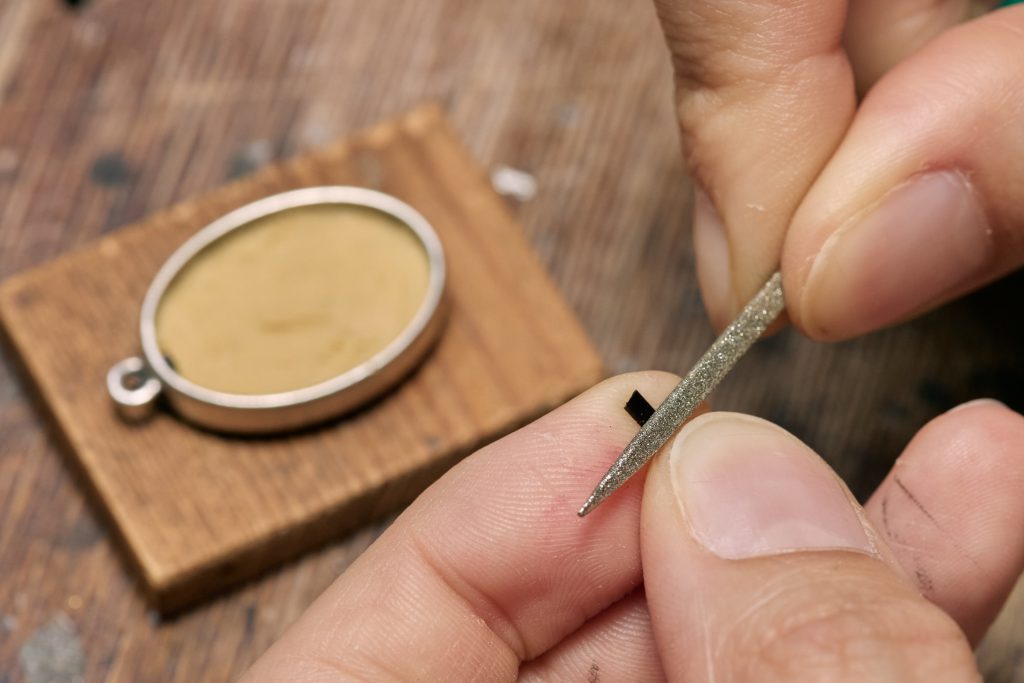
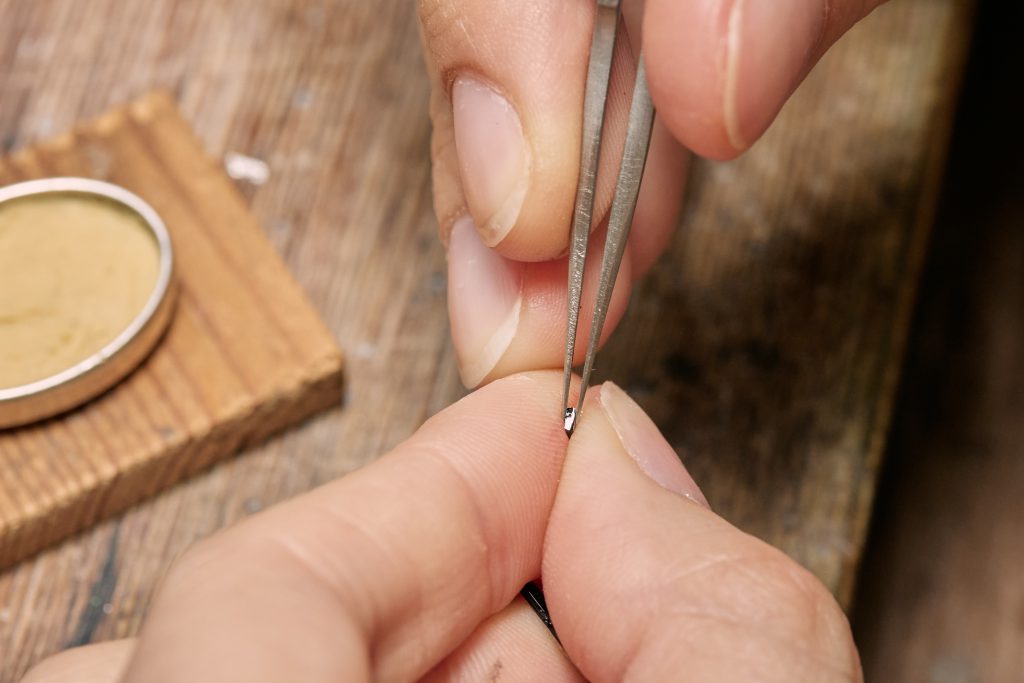
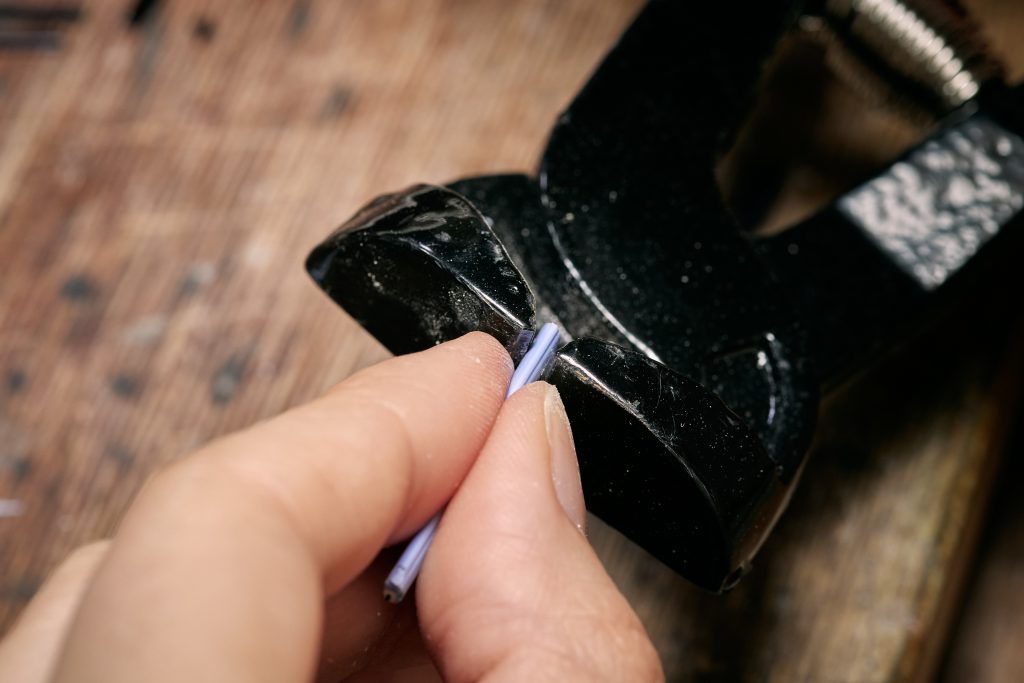
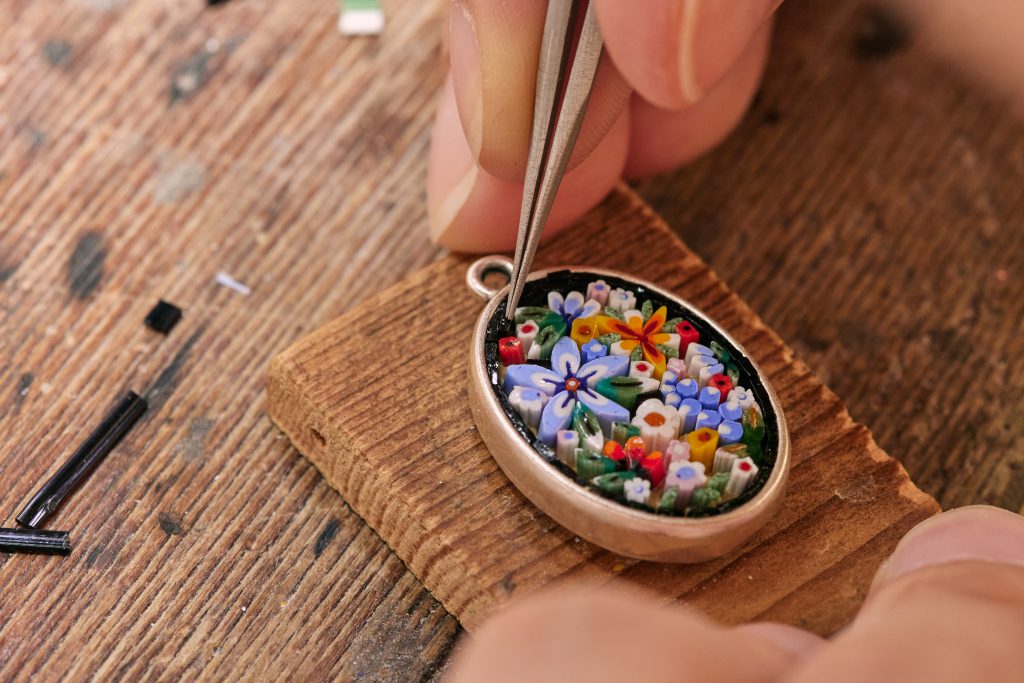
Cut the tiles: for this bezel, the tiles should be between 2.5 and 3 mm in height. Slide the edge of the diamond file to lightly score the flat black filato mosaic. The mark should be exactly where you want the wire to break. You can help yourself at first by taking the measurement, but over time you will be able to do this by eye. Squeeze between the tweezers the part of the wire you want to break. Holding the tweezers tight, but without exerting too much force, tilt it by giving a sharp blow-you’ve got your first tile.

Place the tiles: pick up the tile with tweezers and prepare to place it in the grout. The tile should be placed vertically and pushed slightly into the Stucco until the top of the tile matches the edge of the bezel. Complete the outer round of black tiles by placing one tile next to the other.


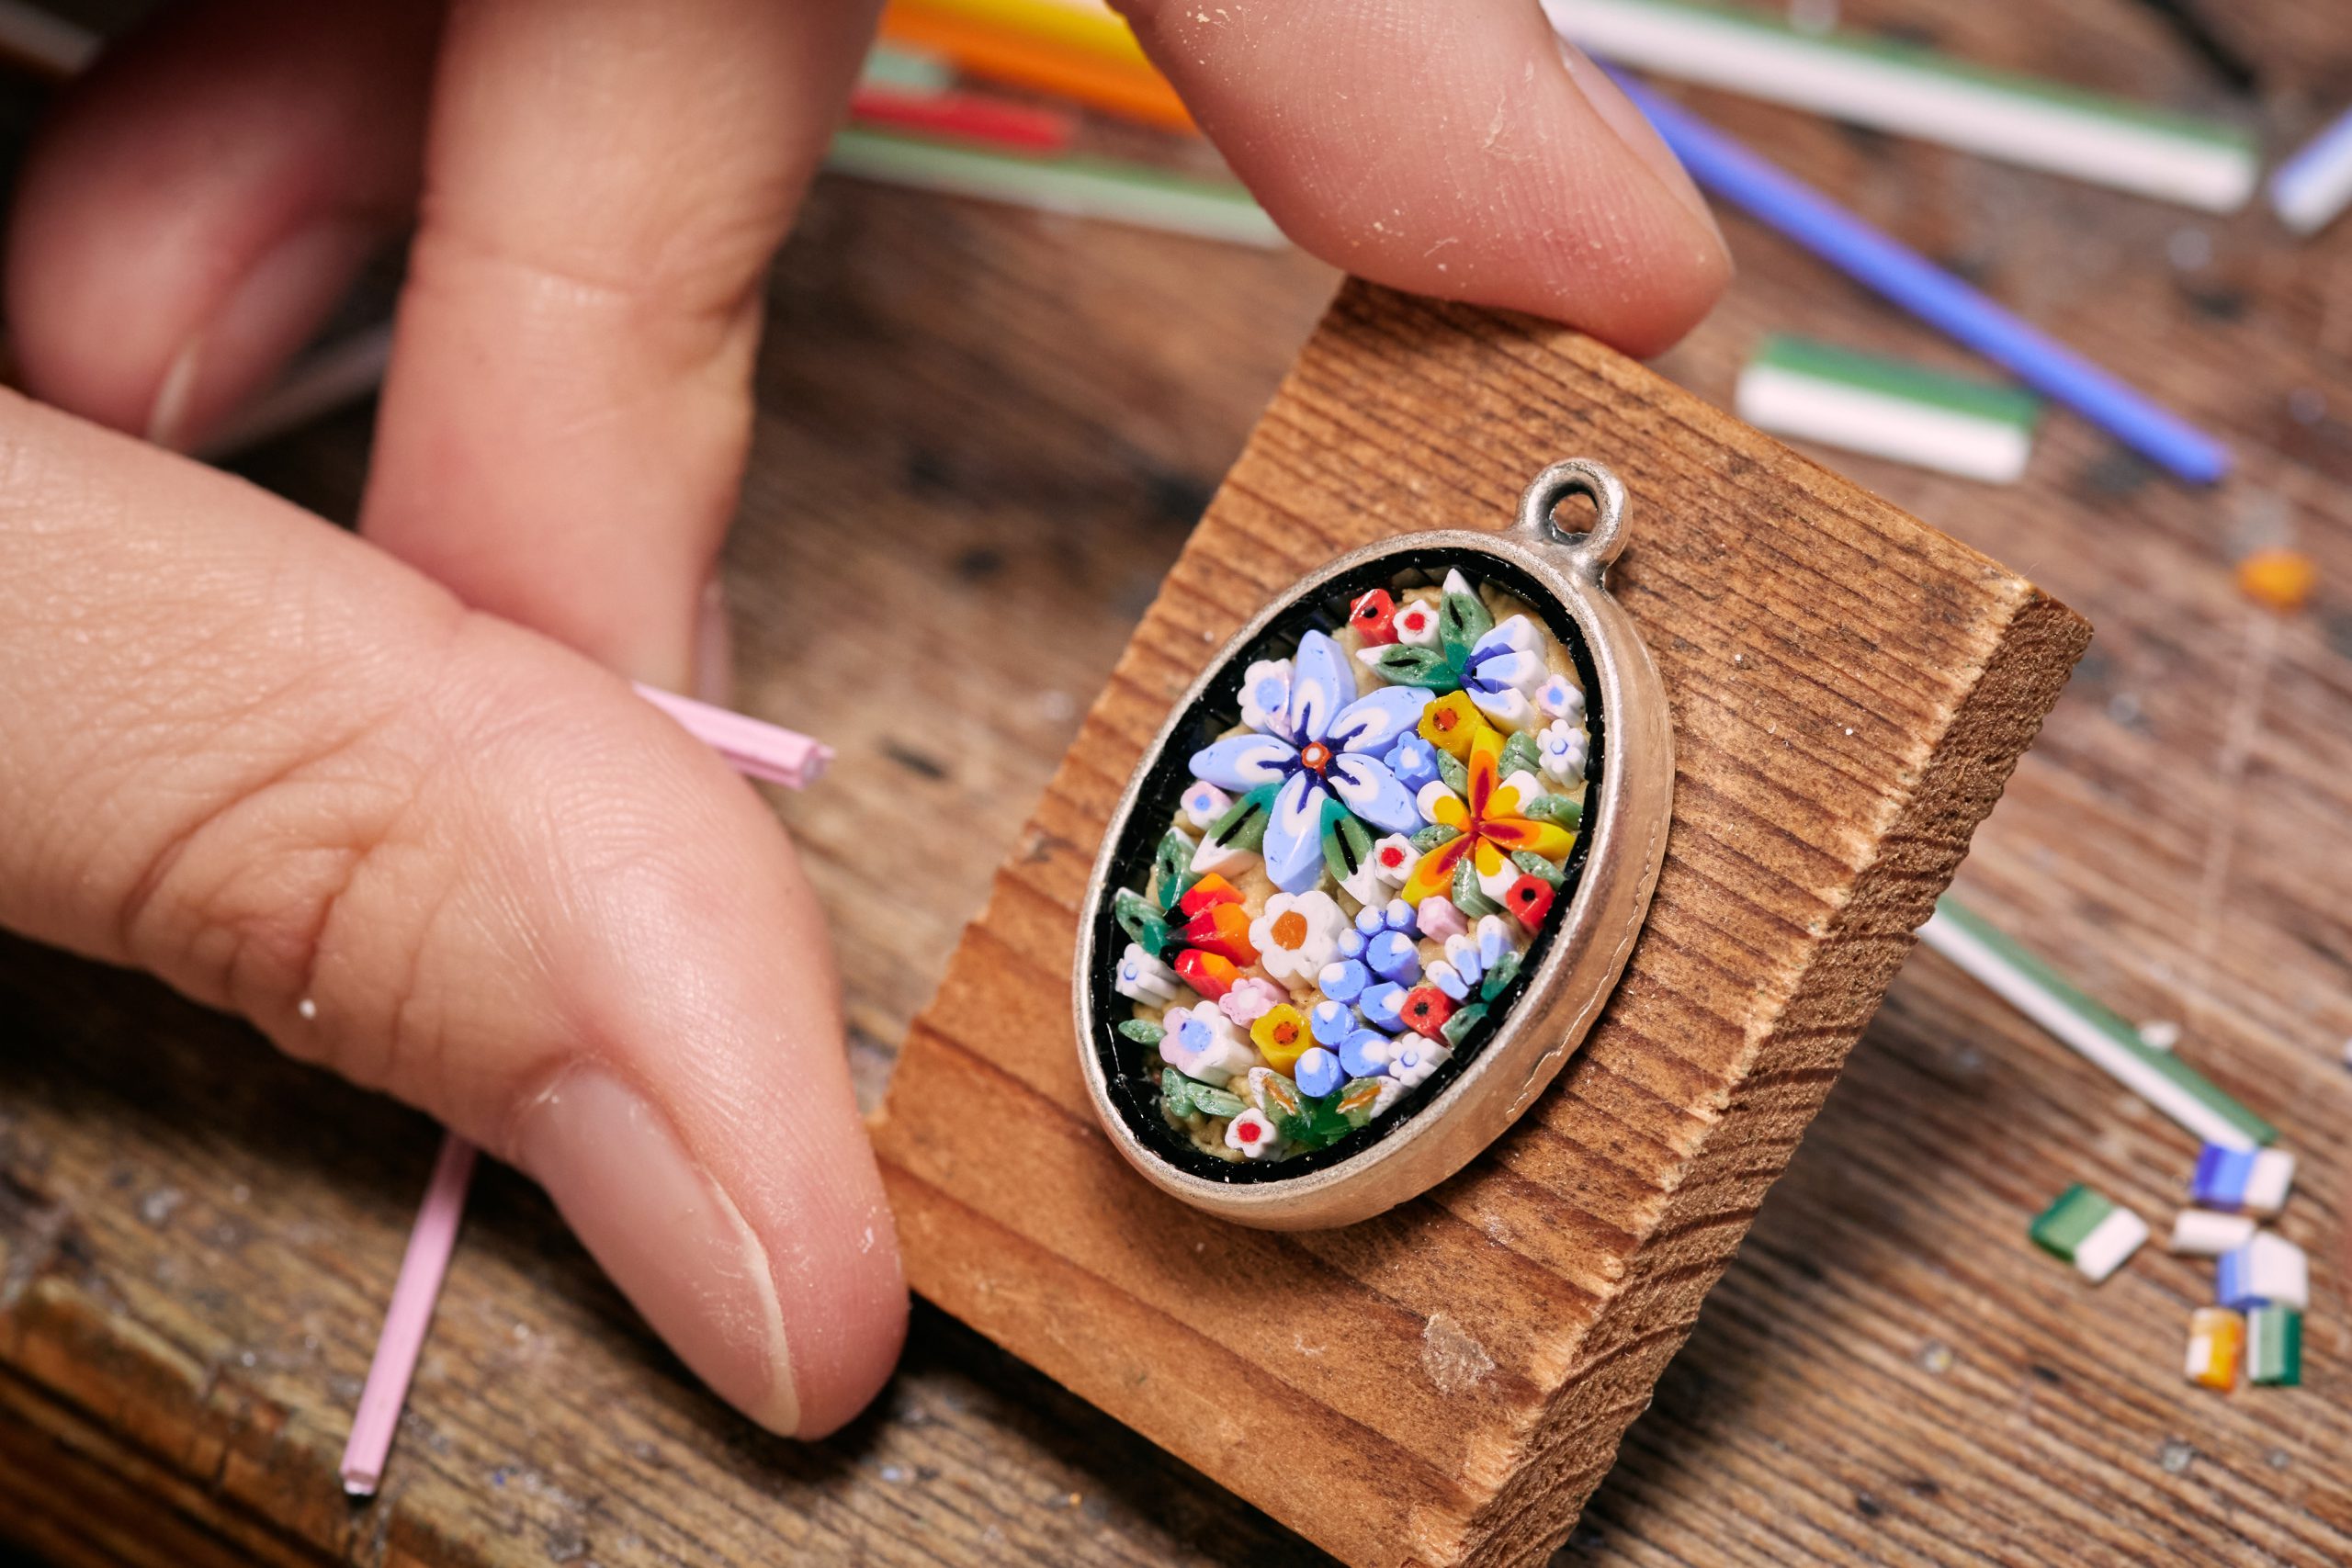
Step 4: Central Decoration
Create the decoration: with the center decoration you can express all your creativity! Use filato in the shape of petals, flowers and leaves to create a unique floral decoration in the center of your pendant. If some of the filato mosaic are too large and you can’t break them with tweezers, you can help yourself with wire cutters. Wear clear safety glasses. Don’t get too close to your face as you cut, lest some of the tiles end up in your eyes. Over time you will be able to control the cutting of the tiles well, but better not take any risks!
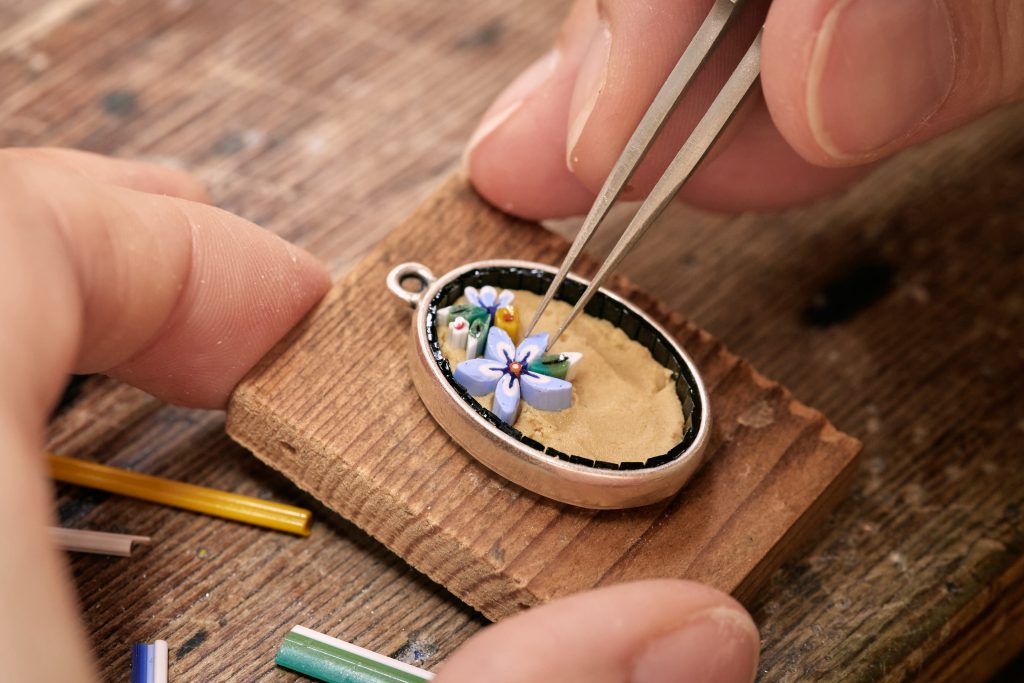
As you place the tiles of the central decoration, do not lose sight of the height of the tiles, which must not protrude from the bezel; and the inclination of the tiles, which must be placed vertically, perpendicular to the base. Do not be in a hurry: the Roman stucco used gives you the opportunity to work on it quietly for a few days.
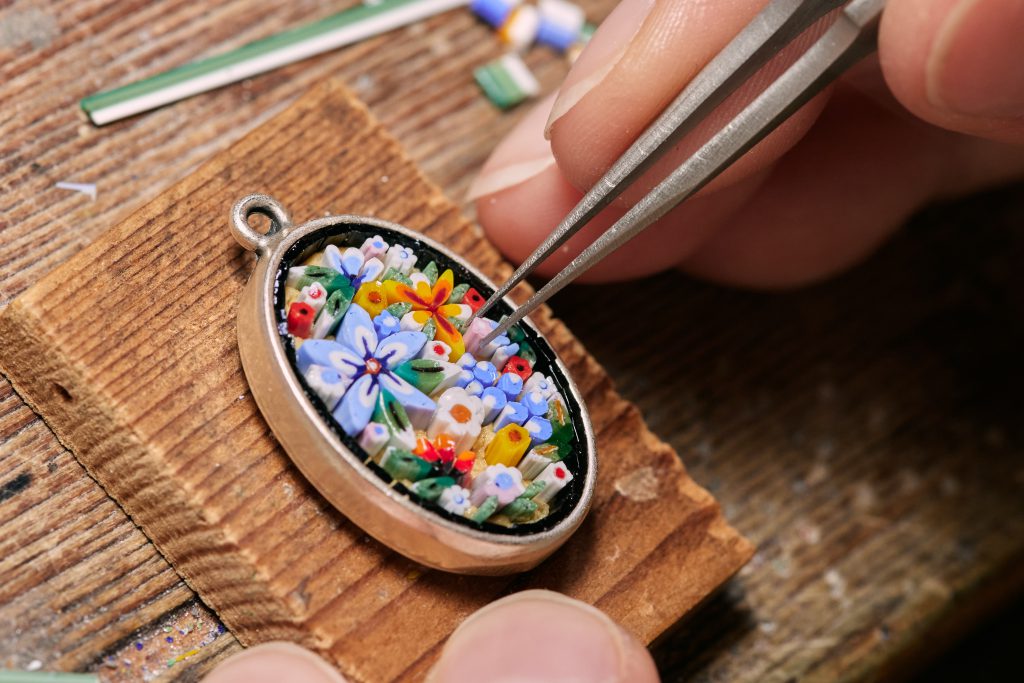
Also keep an eye on the Stucco: if you put too much on, or always use very high tiles and push them too far into the Stucco, it may rise. If it rises too high, getting to 1 mm or less from the edge, better remove some using carving tools or tweezers.
Fill in the blanks: once the center decoration is finished, it is time to fill in the blanks. Use black filato mosaic and black stringers to fill in the spaces that are too small.
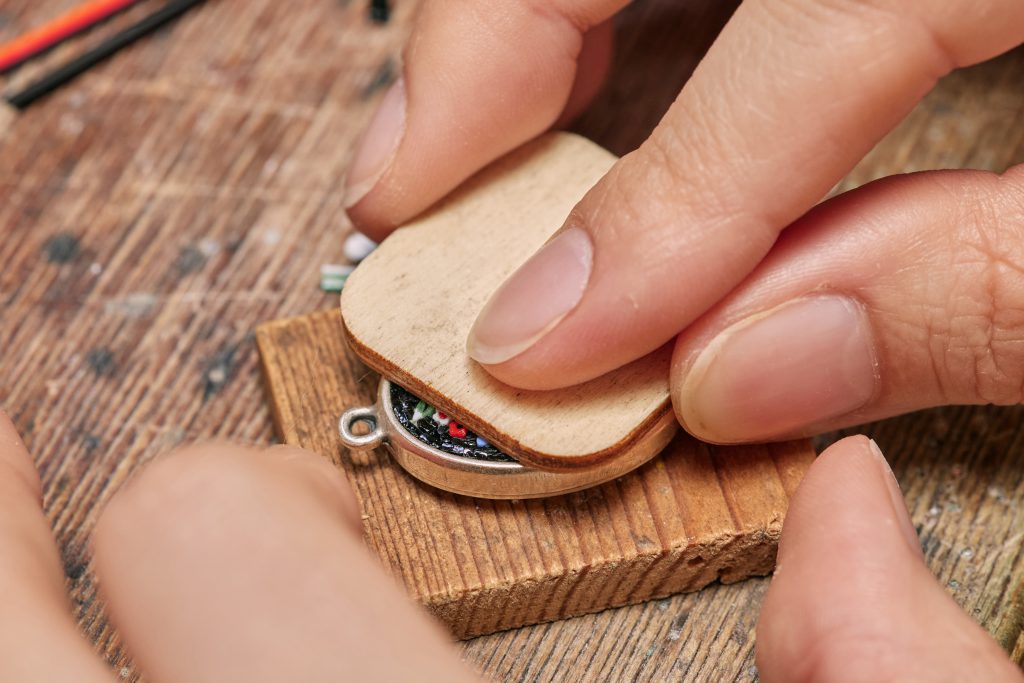
When you are happy with the result, it is time to put the finishing touches on your piece. Using a flat piece of wood lean over the surface and apply pressure. You will level all the tiles and push them well into the Stucco. Let the micromosaic dry for about three weeks before wearing it or doing other work.
We are sure your pendant will be beautiful and unique! Share your creations with us on Instagram by tagging @hobbyland_italy and @rebeccadenamel.
If you enjoyed this project, don’t miss the next scheduled courses.
Have fun with your micromosaic!