Among the most fascinating techniques of craftsmanship, glassblowing represents a perfect balance between technical gesture and artistic sensibility. It is an ancient knowledge, handed down for centuries, that still fascinates today for its ability to transform a solid material like glass through the use of fire and air.
In this article we take you through the discovery of this extraordinary art, its history, the steps to follow, and explain the tools you need.

But what exactly is it?
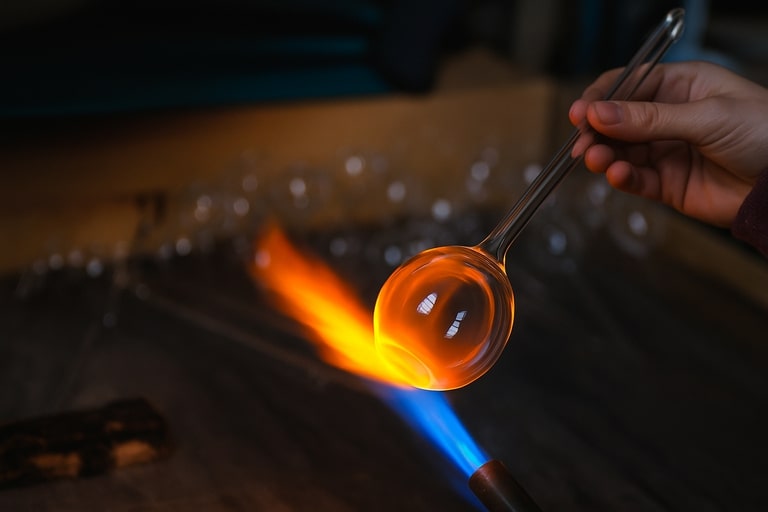
Glassblowing is a very old technique of glassmaking that involves inflating molten glass by the glassmaker’s-or rather, glassblower’s-blowing and shaping the glowing mixture as if it were a balloon.
There are no molds or guides: it is a freehand technique, where the master’s eye makes the real difference. Only experience can tell how much to blow, when to rotate, how to cool. Every gesture is calculated, but always remains open to surprise.
An art that comes from afar
Glassblowing originated more than two thousand years ago, around the first century B.C., in the regions of Syria and Lebanon. Phoenician glassmakers were the first to discover that by blowing into molten glass they could achieve light, broad and subtle shapes never seen before. This technique then traveled through time, finding an ideal home in Murano, where it became a true school.
How does it work?
The process is a small fire ritual, to be experienced with slowness and concentration:
- Tubes made of borosilicate or more commonly known as glass are used Pyrex.
The glass is softened around 1400°C by the use of a flame composed of a mixture of propane gas and oxygen that comes out of a blowpipe. - At this point, work is done freehand, through the use of a few tools and the artist’s breath.
- Then blow into the tube, causing the mass to inflate like a small balloon.
- With special tools-pliers, shears…-shape the form, adjusting proportions and creating details.
- Finally, it will be necessary to wait for the object to cool.

What can be created?
Literally… everything! From glasses to sculptures, from lampshades to decorative spheres. Some blowers work on classic shapes, others on contemporary designs. Each piece is unique and unrepeatable.
What do I need?
In addition to glass and protective equipment such as glasses e gloves, we list below the technical equipment you need.
Since this is professional equipment we recommend assembly under the supervision of a trained technician.
Below are two handy installation guides:
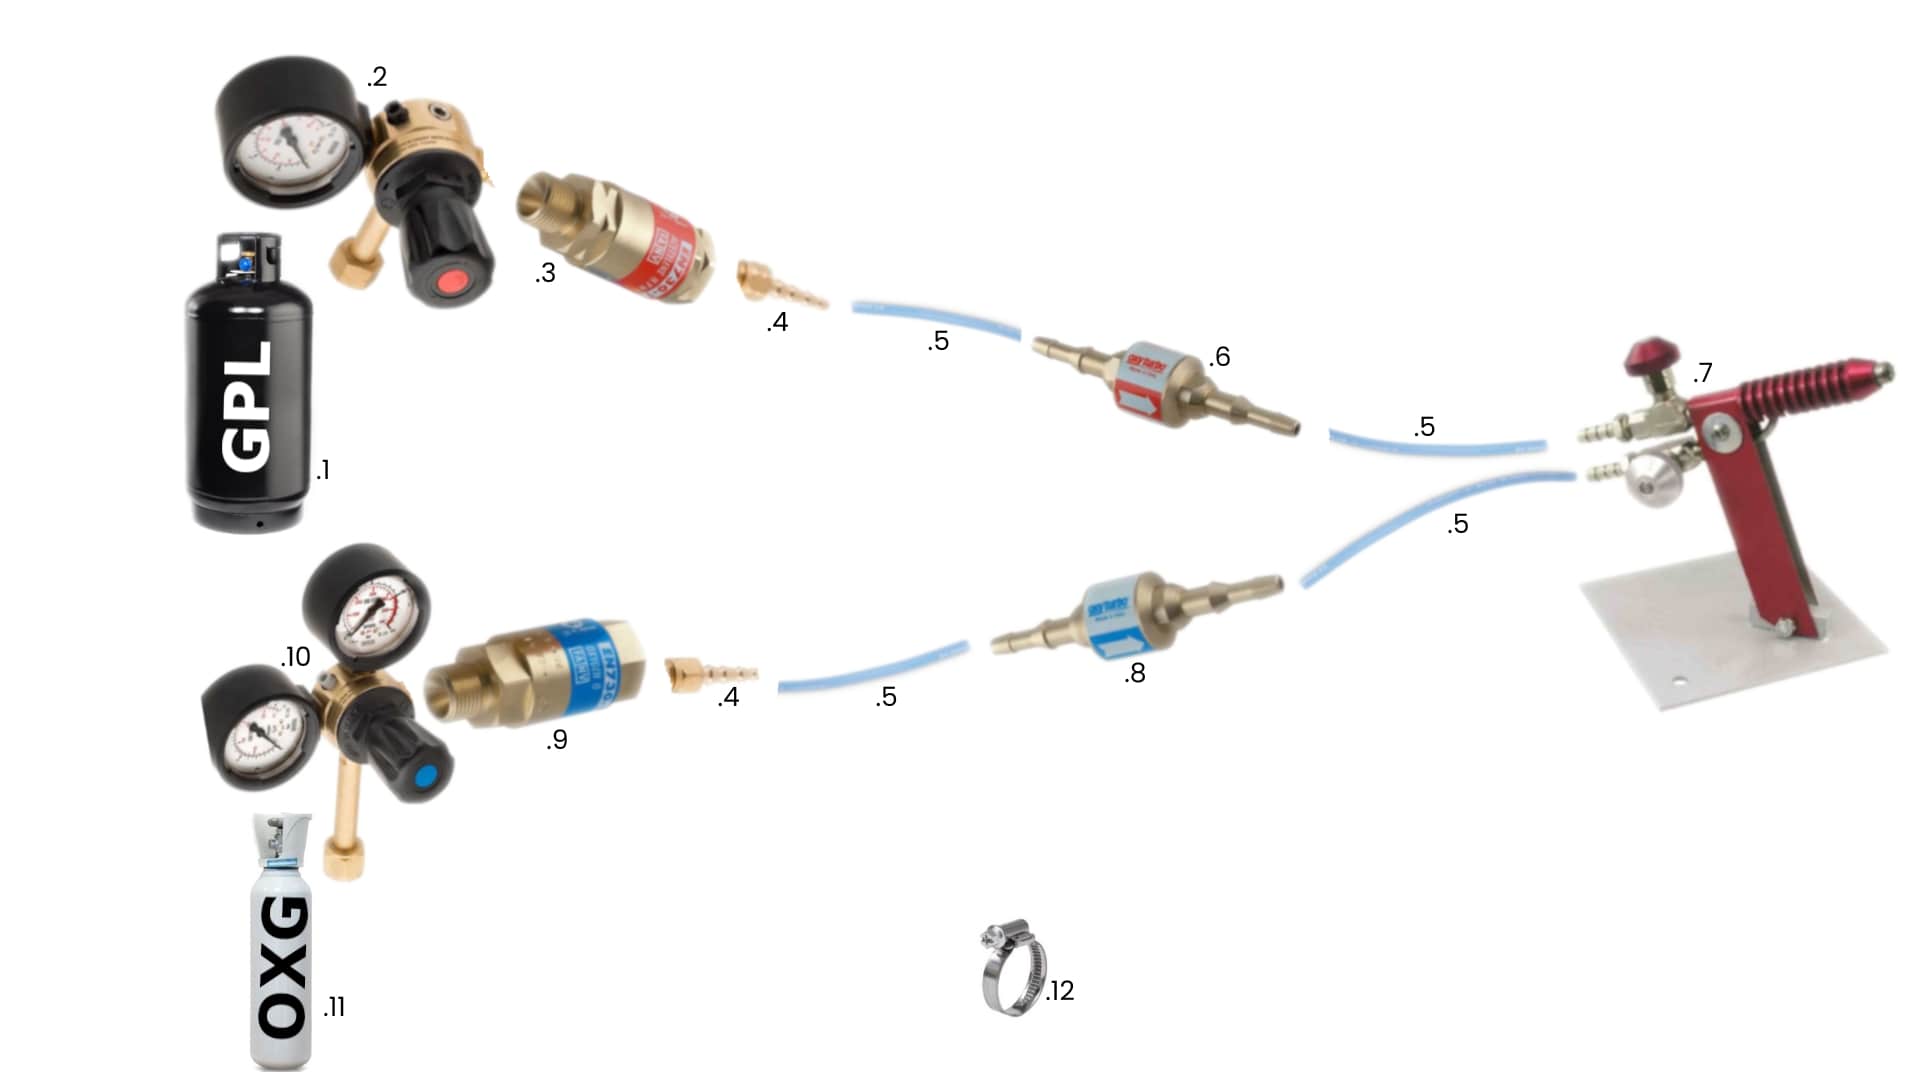
Connection flameworking torch with oxygen cylinder
- LPG cylinder
- Pressure regulator for propane #10050
- Safety Valve #10052
- Hose holder
- LPG rubber hose #10815 / OXG#21136 (at least 1.5mt per section)
- Propane flame arrestor #10054
- Flameworking torch
- OXG flame arrestor #10053
- OXG safety valve #10051
- OXG pressure regulator #10049
- Oxygen cylinder
- Stainless steel camp #10059 to be applied to the hose
after attaching it to the hose holder (2 pcs.)
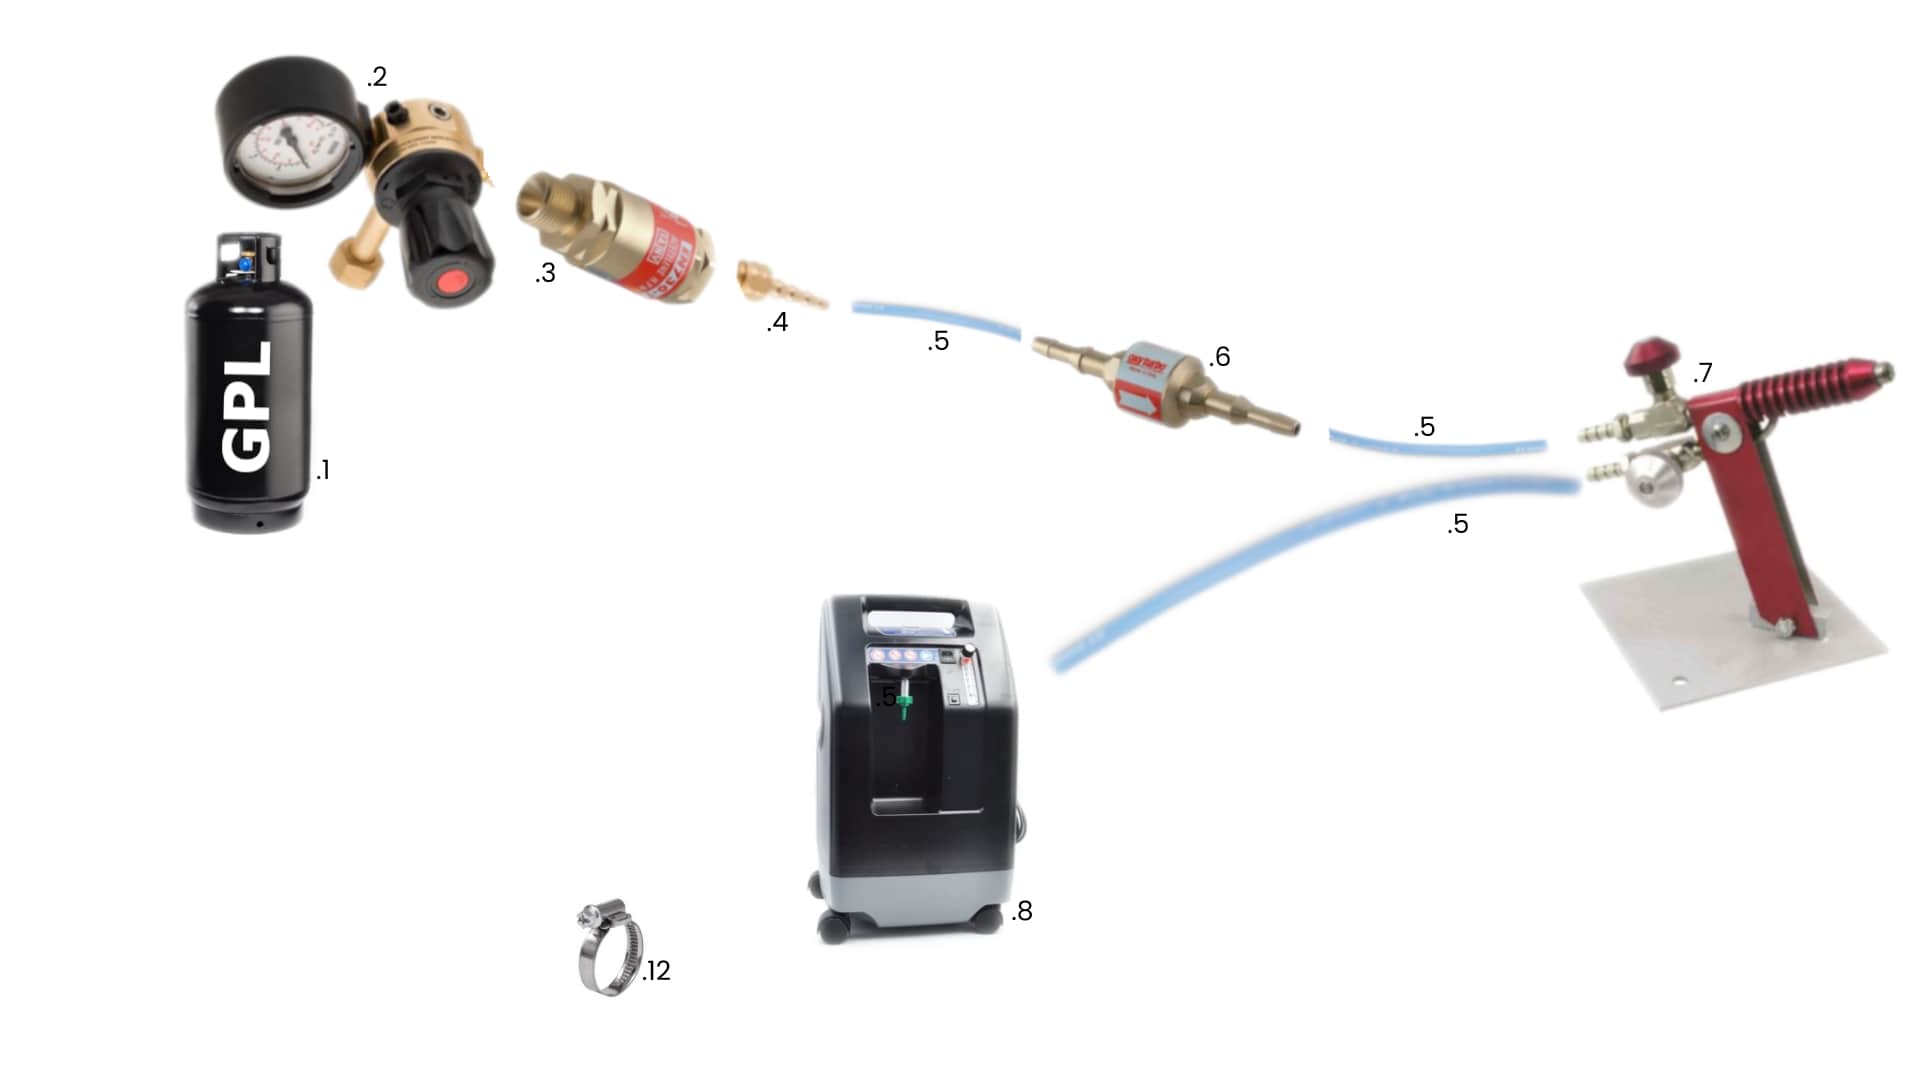
Connecting flameworking torch with oxygen concentrator
- LPG cylinder
- Pressure regulator for propane #10050
- Safety Valve #10052
- Hose holder
- LPG rubber hose #10815 / OXG#21136 (at least 1.5mt per section)
- Propane flame arrestor #10054
- Flameworking torch
- Oxygen concentrator #53521
12.Stainless steel clamp #10059 to be applied to the hose
after attaching it to the hose holder (2 pcs.)
The choice of the flameworking torch
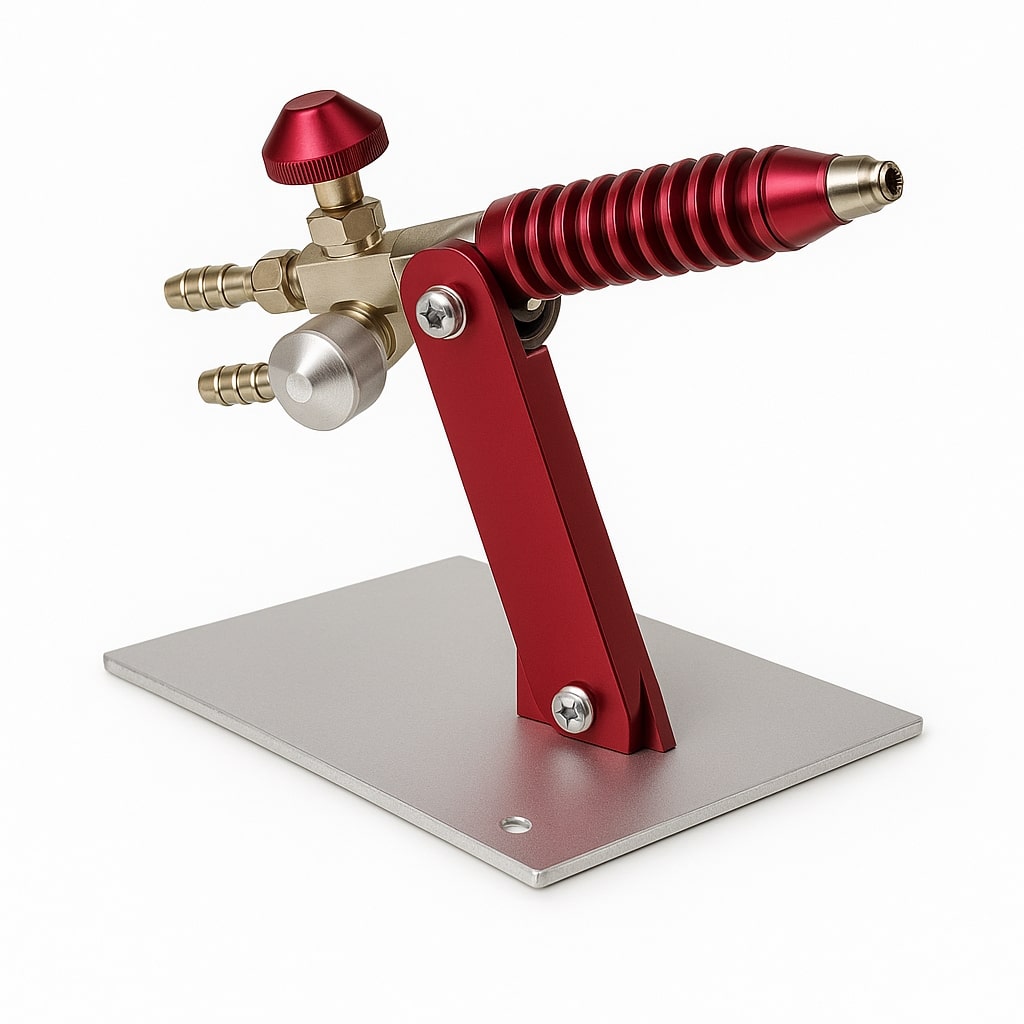
In addition to all the technical connections you will need to choose the torch that best meets your needs.
If you wish to create small objects we recommend using the Mega Minor or Bethlehem Alpha models.
If, on the other hand, you wish to create glasses, vases, sculptures…we recommend the Prometheus T2 or Bethelehem Bravo models.
What are the essential tools?
As anticipated, you will need tools such as pliers, scissors, holders, and protective devices.
Let’s get to know them in detail now !!!
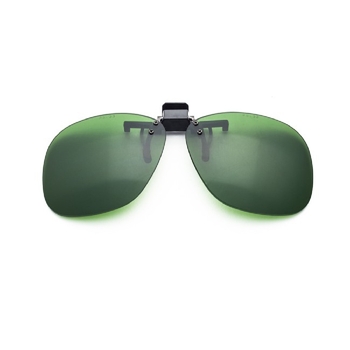
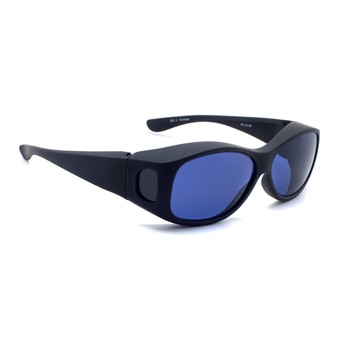
PROTECTIVE EQUIPMENT
It is recommended that you use heat-resistant gloves to be used according to your own experience, but it is absolutely mandatory to equip yourself with goggles specific to the work you are performing.
Two types are commercially available: for Pyrex (borosilicate) and for Murano.
They are different because they must be chosen according to the nature of the light emitted during processing and the optical effects to be counteracted to adequately protect the eyes.
Basically, glasses for Pyrex contain filters that block the intense yellow light emitted by the flame during borosilicate processing, so as to reduce glare and allow the glass to be seen clearly; those for Murano, on the other hand, protect against UV and IR rays and also serve to preserve color rendition, thus preventing eye fatigue.


TOOLS
Essential are the tools you need to make the objects you are designing. Without them you will not be able to handle hot and soft glass.
We list the main ones and a brief description of their use below:
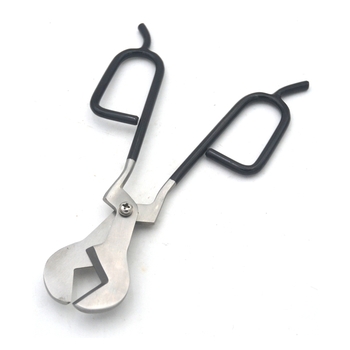
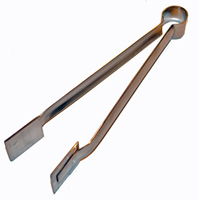
Diamond shears: used to cut hot glass.
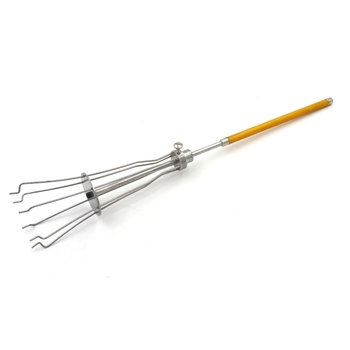
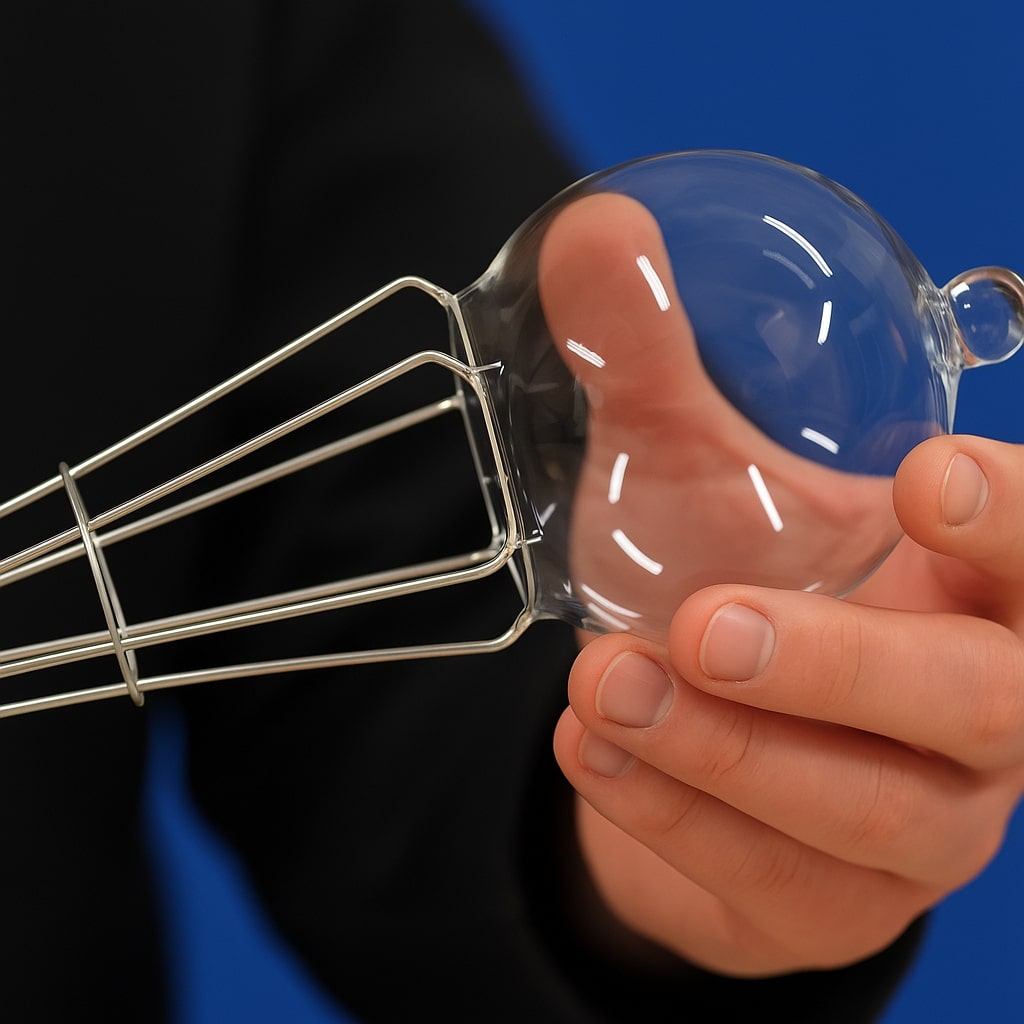
Claw holders small: allows you to clamp objects such as balls, beads, goblets or hot glass vases.

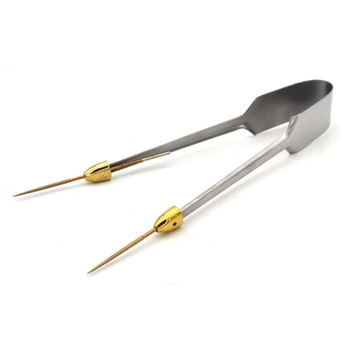
Hole punching plier: they make it easy to drill pendants, buttons or other artifacts while the glass is still hot.
Stainless steel heavy duty mashers: useful for squash glass.
Diamond file jack: equipped with a diamond tip, used to make marks on goblets or cups that will allow for clean cuts.
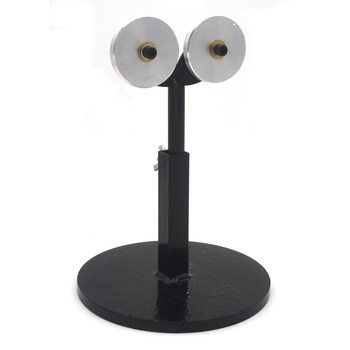
Bench roller with 2 wheels: useful for supporting the rods during processing. The wheels can be placed more or less spaced apart, depending on the diameter of pipe or rod that will be used.

Glass blowing hose Assembly : Set with Angled Joint connects directly to the glass tube and allows you to blow into it while shaping shapes with both hands.
Why love this art?
Glassblowing means getting in touch with one of the oldest forms of craftsmanship. It is a practice that teaches the value of time, attention to detail and at the same time, the beauty of imperfection that makes from your creation a unique piece in the world.
If you are looking for a new creative technique, this one just might surprise you. Each object you create will tell a story, and we can’t wait to hear yours!