
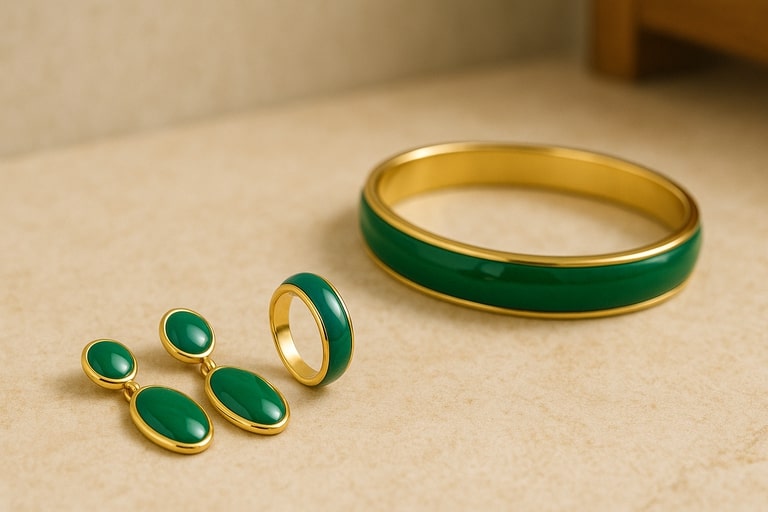
You know that bright, smooth, and often colorful finishing touch that makes an entire piece of jewelry or a detail of it stand out?
The technique for achieving that finish is called enameling and can be applied in two ways: fire or cold.
Of the two, the simplest and fastest application is definitely cold enameling. In this guide, we tell you everything you need to know about this product and this fascinating technique, and guide you step by step in making a simple and impressive project.
What is cold enameling?
Cold enameling is a two-component resin consisting of a colored base and its catalyst, which, once mixed and applied, self-levels to create a glossy and durable vitrified effect.
It is a perfect technique for those who like to customize metals, but, since it is in fact a resin, its application has no limits and can also be used on ceramics, wood, glass or plastics without the need for kilns or special equipment.
Once dry, the surface will be scratch and sunlight resistant, just like a baked enamel–but without baking!
What you need
- Colors: choice of opaque, transparent, pearlescent or metallic
- one small plastic cup
- wooden slats
- precision balance
- Squeeze bottle
- toothpick
- jewel to decorate
The proceedings
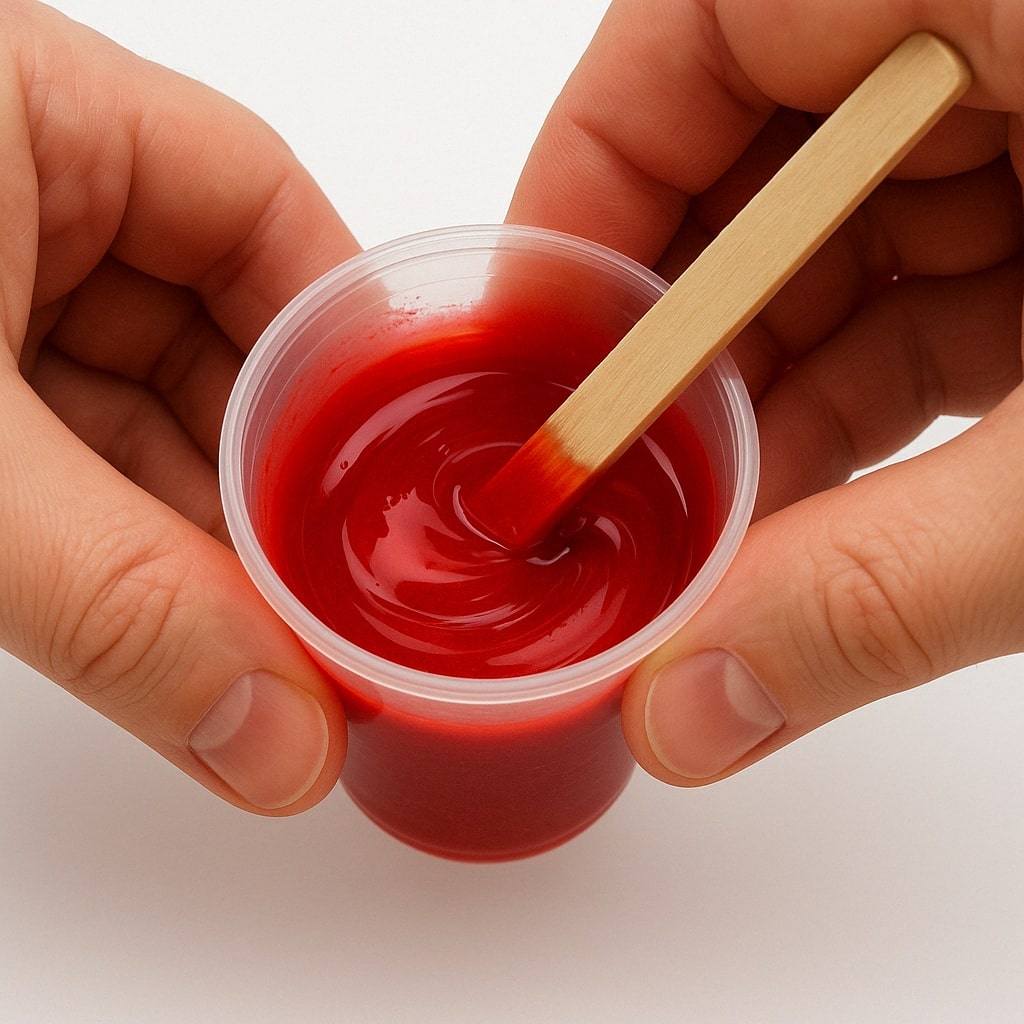
Step 1. Prepare the mixture
The mixing ratio of these cold glazes changes depending on the catalyst you find included in the package, you will just have to look at the label (it could be 100/50 or 100/40). This figure is very important to be able to achieve perfect catalysis, and here is where the precision balance comes to our aid.
Let’s start now!
We pour 10 g of resin + 4 g of hardener into a small plastic cup and mix the two parts with the help of a wooden stick. It is essential to do this step very slowly to avoid incorporating air into the mixture.
After mixing wait 3-4 minutes for air bubbles to rise to the surface.
Cold enamel can be applied by syringe, brush, spatula or by pouring it into a mold.
For our project we will endorse the help of the Squeeze bottle.
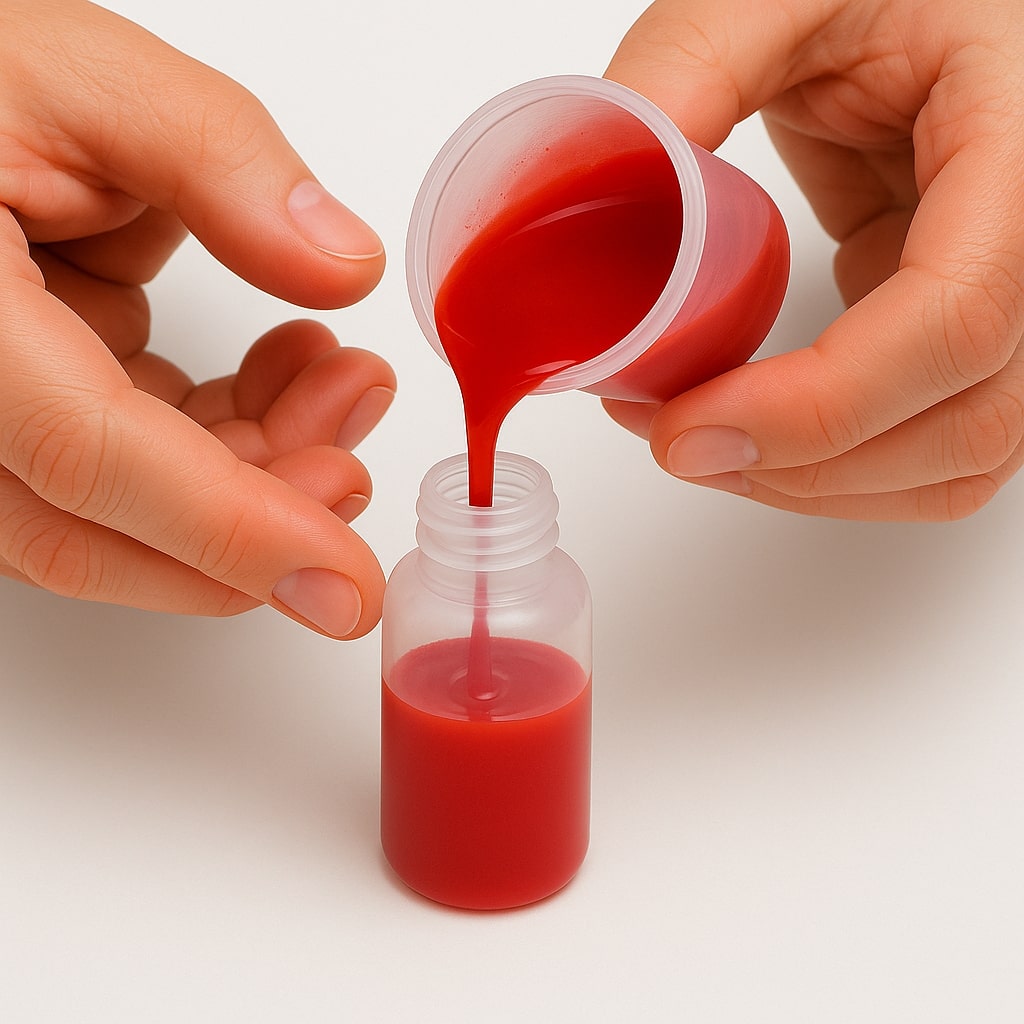
We then pour the previously mixed mixture into it, close it and apply the nozzle in the size we think best to decorate the jewelry.
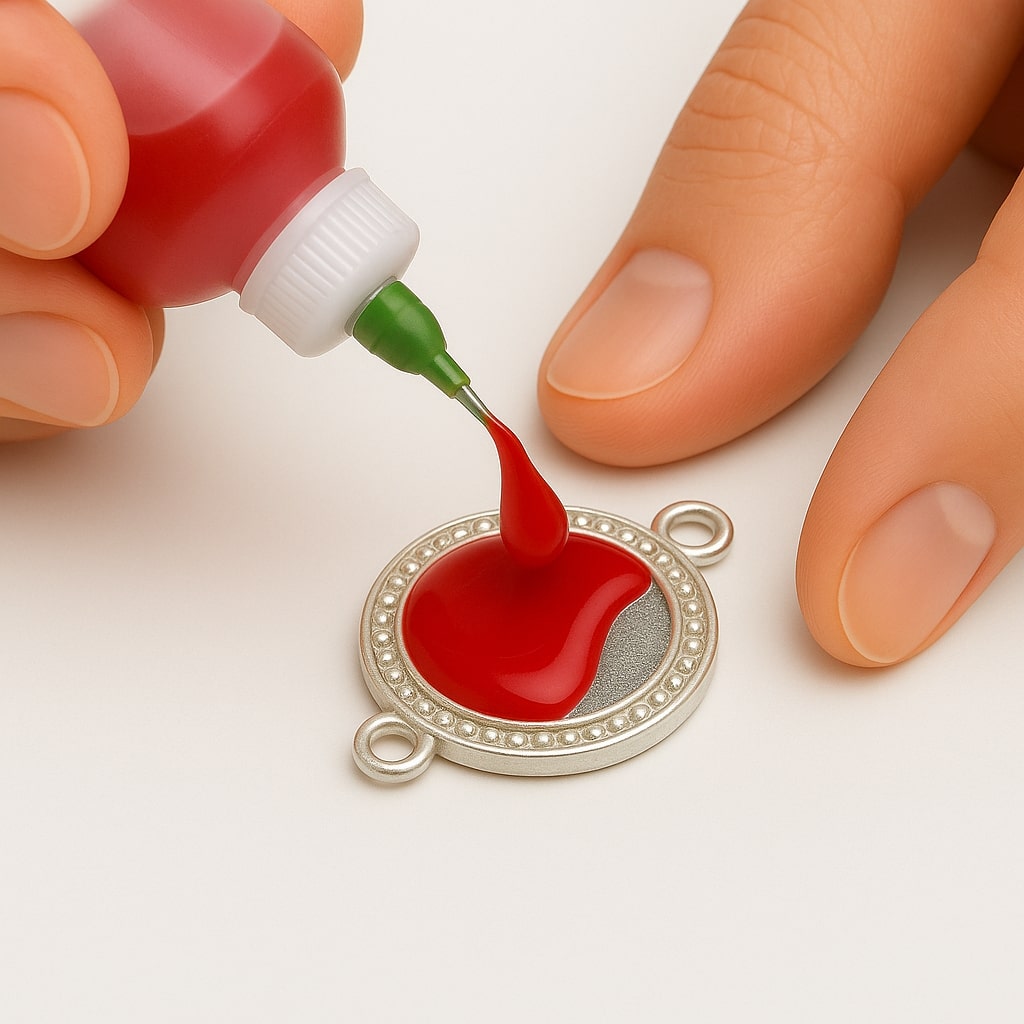
Step 2. Decorate your jewel
Now apply the color, paying attention to the amount.
Also at this stage it is important to work slowly to avoid over-applying.
If you accidentally apply too much, don’t worry, remove the product, wipe it off with a cloth and start again.
Step 3. Let it dry
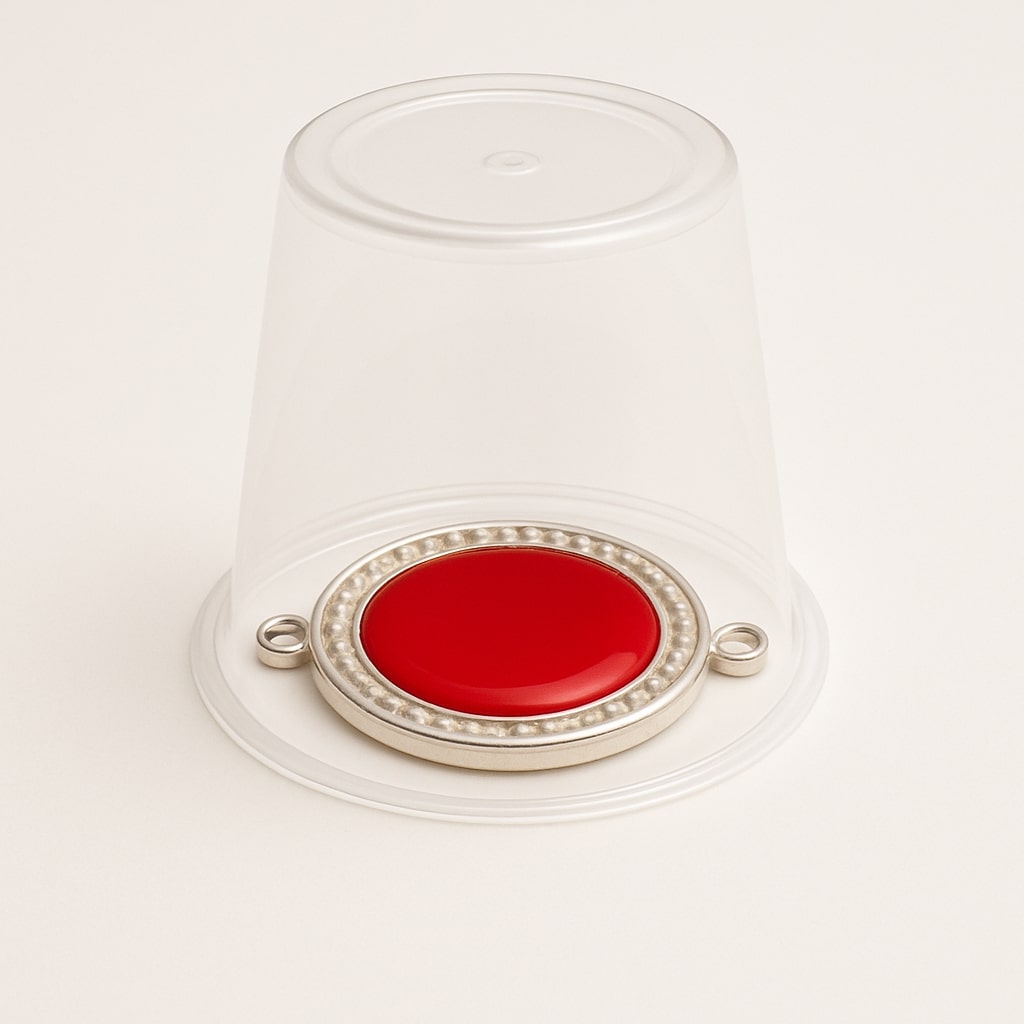
In the first 18 hours it is recommended to protect the color from any dust, it will be sufficient to cover the jewelry with a clean small cup.
Leave your project stationary in a place sheltered from dust for 24 hours.
Avoid touching or moving it until the surface is completely dry and hard.
If you deem it necessary, it is also possible to level/smooth/polish the glaze when it is fully catalyzed.
That’s it! Your pendant is ready to be worn !
The biggest difficulty you may encounter is the formation of bubbles. Remember that it is critical in the initial part to avoid mixing quickly.
If you have a lot of bubbles in clusters, like foam, it could be that the resin during mixing was too cold, not at room temperature, in which case the solution is to heat the resin and make it at room temperature and remix the mixture.
If you have a rough surface, on the other hand, the temperature may be too high.
If the bubbles are on your piece when you have already applied the glaze, you have two options. You can use a needle to make them rise to the surface and burst or use a flame with the same technique you use with resin.
Useful tips
- Prepare only the amount of resin you will use: once mixed, start catalyzing immediately.
- Work in a ventilated environment and protect the surface well.
- If you want to create multiple layers, wait until the first one is completely dry before pouring the second.
- It is not advisable to work in an environment with temperature below 18°C, the curing time would be very long, and in some cases the mixture may not cure.
- Store the product at temperatures not lower than 12°C (54°F)
- In the winter time if it is thick, you can heat it for a few minutes.
- Mix the base color well before each use because pigments tend to settle.
- Clean tools with ammonia or Isopropyl Alcohol within 1 hour of their use.
- The colors can be mixed together before adding the hardener.
- If you need to apply color on curved, convex, concave surfaces, or if you need to decorate vertically, you should replace the classic catalyst with the specific one: CATALYST FOR CURVED SURFACES.
With practice, cold enameling becomes an irreplaceable ally for brilliant and professional decorations. What about you, do you already have in mind what to customize?