Have you always dreamed of creating metal jewelry from scratch, but it’s a technique that seems so complicated and you’ve always been told that you need an expert goldsmith to cast the metal?
This is partly true, but what if I told you that you can create your own jewelry without necessarily relying on a workshop to do the casting for you?
In this article we not only explain how it works, but also tell you what materials and tools to choose, step by step, to get great results even in your own small home workshop.
Lost wax and Sand Casting, what does it mean?
There are two different techniques that are used to obtain a metal jewelry piece, and both start from working on a model created in wax.
The lost wax technique is one of the oldest and most refined techniques for creating jewelry. It originated with the first metallurgical civilizations over 6000 years ago. The basic process has remained unchanged over the centuries and involves making a wax model that will be melted down and replaced by molten metal through a refractory mold casting process. It is a technique that allows great creative freedom and remarkable precision in detail.
The technique, on the other hand, with red sand (Sand casting), still gives the same result, but without losing the work created with wax. This technique is more immediate, but less precise. It is not suitable for detailed carving and recommended for small productions.
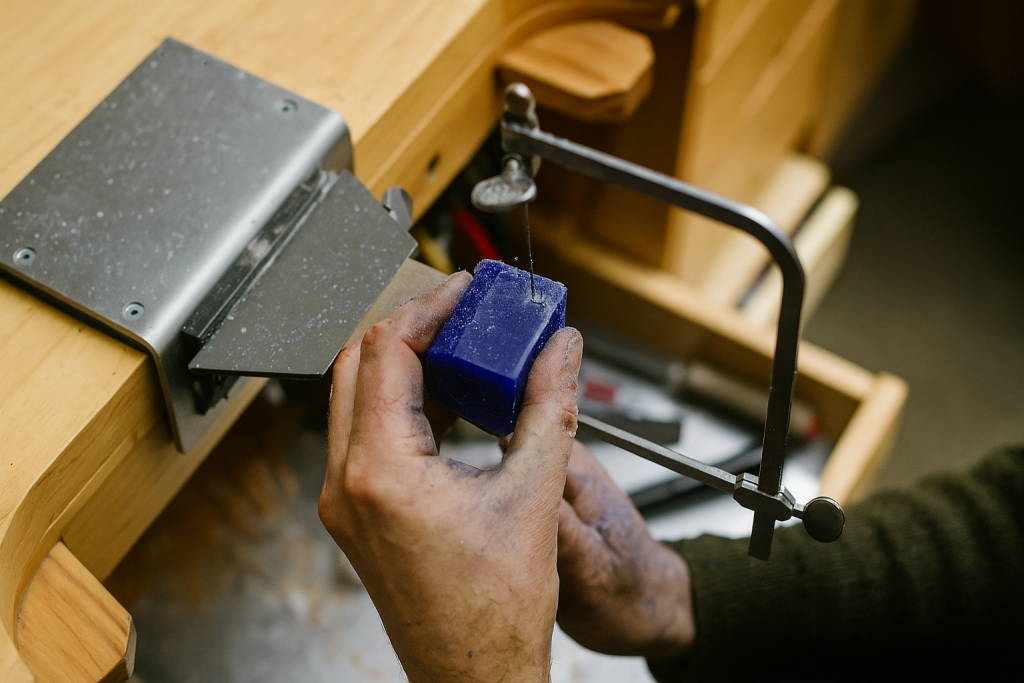
First important step: choosing the wax and the tools to shape it
It is critical to choose the right wax based on the work you are planning to do.
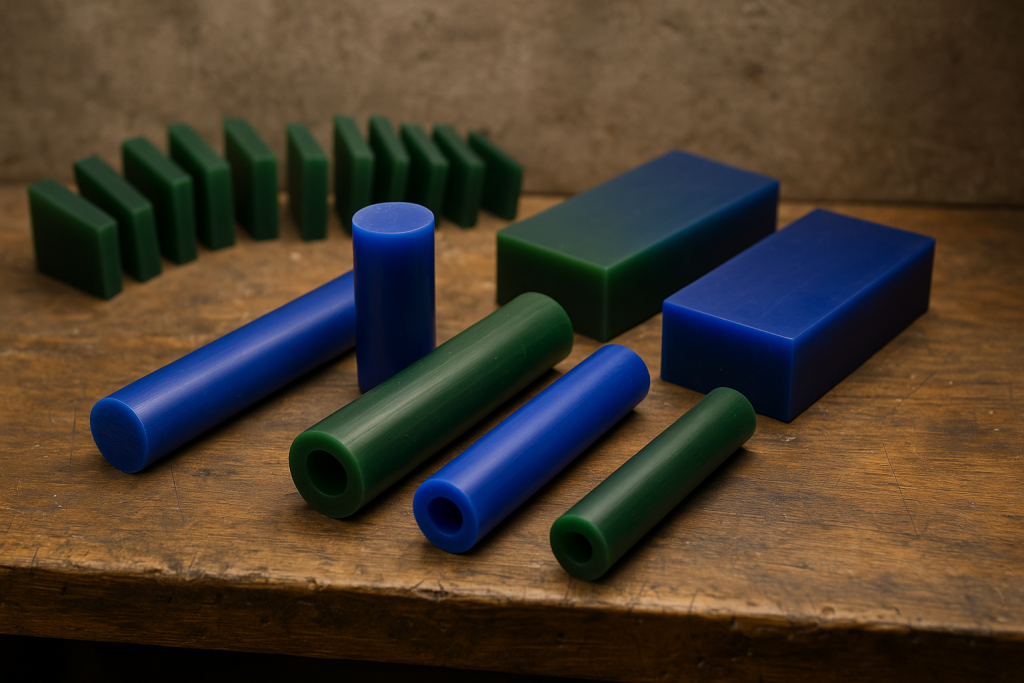
The color of the wax identifies its flexibility:
BLUE – more flexible wax, suitable for curves and soft details
GREEN – stiffer wax, perfect for milling and precision machining
PORPORA – multipurpose, great for chip-carving
Form, on the other hand, is selected according to purpose:
ROUND WITH CENTRAL HOLE – for rings with a round profile and central hole.
ROUND WITH EXCENTRIC HOLE – for rings with a round profile and eccentric hole, ideal for inserting a bezel.
SOLID ROUND – suitable for multiple uses, especially small pendants and rings.
SHIELD-SHAPED WITH HOLE – for seal rings, already shaped to minimize material removal.
BLOCK AND SHEETS – designed for sculpting with versatility, perfect for precise layering and detailing.
A good saw frame and good blades will allow you to cut precisely the part you need. Then you can move on to machining using carving tools of wax and a wax carving station to hot mold it and melt the wax parts to be carved.
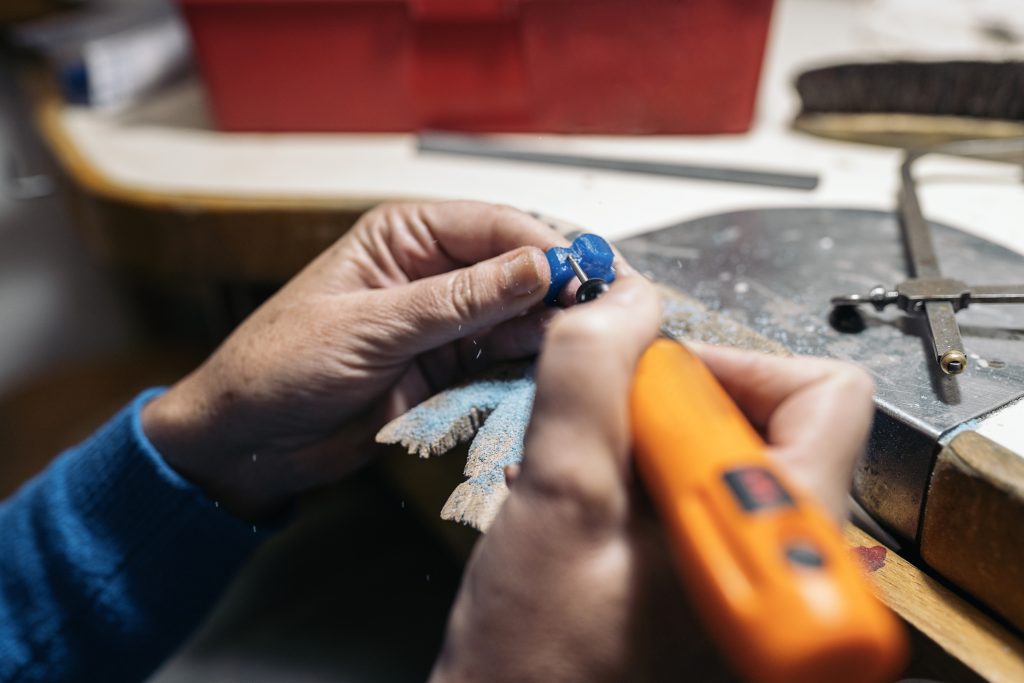
To enlarge the holes in the wax rounds, which you will need for creating the rings, you can use the chuck with blade. A single tool that helps you increase the size of the ring by gradually cutting out the parts of wax you don’t need.
Always remember that the prototype you create must look exactly like the end result you want to achieve, both in detail and in size.
Lost Wax Technique
You have finally succeeded in molding your wax jewelry, now what ? For the lost wax technique you have to create more !
This method is used for working with several pieces at once, so that in one metal casting you can manage to get many, thus concentrating more production in the shortest possible time.
Then add to each piece, on its base, a sprue, nothing more than a wax filament that will allow you to mount the prototypes on a central axis (sprue tree), also made of wax, that will act as a conduit for the molten metal.
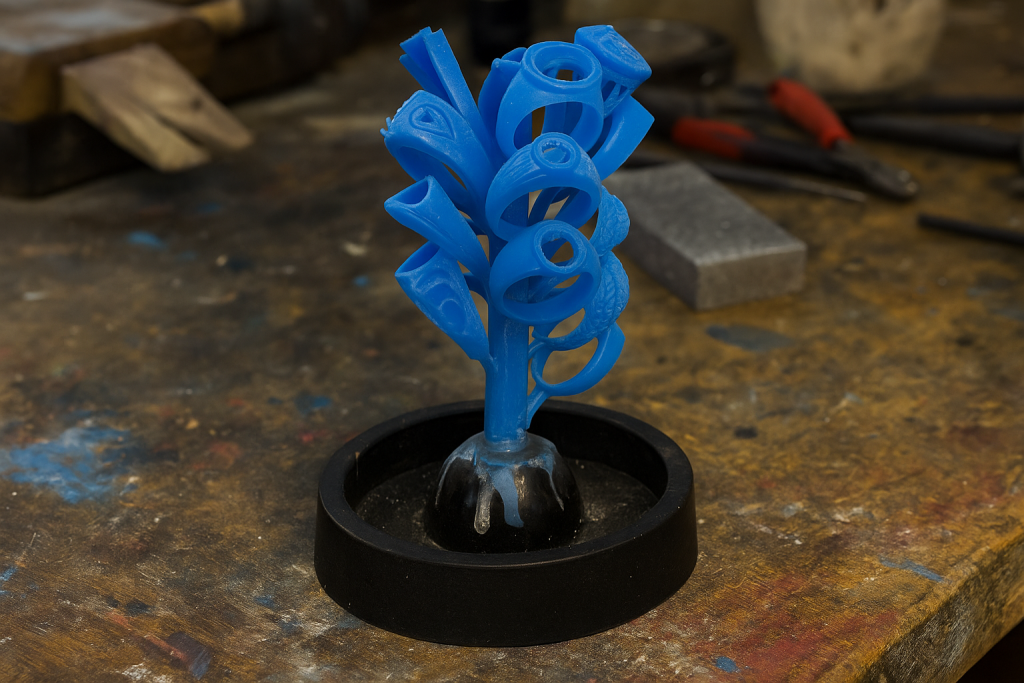
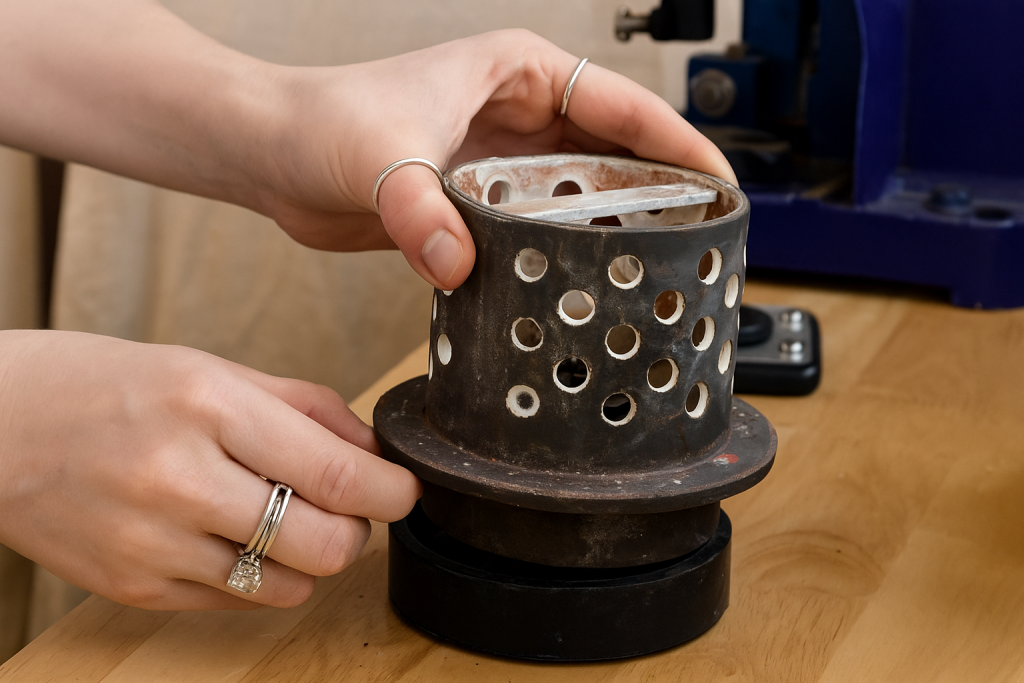
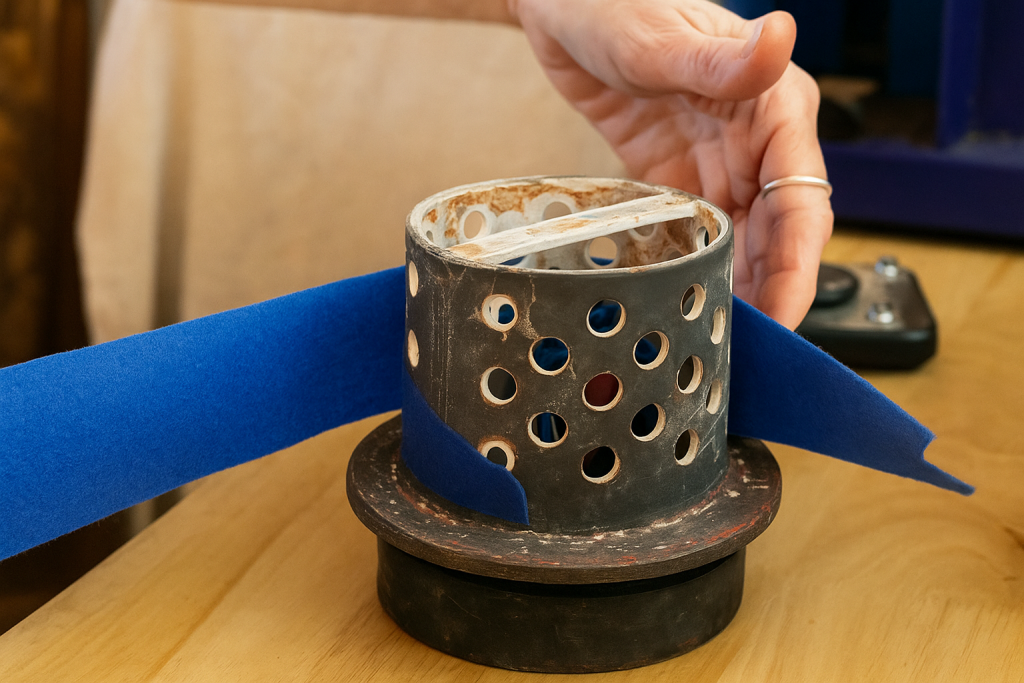
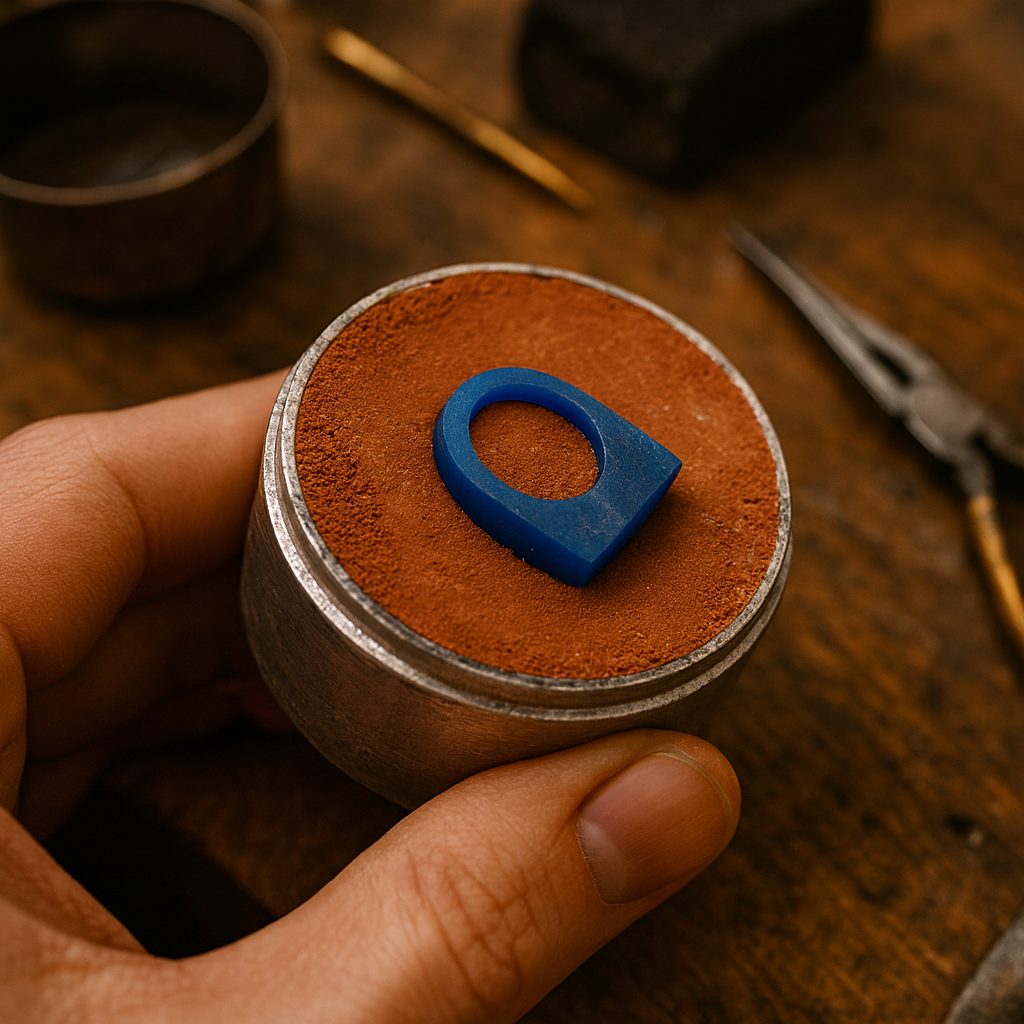
This cluster is then attached to a rubber base and then covered with the perforated cylinder that will serve as a container for the plaster to be poured inside. The holes in it are useful during the firing phase for proper air evacuation, but it will need to be sealed beforehand in order to be filled. You can choose to seal it with paper and tape or with different types of films, the important thing is that it is well adhered to prevent the plaster from leaking out.
Investment
It is a special refractory material designed for use with cast metals, thus resistant to heat. Jewelry investment fo casting is suitable for nonferrous metals, such as silver, gold, and brass. When it is mixed with water, it is important to avoid incorporating air bubbles, so the use of an agitator or vacuum pump is always recommended.
It is poured inside the cylinder , and after it dries, both the rubber base and the casing created around the cylinder are removed. It is now possible to move on to melting the wax inside the furnace so as to obtain the shell where the molten metal will then be poured.
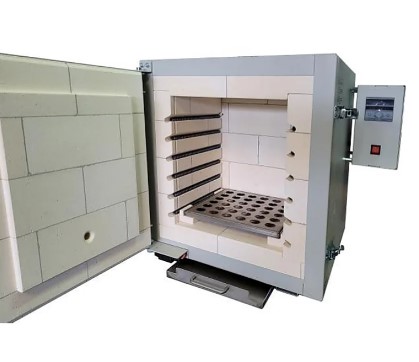
The kiln
The cylinder is placed inside a kiln designed specifically for the lost-wax technique. In the firing chamber there is a perforated grid suitable for inserting the cylinders and immediately below a basin for collecting the wax that will melt during firing.
The wax in the cylinder will melt completely, leaving a hollow indentation in the plaster: the mold is then ready to receive the casting of the molten metal.
Metal casting
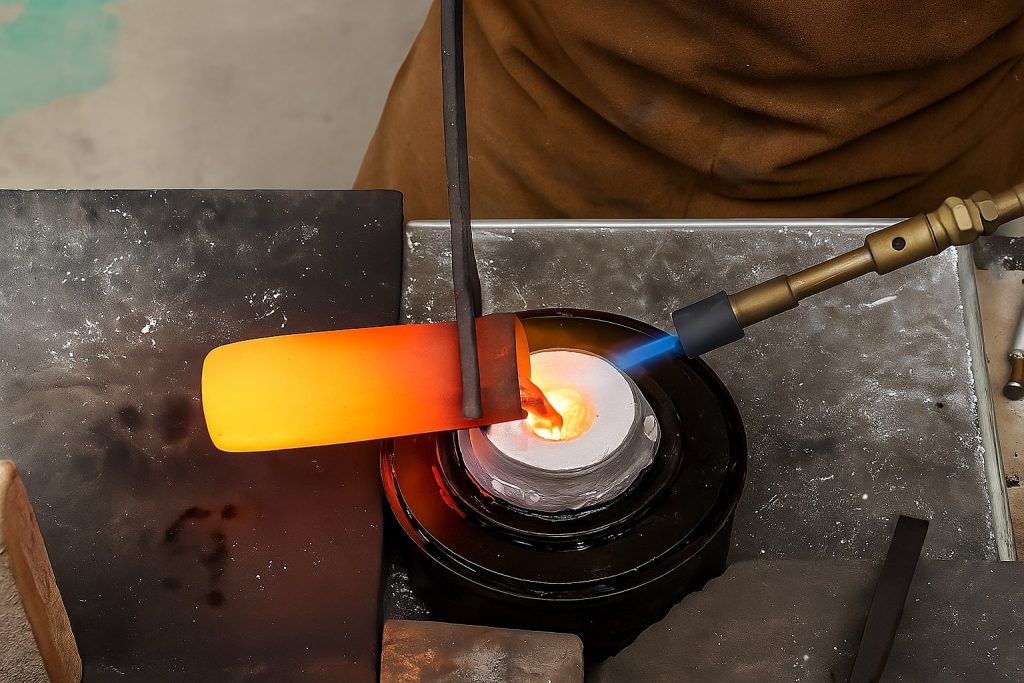
We prepare the metal.
This process takes place in a small furnace that houses a crucible inside. Here the metal to be melted is inserted and the appropriate melting temperature is set for the type of metal chosen.
Once this process is finished, thanks to the use of a special crucible tongs, the metal is poured inside the still hot plaster mold going to fill all the spaces left by the wax cast away. A centrifuge or vacuum machine is often used to ensure full insertion into the cavities.
Extraction and finishing
After cooling, the cylinder is immersed in cold water to dissolve the refractory plaster and then extract the cluster , which has now become completely metal.
Washings are carried out to clean the entire structure of plaster from it, and finally the resulting pieces are separated one by one.
The central sprue, which has also become metal, is material that can be remelted and reused.
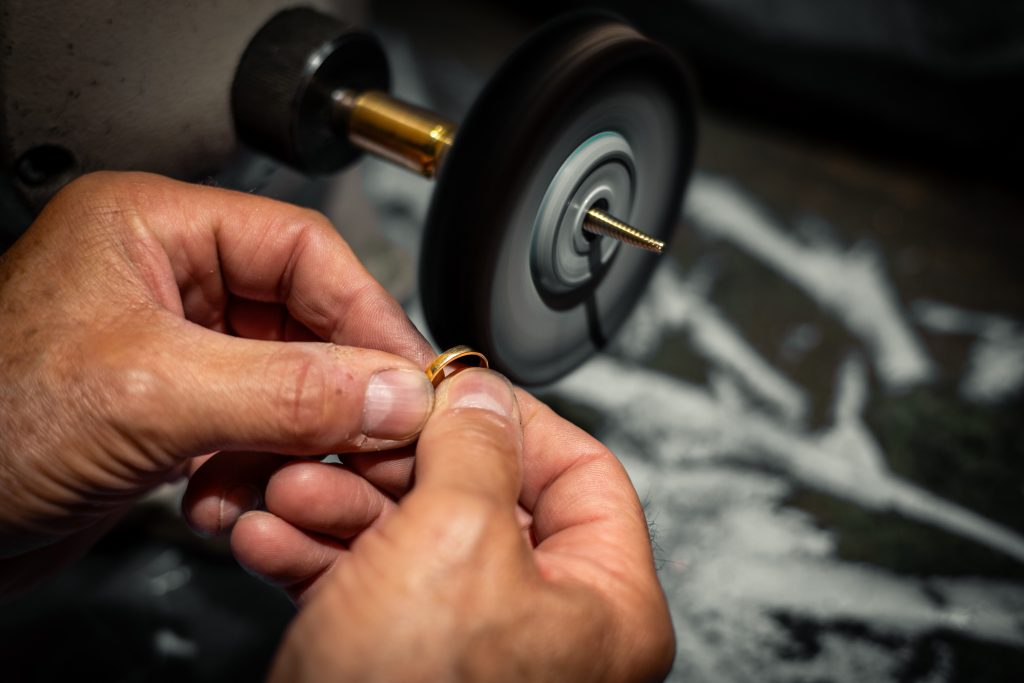
Then begins the process of finishing the jewelry: filing, polishing, tumbling and finishing by hand, and where possible stones can be added, engravings can be created or details can be colored with special enamel.
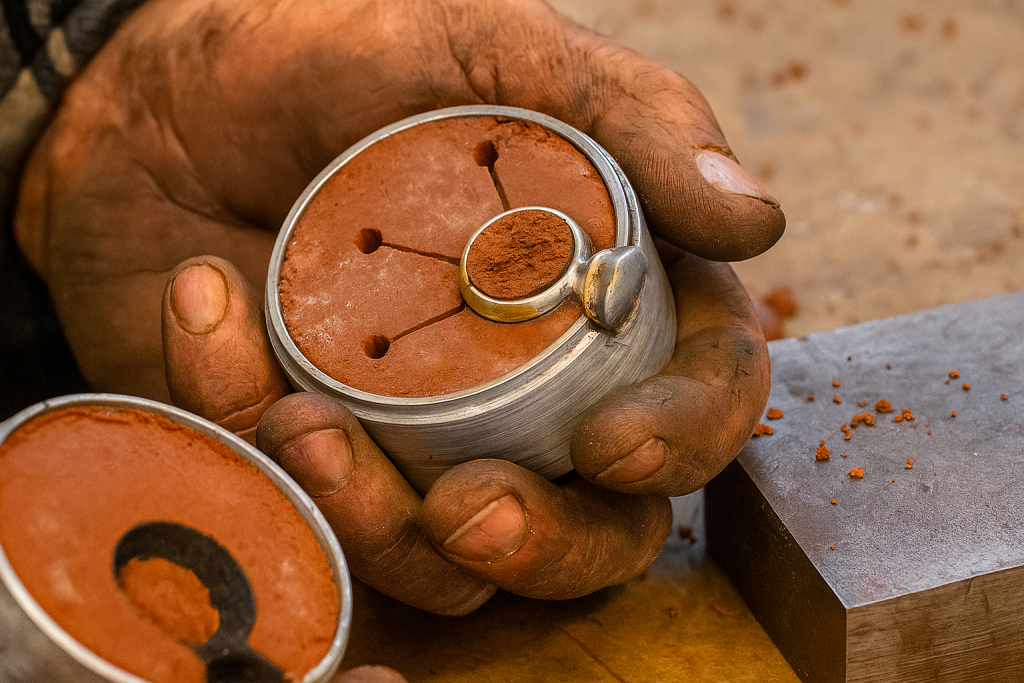
Sand Casting Technique
There is also another technique for working with cast metal that always requires the creation of a wax model as a starting project. The model created will not be cast, but used to create a mold. This is a process that allows for the creation of one piece of jewelry at a time and is not suitable for the reproduction of particular and minute details.
Let’s see how it works and all the materials you need.
Frame preparation
As a first fundamental tool you will need a frame inside of which you are going to press red clay sand.
The frame consists of 2 pieces, take the base and inside it insert the sand by beating it with a nylon hammer to make it as compact as possible.
Then imprint the prototype so that it is half its volume submerged in the earth and dust the surface with talcum powder. Then join the second part of the frame that is still empty and add more red sand to fill it, again tapping with the hammer. This process will create a kind of mold in the sand.
Now separate the two parts, remove the wax prototype and create the heat escape channels and a larger channel that you will need for pouring the metal into the mold (this one matching the one already in the frame).
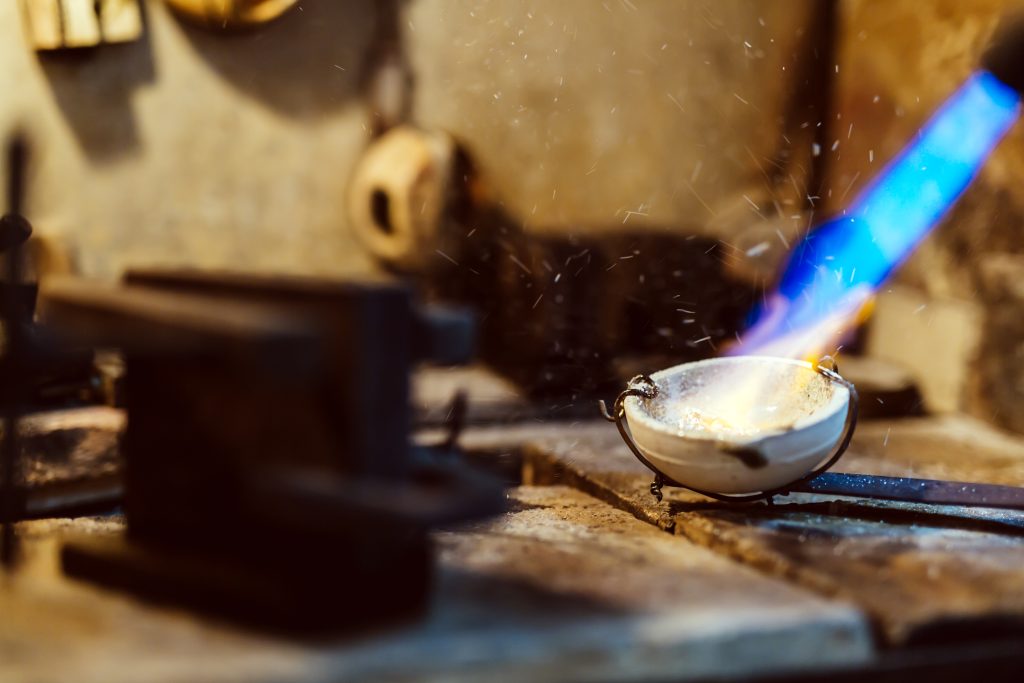
Put the two parts of the frame back together and you are now ready to pour the liquid metal into it. For this process especially if you are working on one piece, you can melt it directly with a blowtorch , helping yourself with a crucible and tongs. Remember to prepare the crucible with borax before casting.
Let it cool and then open the frame to pull the piece out.
Then proceed to finish it as indicated for the previous work.
Latest suggestions and summary table
- Always wear appropriate protective and heat-resistant gloves.
- Lean on heat-resistant surfaces.
- Use a different crucible for each type of metal you melt.
| Lost Wax | Sand Casting (Red sand) | |
| Accuracy of detail | Very tall, suitable for complex carving | Low, not suitable for fine details |
| Production | Multiple: multiple jewels in one casting | Single: one piece per frame |
| Processing time | Longer | Faster |
| Main tools required | Lost wax furnace, crucible furnace, cylinder, plaster, centrifuge or vacuum furnace | Frame, red sand, crucible and torch |
| Initial cost | Higher (dedicated equipment) | Lower (essential tools) |
| Creative flexibility | Maximum freedom in design and complexity | Limited to simple forms |
| Ideal for | Professional-quality, detailed and serially repeated jewelry | Unique pieces, rapid prototypes, beginners |