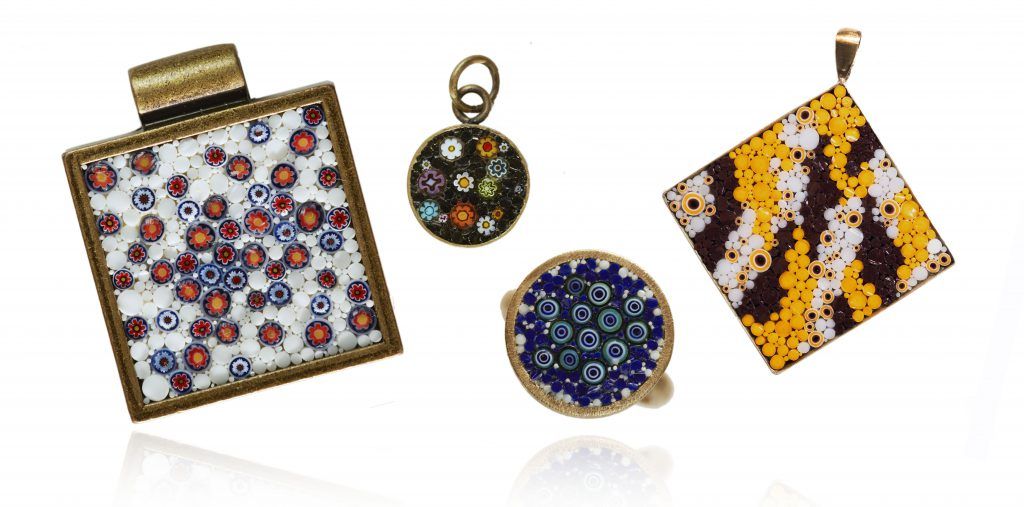
Jewellery, mosaic and murrine come together in this guide to create a unique piece, a simple and colourful pendant.
With this tutorial, I will show you how to approach the micromosaic technique, an ancient art that does not require special skills, just manual dexterity and a lot of creativity! The murrine, with their colours, will bring a breath of joy to this project and allow you to express yourself as you wish.
What do you need?
- Round pendant base Col. Antique gold
- Assorted murrine – opals 3-4 mm 50 g
- Assorted murrine – opals 2-3 mm 50 g
- Roman stucco or Milliput White superfine
- 1 fine-tipped tweezers (I recommend Set of 6 precision tweezers)
- Set of 10 tools for wax carving
- Denatured alcohol
- Kitchen paper
- Patafix
What is micromosaic?
Roman filigree micromosaic originated in Rome in the second half of the 18th century. It is still made there today according to tradition.
At the heart of micromosaic is the filigree of Venetian glass. It is melted and drawn into thin threads from which small tiles are cut to compose the micromosaic. Originally, this technique was used to reproduce existing works, using small tiles whose colours did not change over time, unlike, for example, an oil painting.
Micromosaic can be used to create large paintings as well as jewellery or to decorate small objects. With micro or minute, it refers to the size of the tiles rather than the artwork itself.
Creating a micromosaic like the ancient ones requires immense work and years of practice, but by allowing for a more contemporary taste, your own creativity, and simplifying the technique, you can have fun decorating jewellery and accessories.
The project: choose the murrine
This pendant is designed to be reproduced at home with just a few tools. It is also a great exercise to start getting familiar with tweezers, a fundamental tool for taking the first steps with the micromosaic technique.
The colours and design can be personalised. In fact, within the packages of murrine, you will find many with different designs and colours. This will allow you to create either a floral composition or a geometric one.
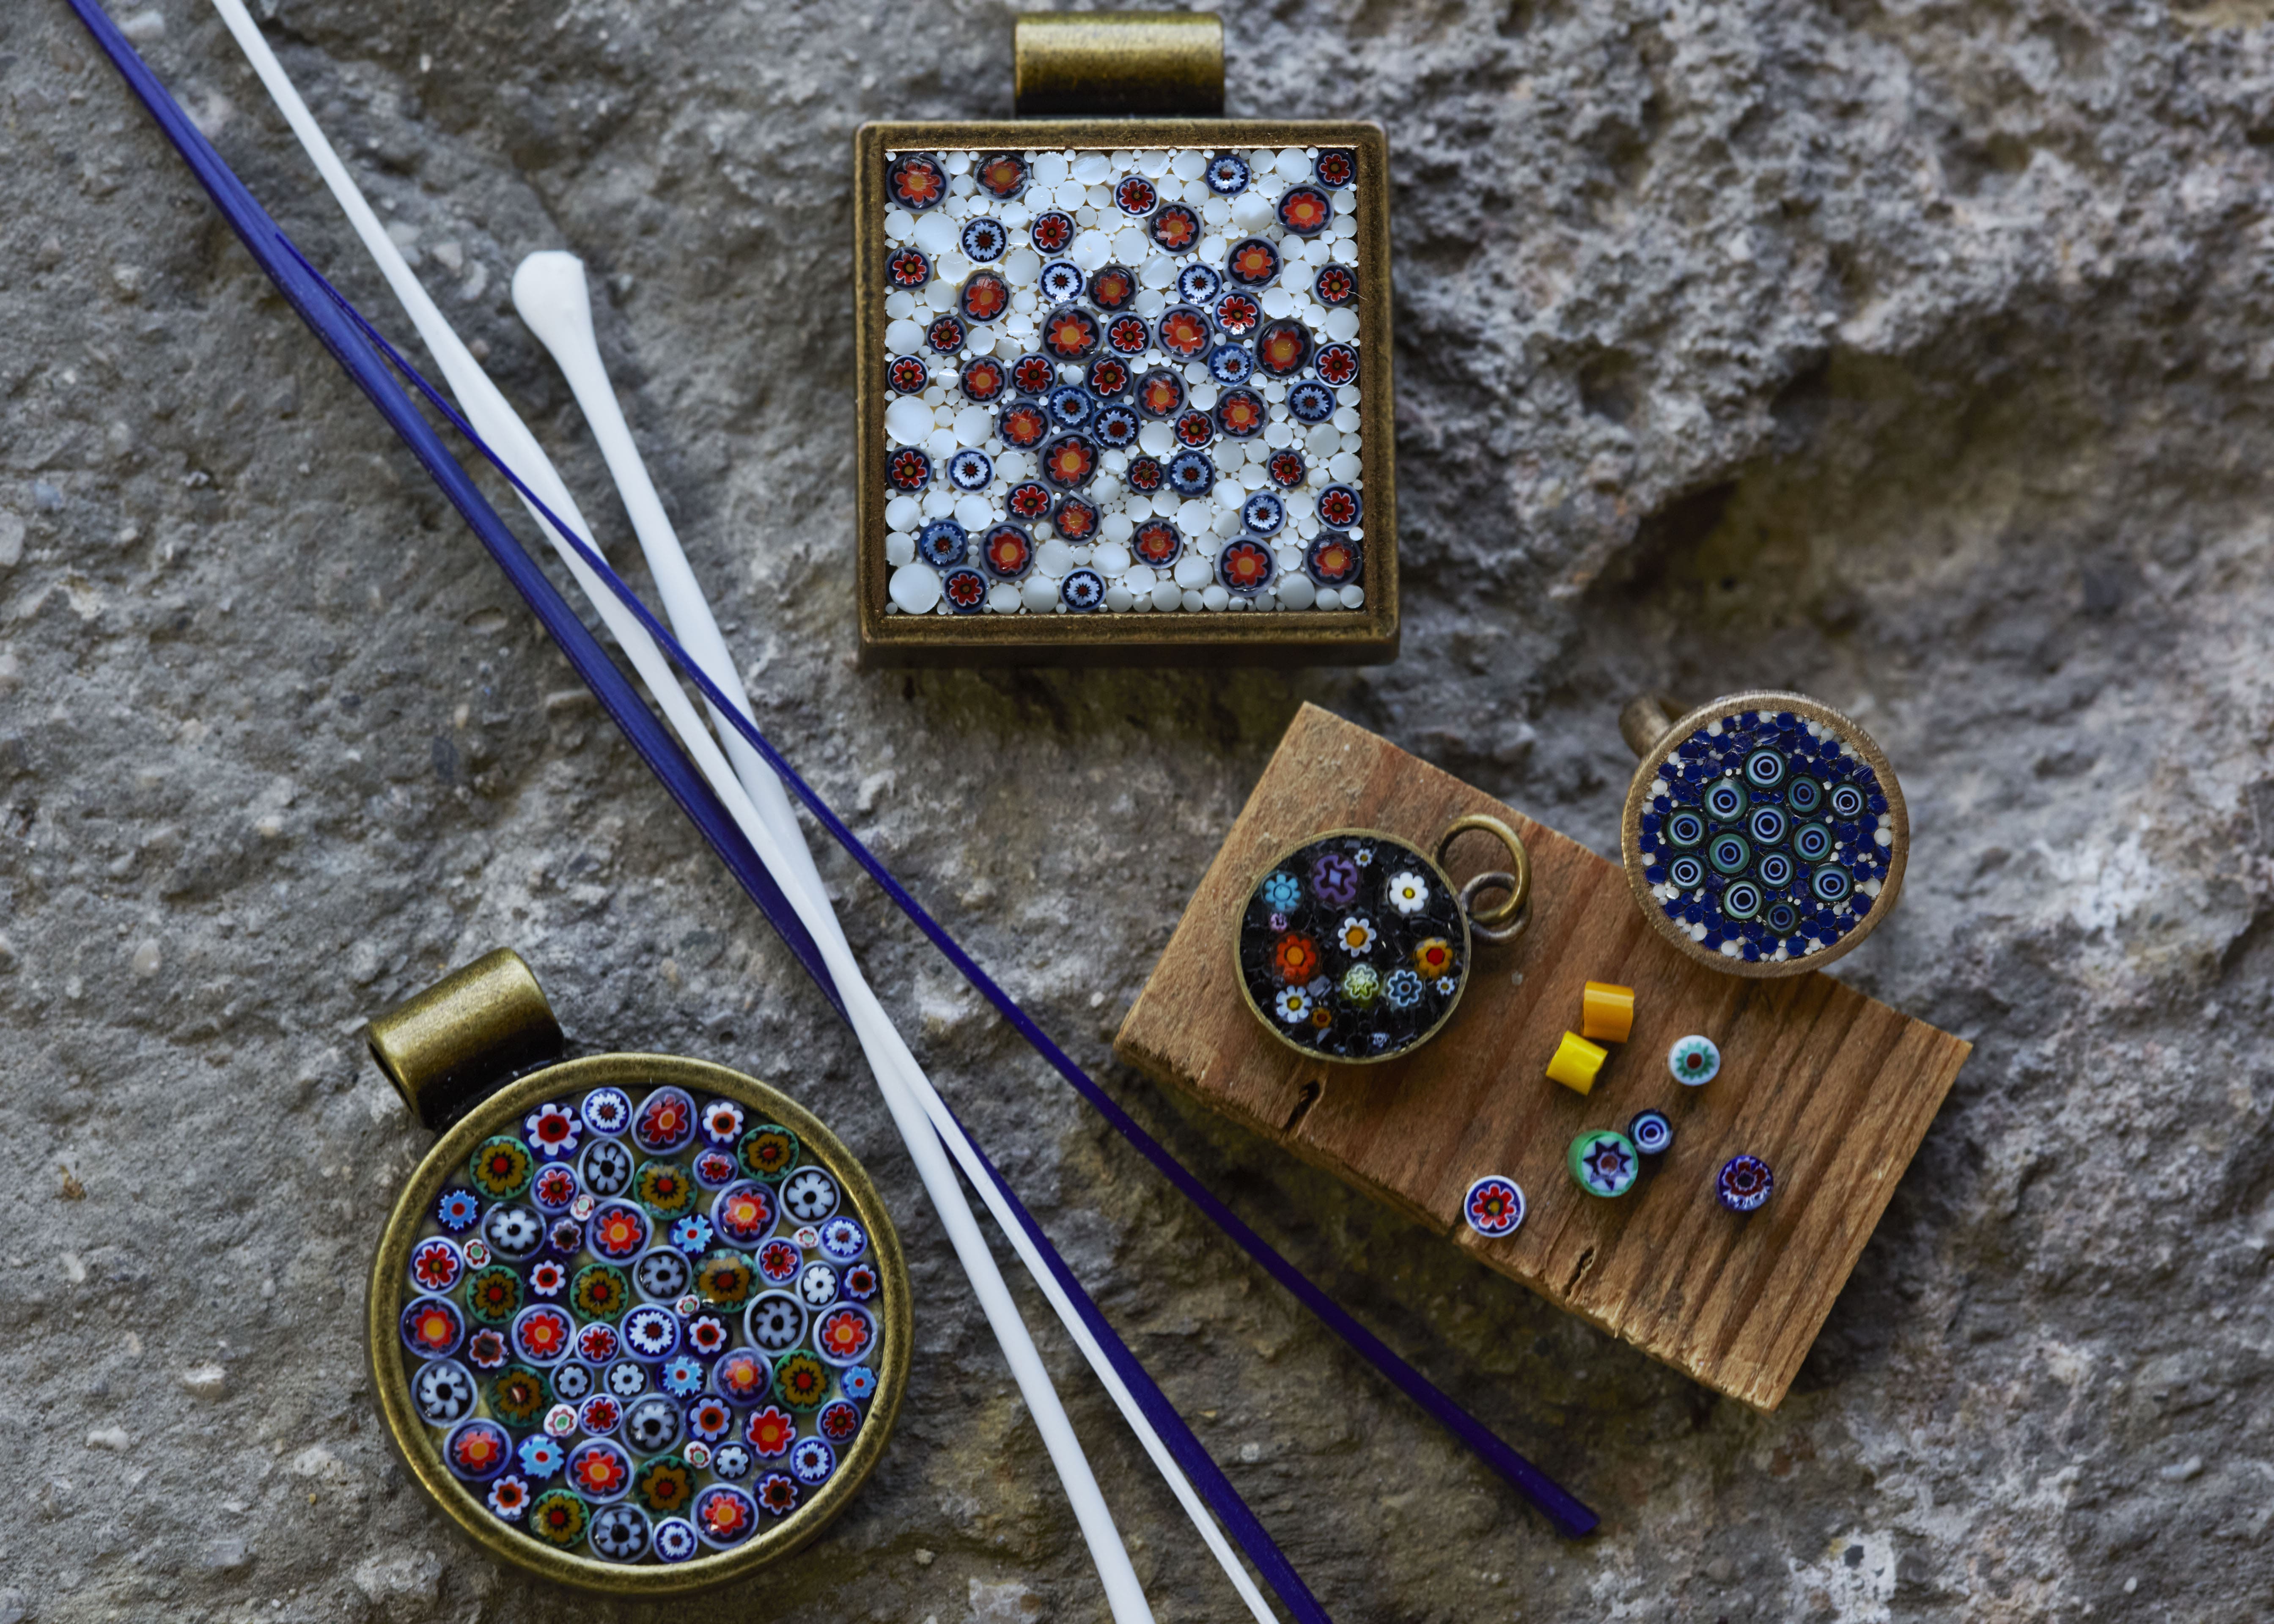
The first step to start the pendant is to select the murrine you want to use.
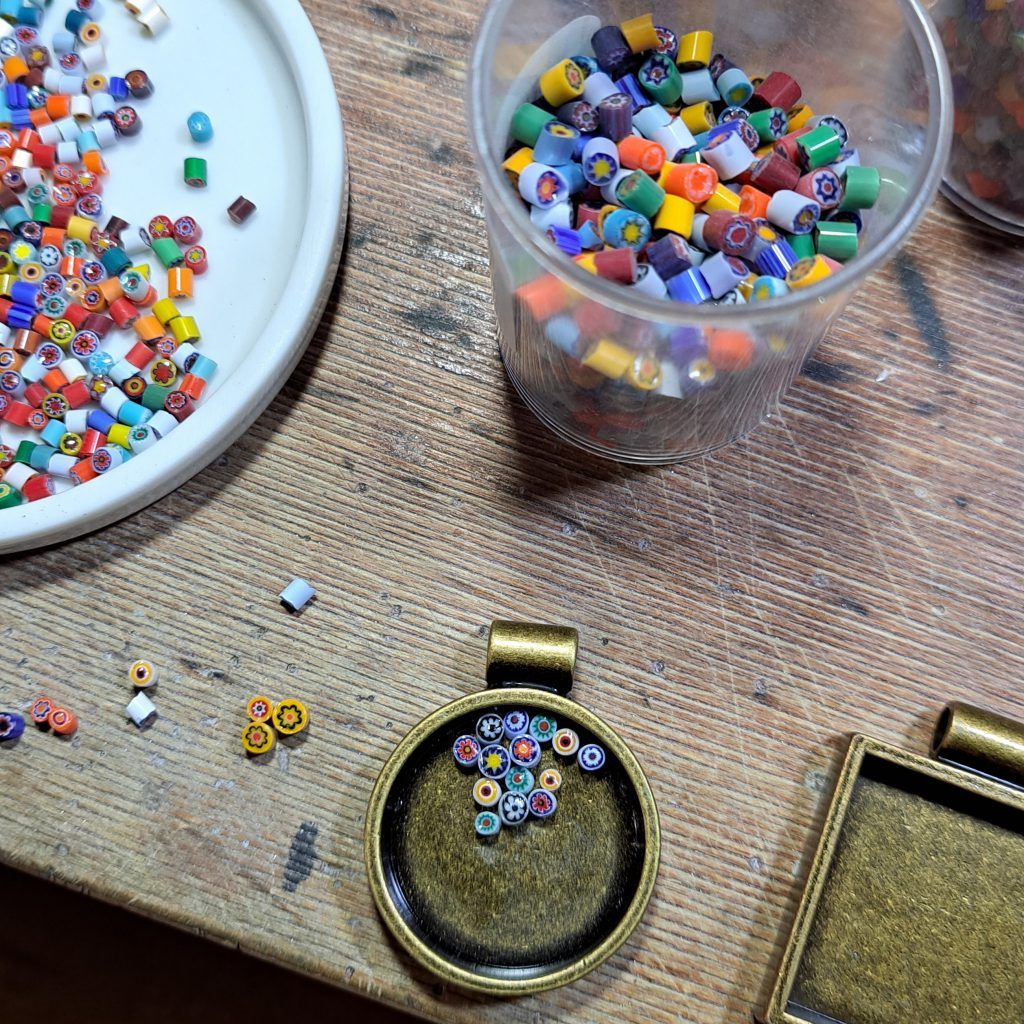
Pour the murrine into a container where you can see them better. I used a flat ceramic container. Select the murrine that catch your attention and start placing them next to each other to see if the colour combinations satisfy you.
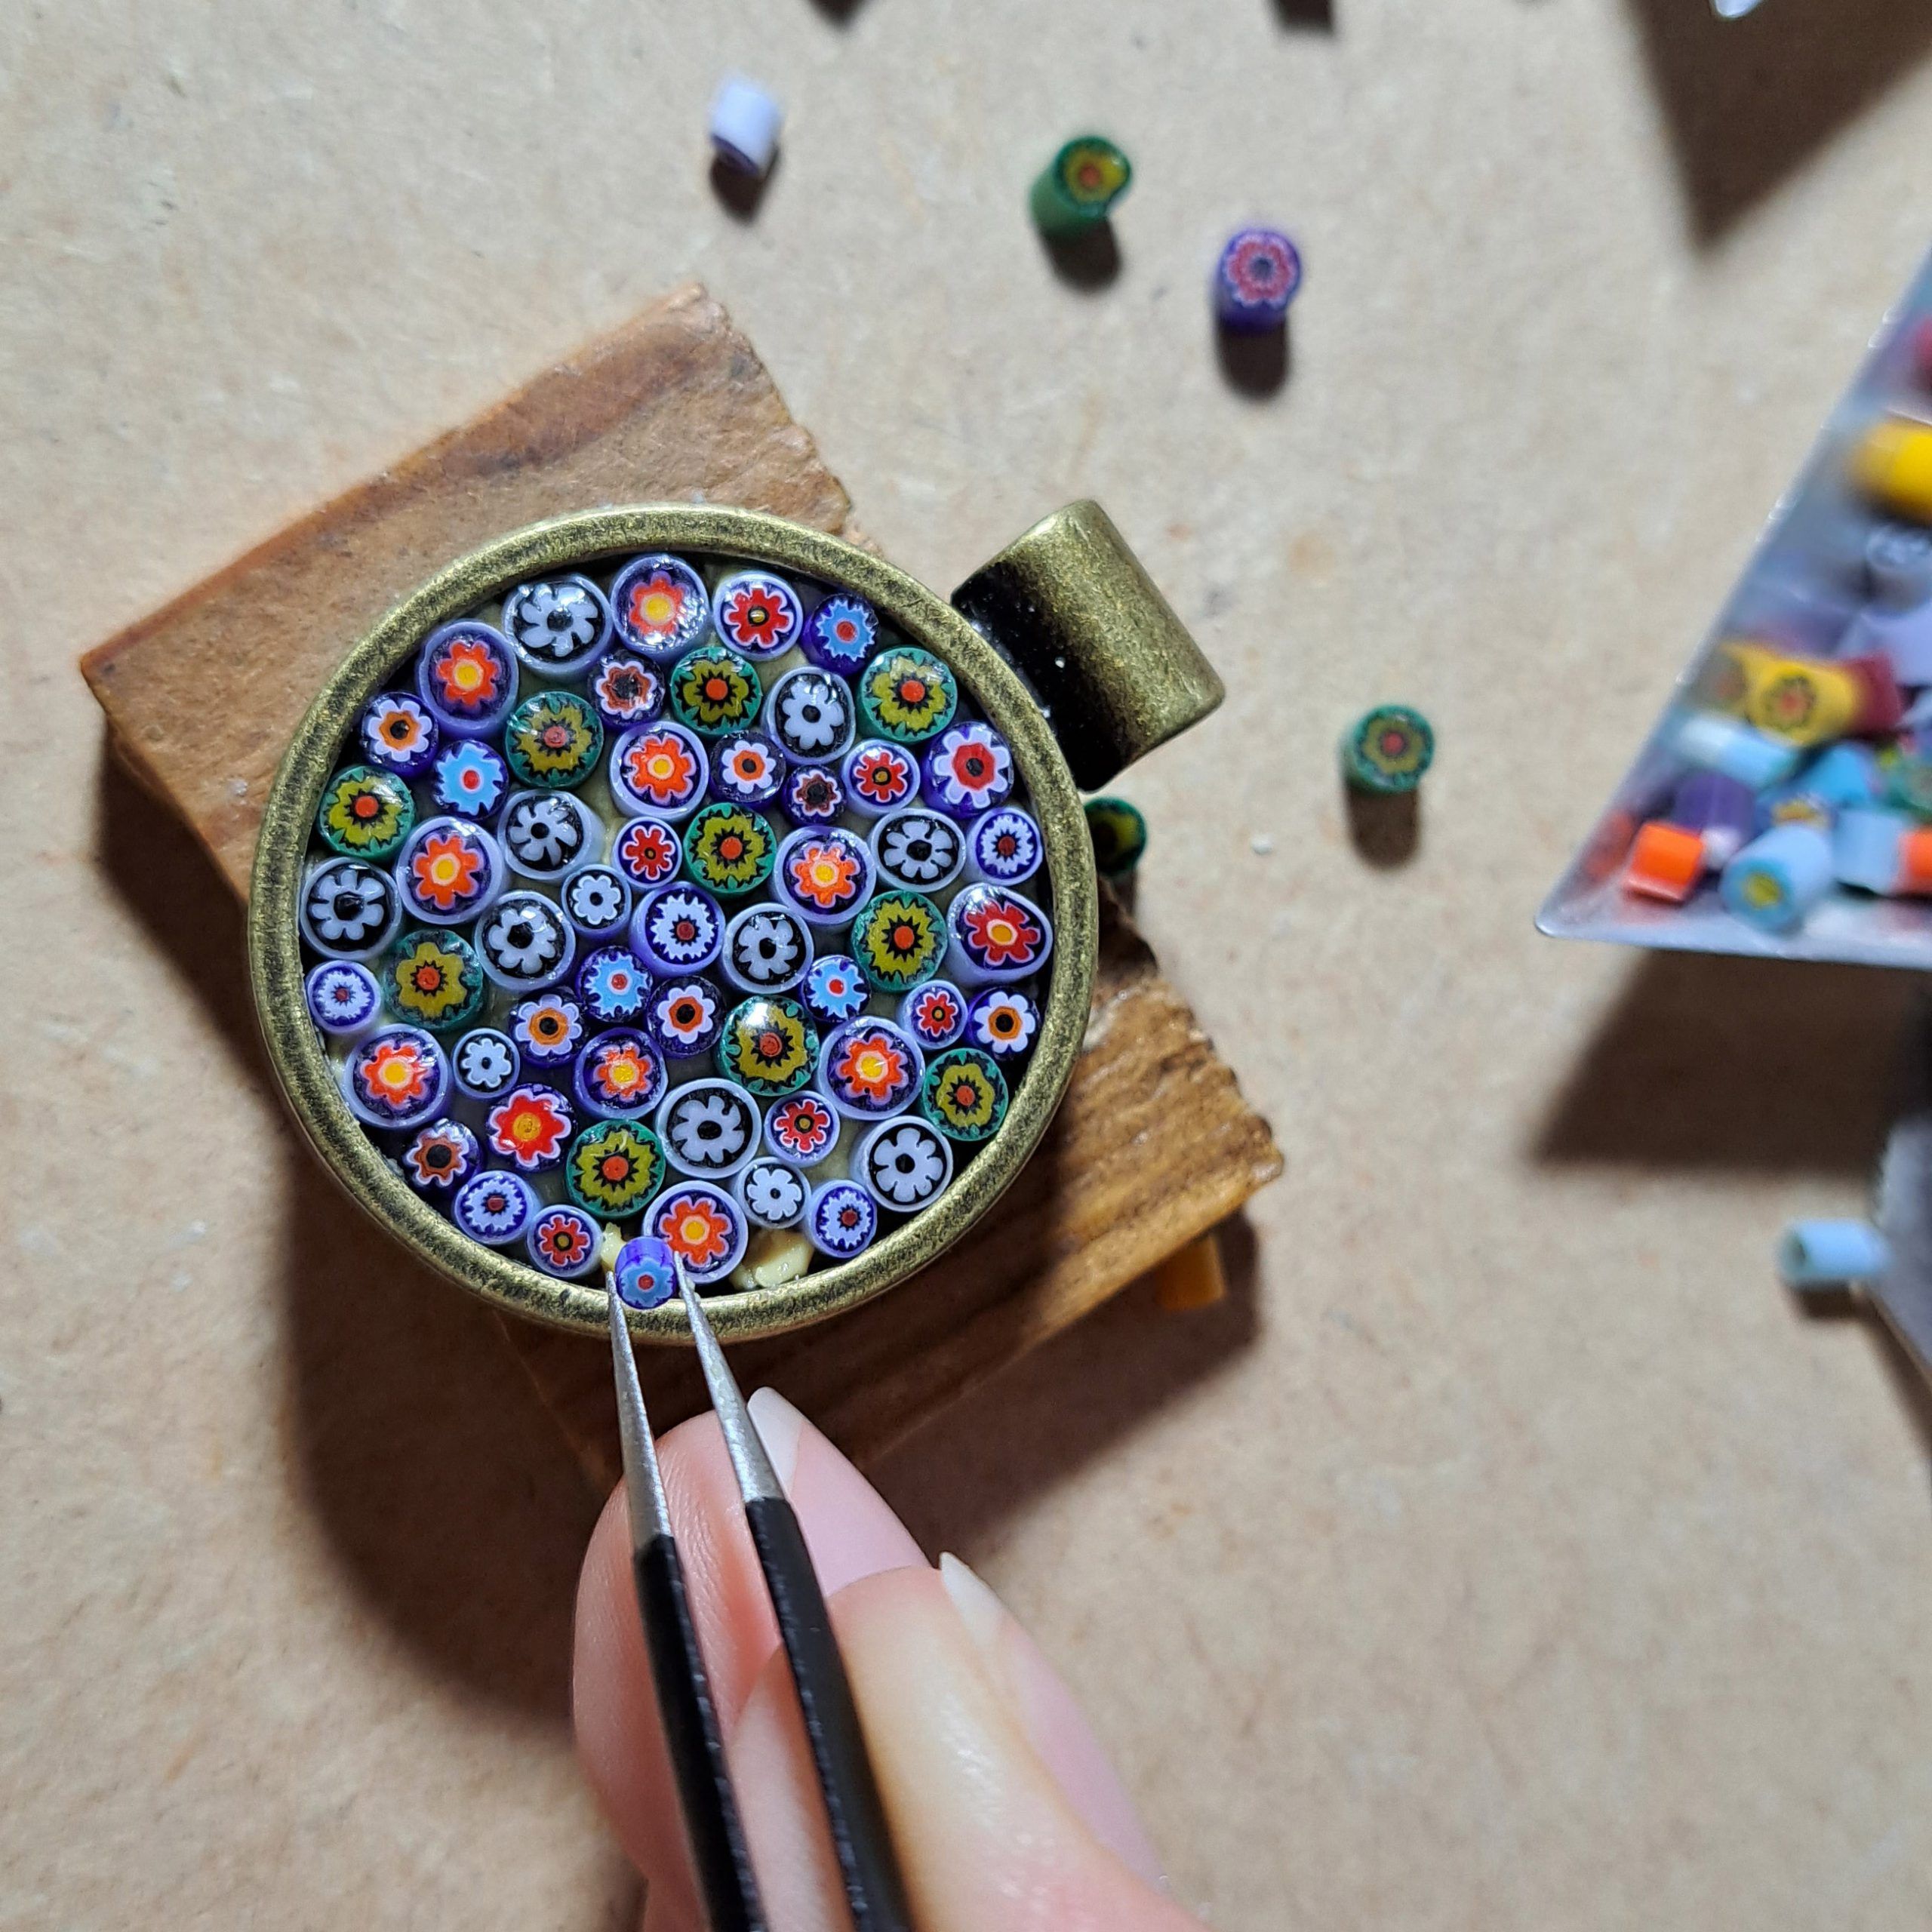
I chose to create a floral composition and, to help me imagine the final result, I temporarily placed the murrine inside the pendant. This way, it is also possible to calculate the amount of murrine needed for the chosen pendant.
I recommend selecting a few more than necessary, especially among the 2-3 mm murrine.
Prepare the base of your composition
First of all, create a support for your pendant: place it on a piece of wood or cardboard and fix it with Patafix. The important thing is that you can move it easily, and don't worry, Patafix will not damage your jewellery and will allow you to remove it easily once the work is finished.
After securing the pendant, clean the inside with a piece of kitchen paper dampened with a bit of alcohol. This will help remove any grease caused by contact with your fingers, thus improving the adhesion of the stucco.
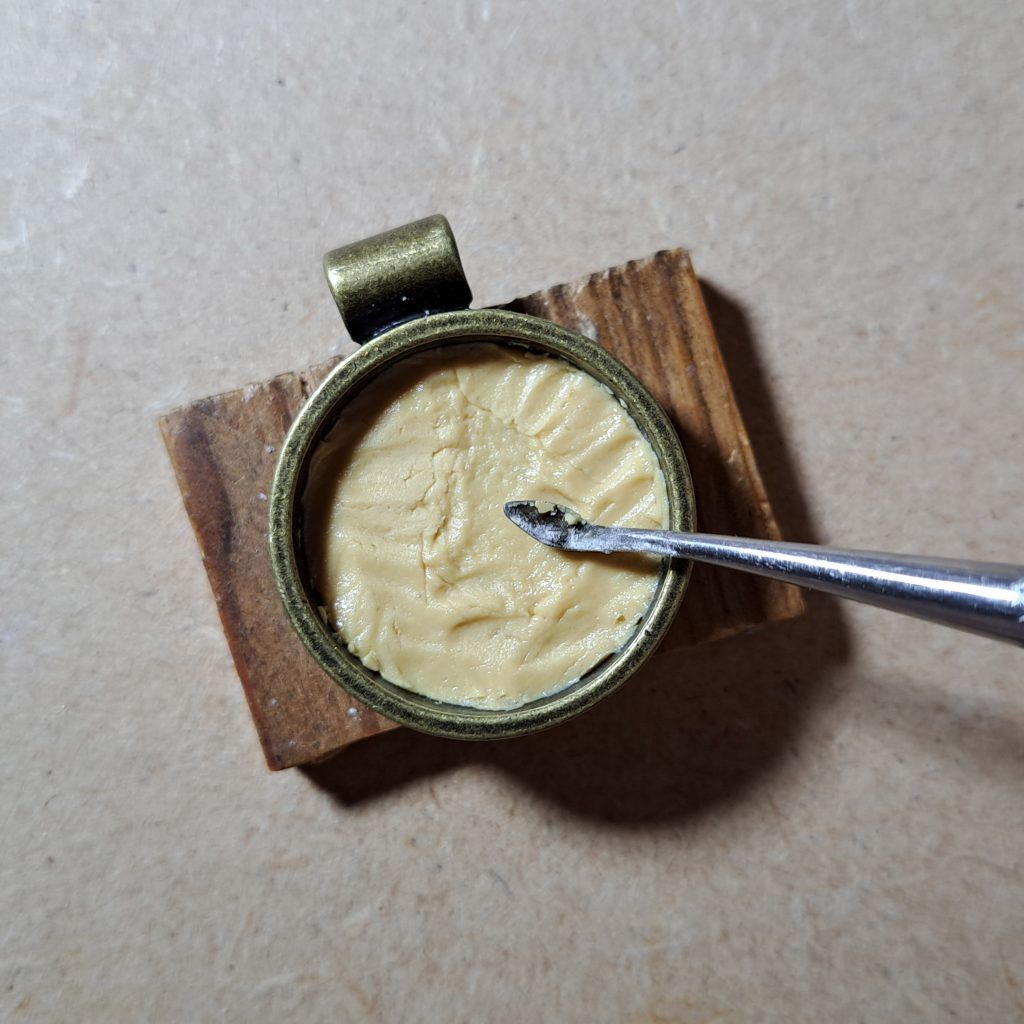
Fill the stucco to just under half the total height of the base that will hold your mosaic of murrine.
Use a spatula to help you or use your fingers. The spatulas in this tool set are my first choice because they allow for good control of the stucco and can be used to add it even in small bases or with different shapes, reaching into the tightest spaces.
But how to choose the stucco?
Traditionally, micromosaic was made on a base of Roman stucco. This stucco has special characteristics - such as slow drying - that allow you to work calmly and make corrections even days later. If you have this stucco available, you can use it to create your base.
Its preparation is too elaborate to explain in this tutorial, but the good news is that you will get to know it well thanks to the micromosaic course I will hold at Hobbyland at the end of September.
In the meantime, you can use Milliput white superfine paste to create your pendant.
For this, it is important to think about the design before preparing the base: this way, you won't waste precious time. After finishing your pendant, let it dry for at least 24 hours. The hardening and drying time depends on the temperature of the room where you work. Roman stucco, on the other hand, gives you a few days to finish your work and then needs to dry for a few weeks.
And now: the murrine!
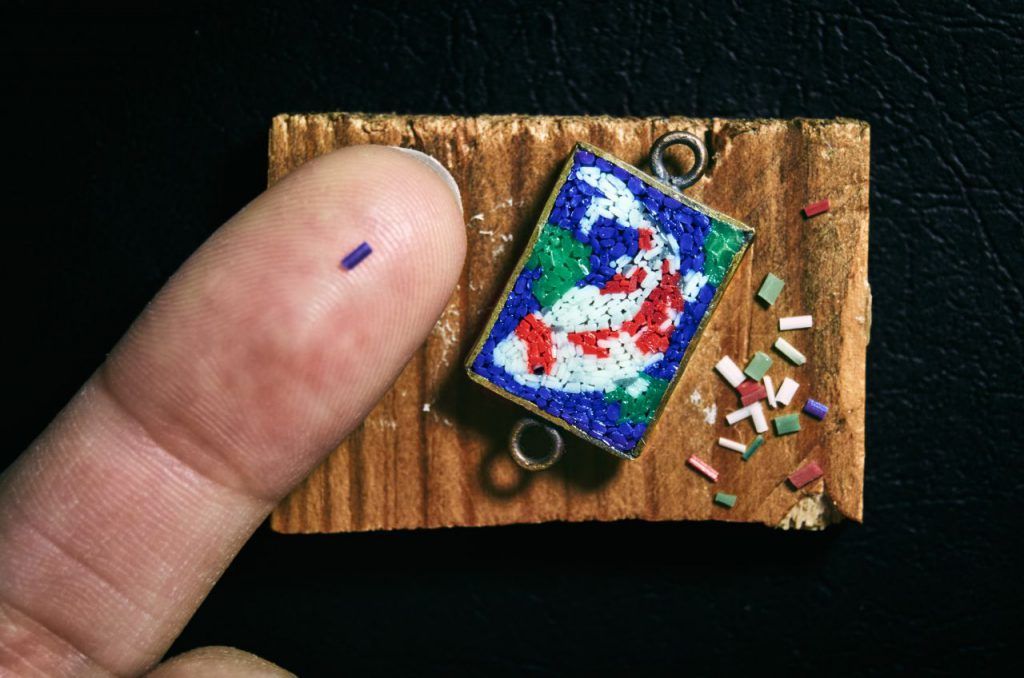
For our pendant, we will use pre-cut murrine. You will immediately notice that they are not all the same length, but don't worry: now I will explain how to position them so that these height differences are not visible. You will become a professional in using tweezers!
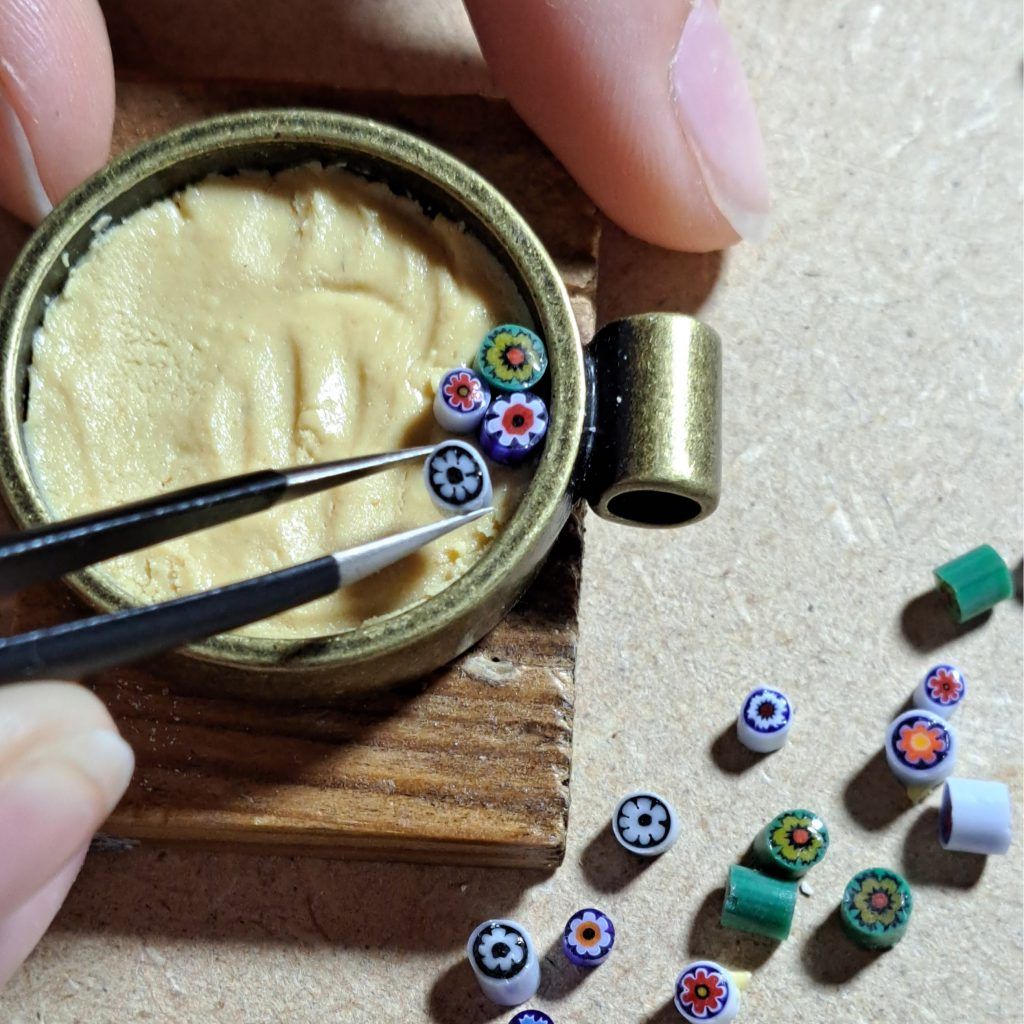
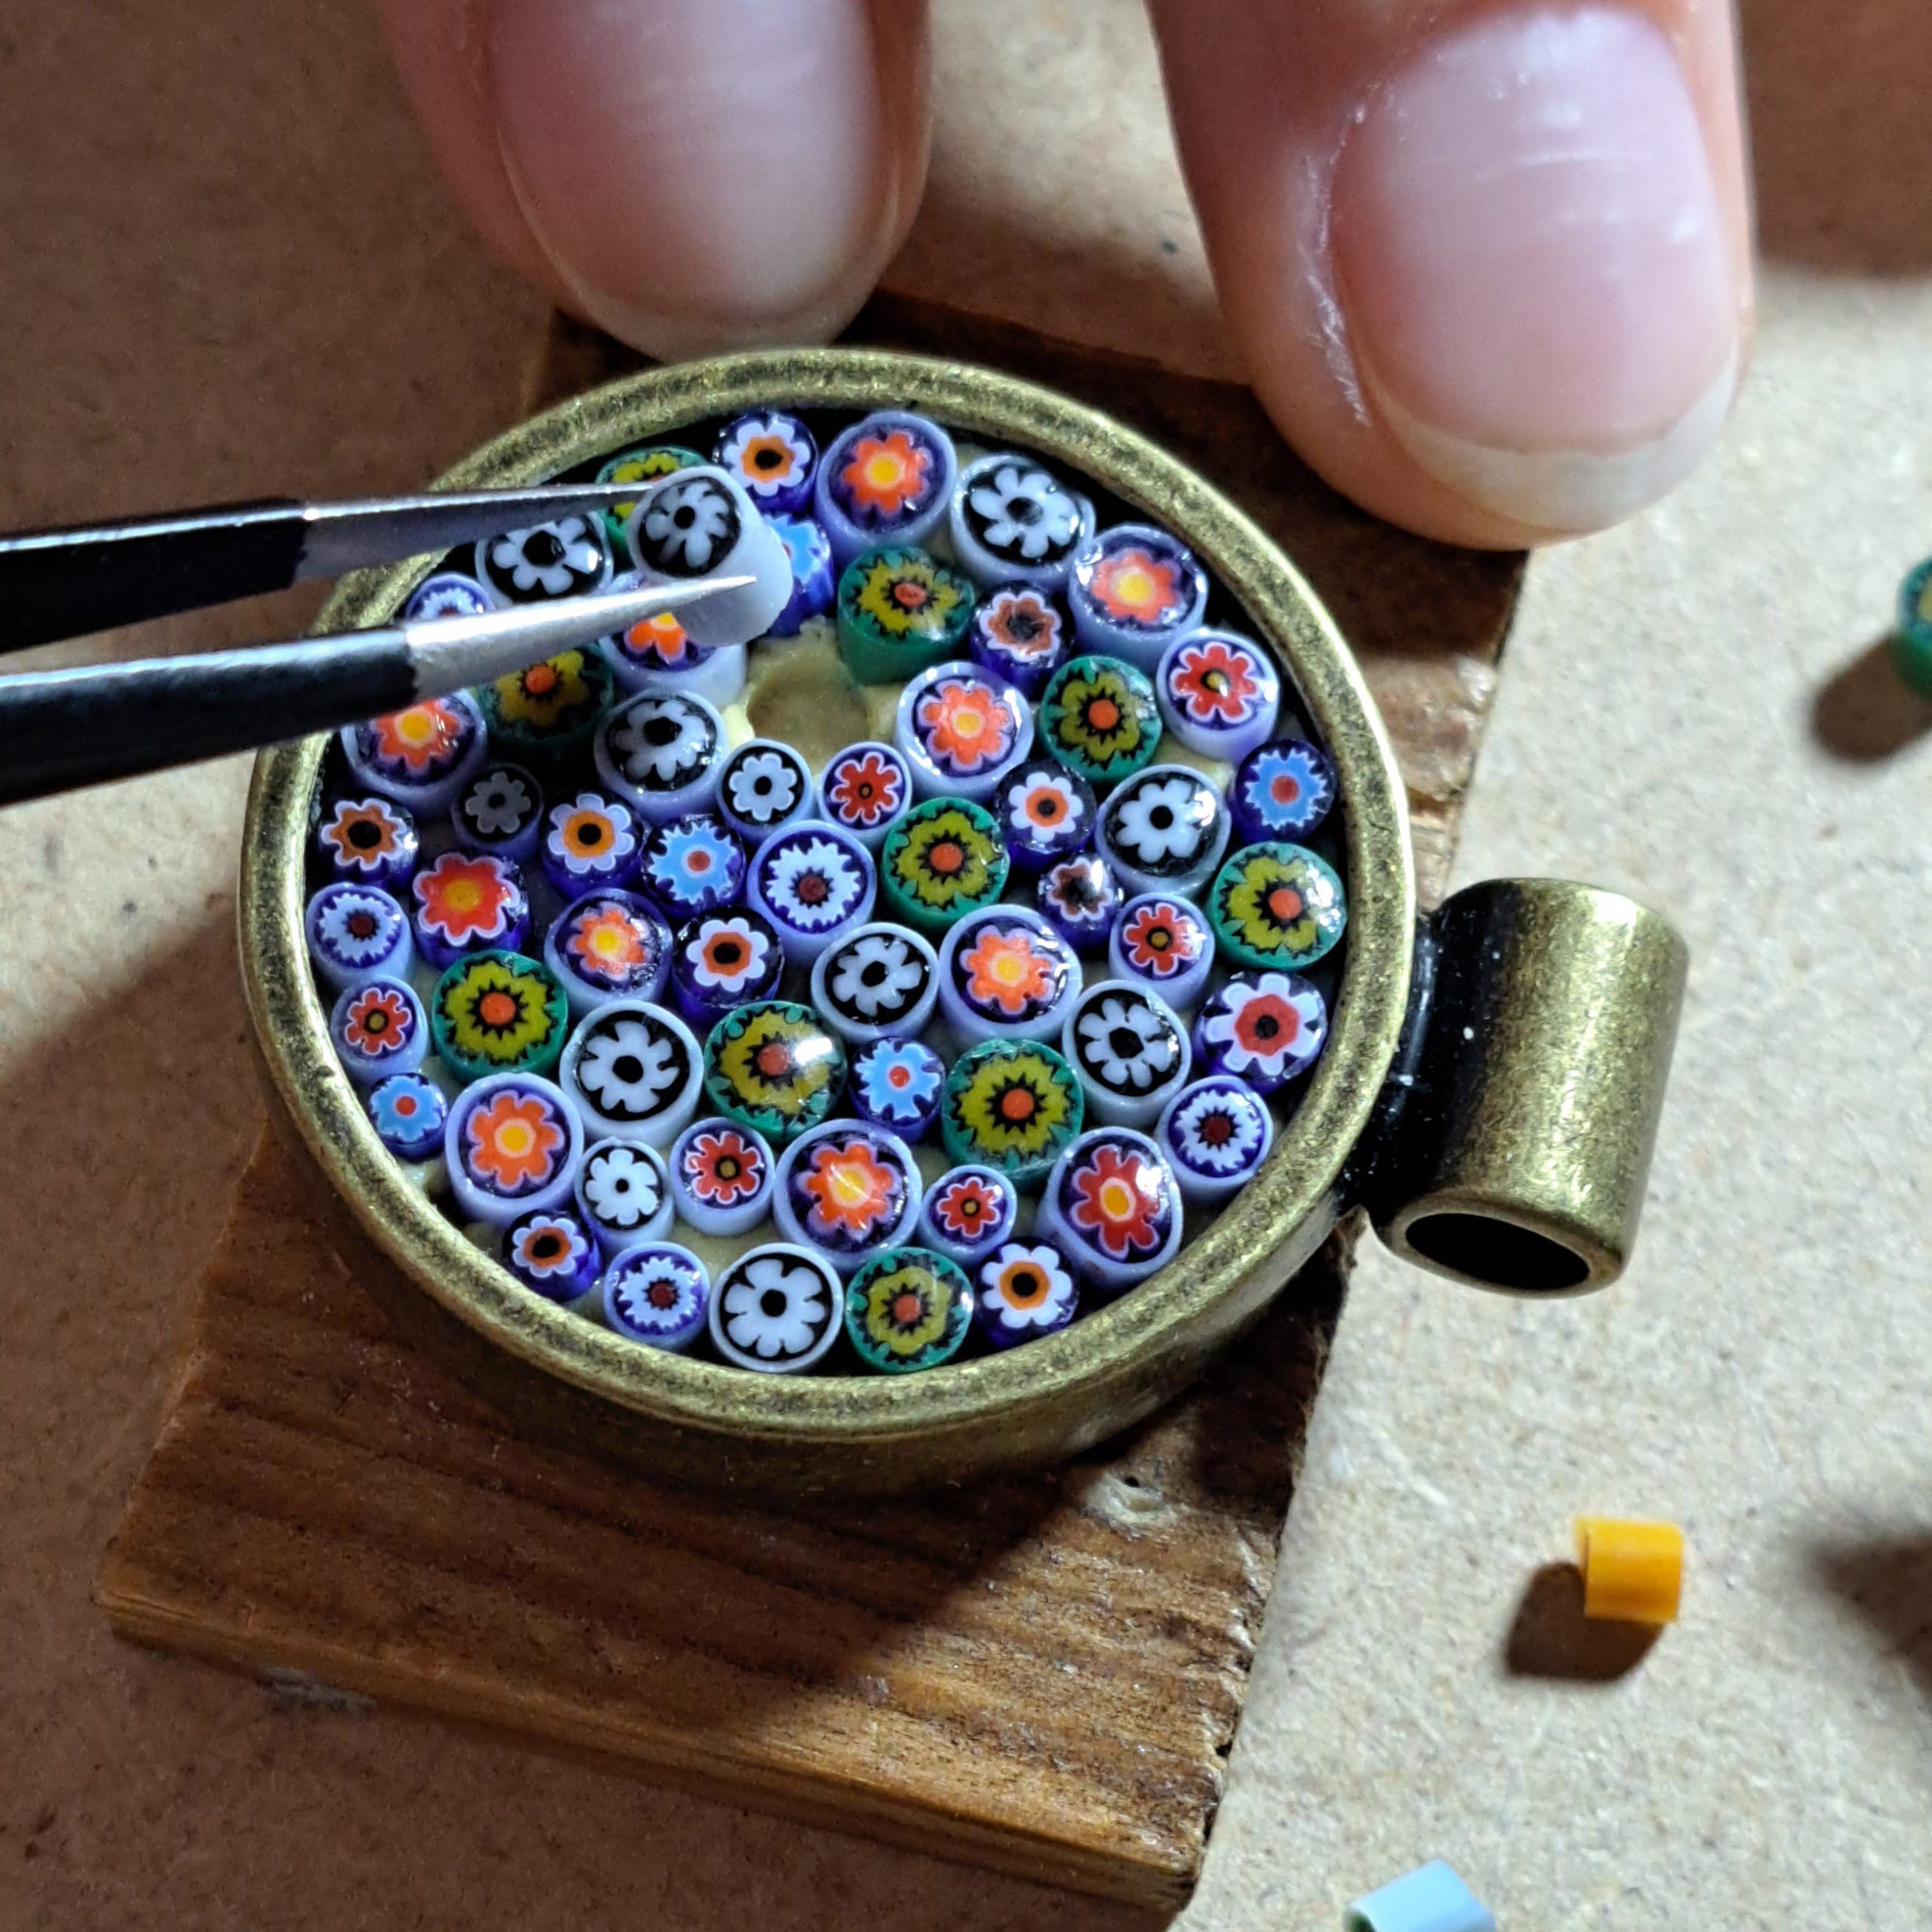
Take one murrina at a time with the tweezers and, starting from the edge, position them according to the design you prefer.
Place them one at a time and gently push them with the tweezers into the stucco. Push them one by one until they are all at the same height. Be gentle: it is easy to push them too deep if you apply too much pressure. If a murrina "sinks", you can pull it out and fix it. Adjust the stucco with the tweezers or spatula and reposition it correctly.
The composition
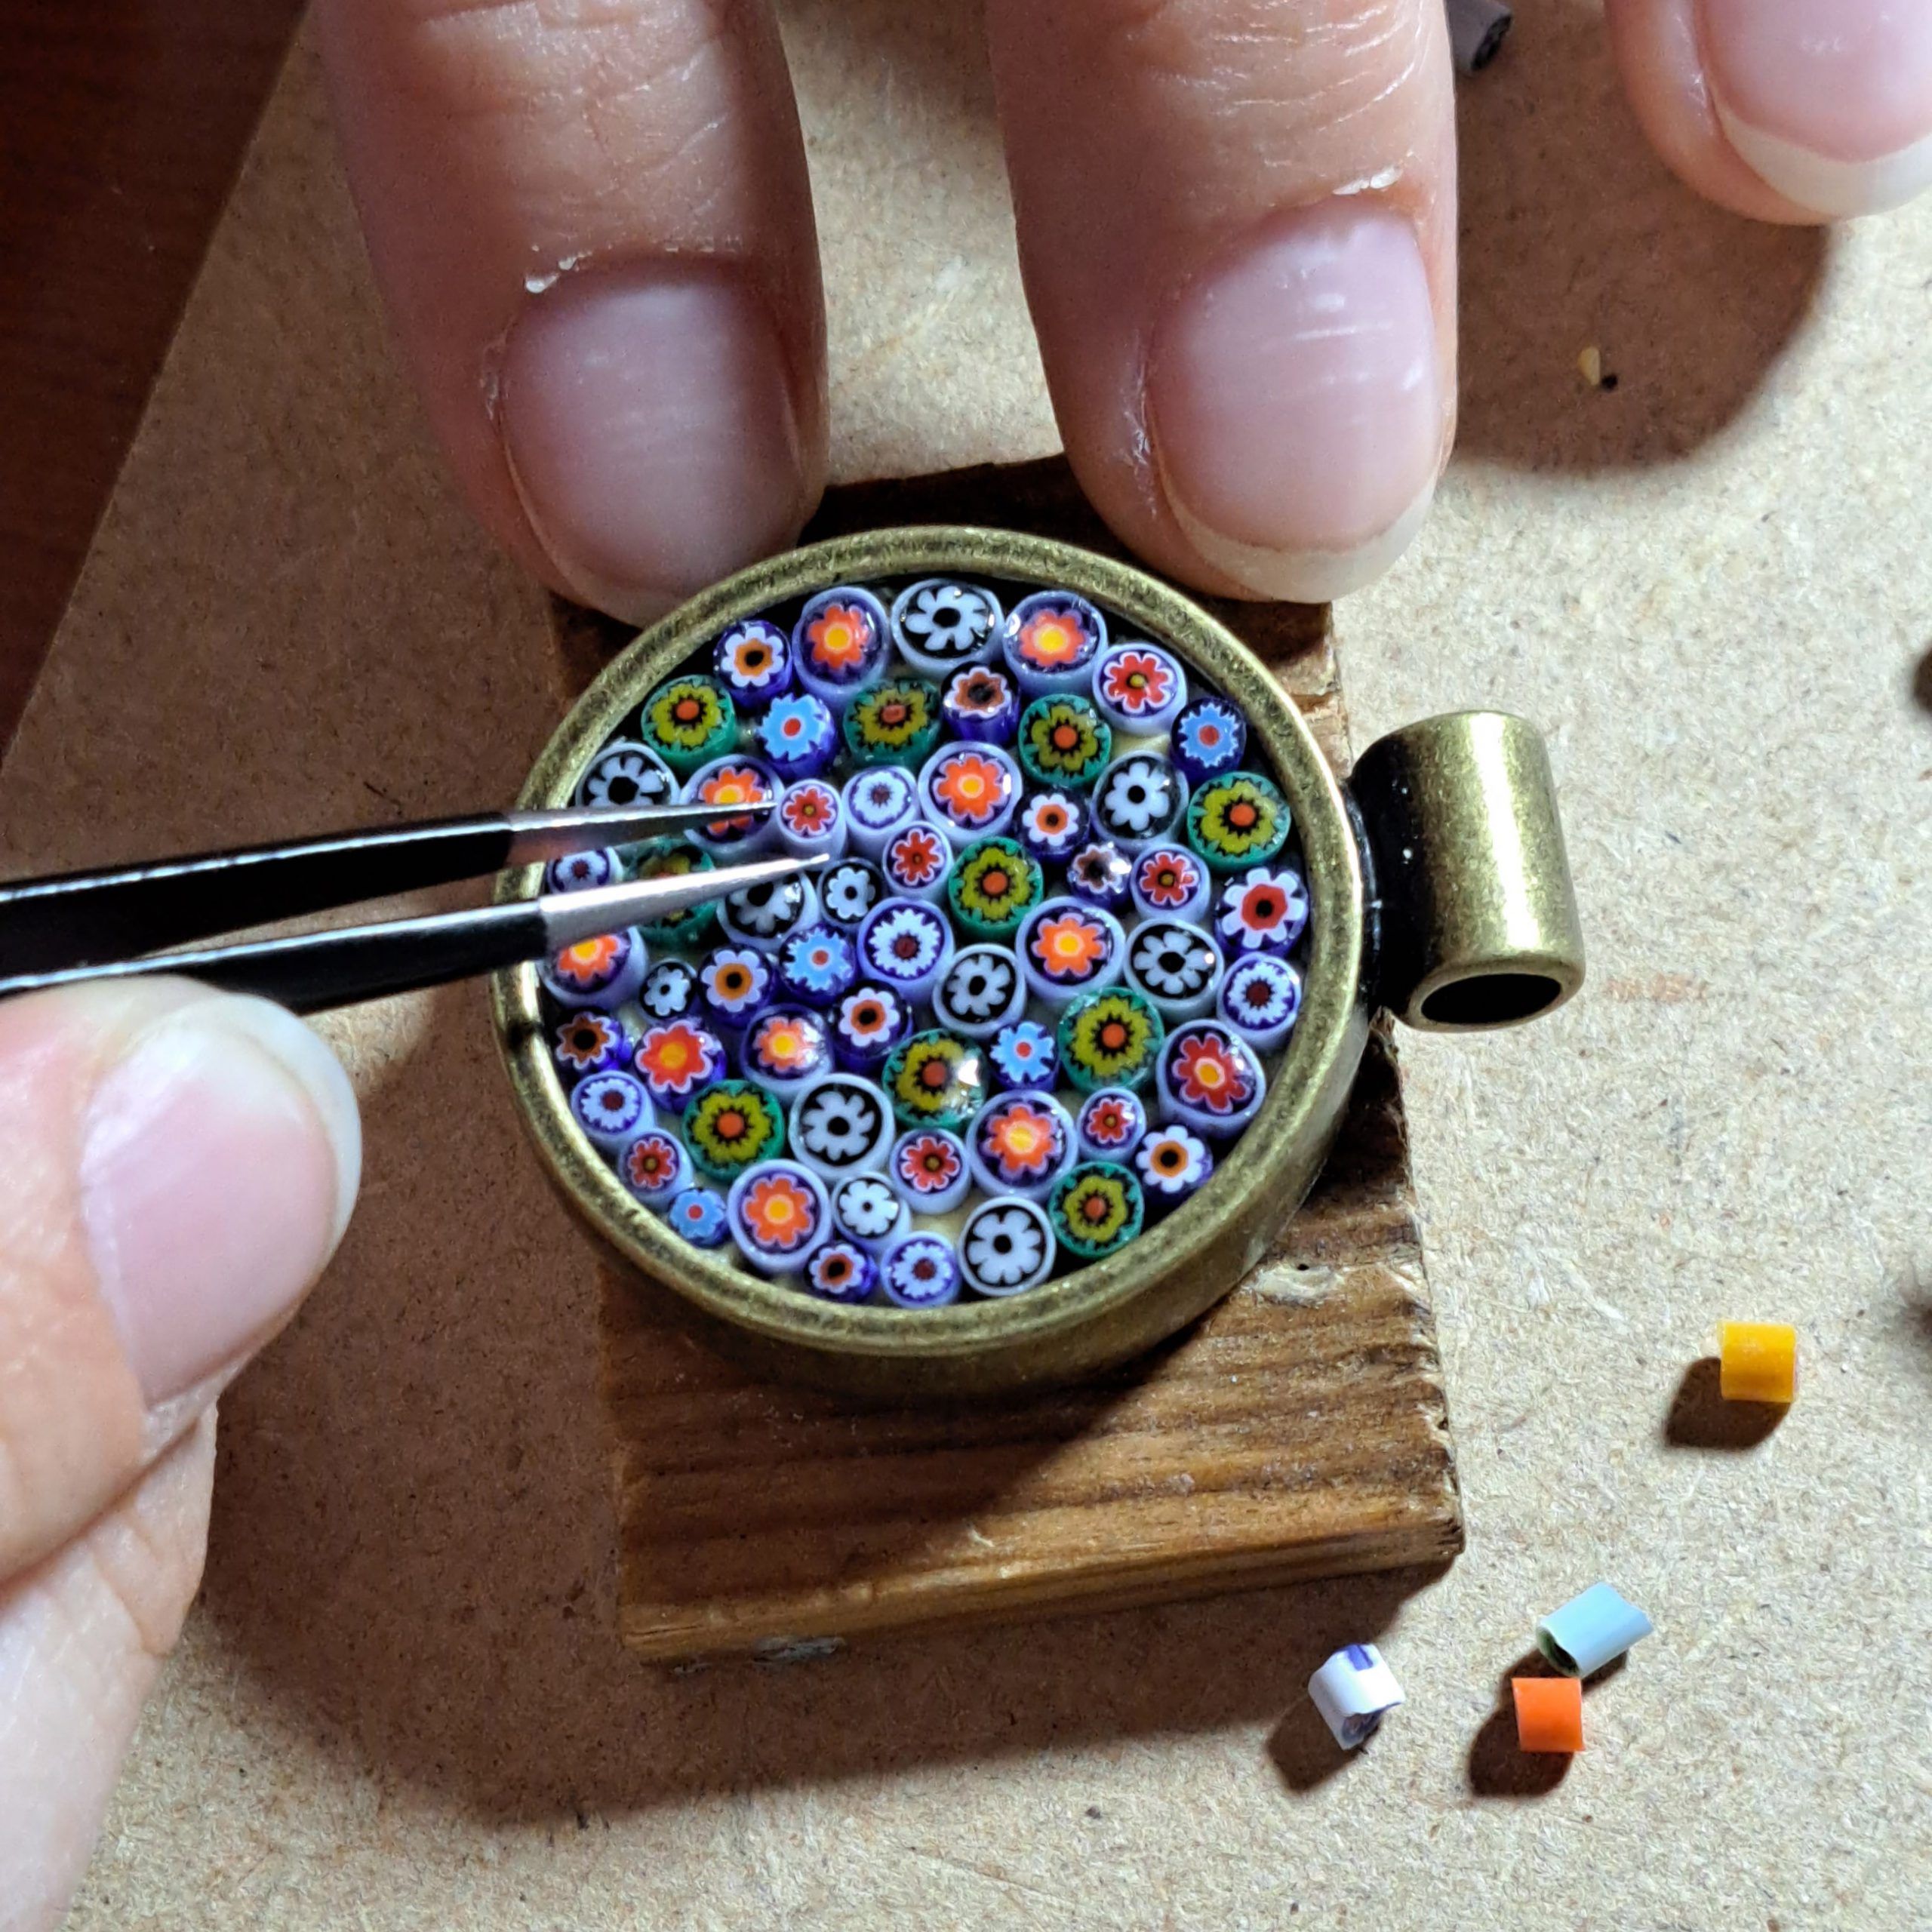
You can create any design you like! Try to pay attention to place the murrine as close together as possible, to avoid large empty spaces between them.
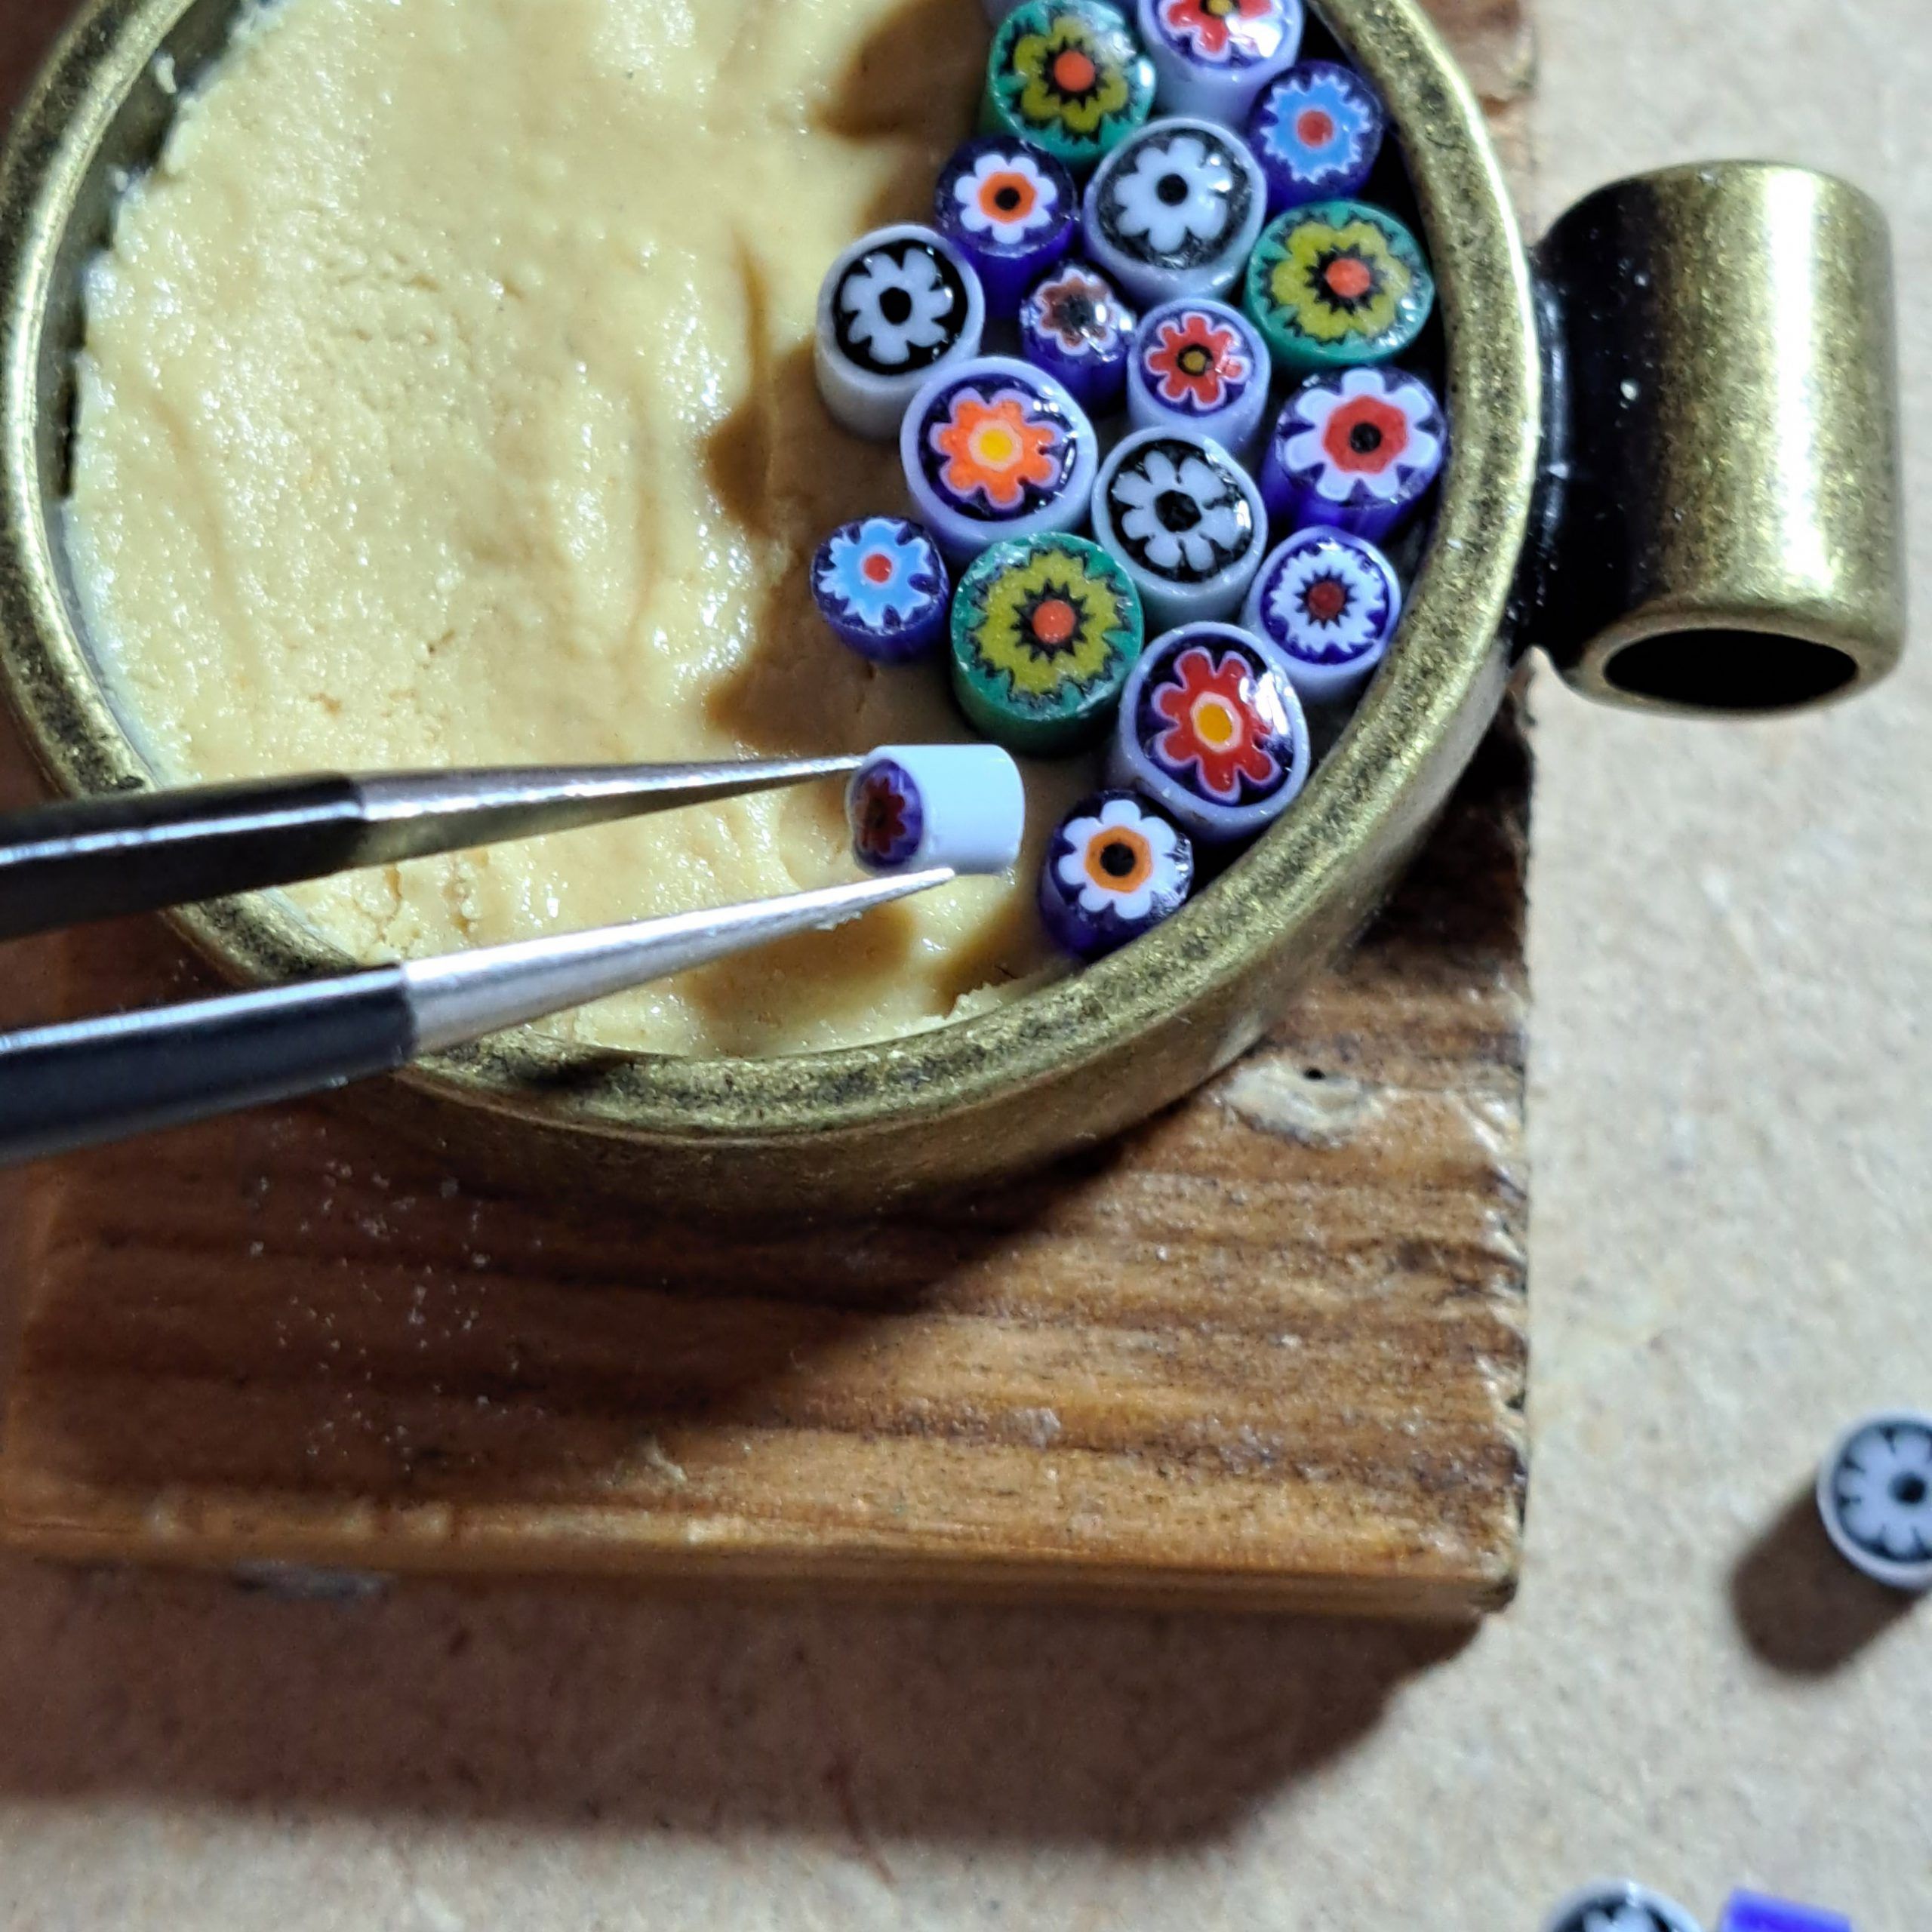
But empty spaces are normal. The solution is to use 2-3 mm murrine, which are perfect for filling smaller gaps. Sometimes it can also be helpful to remove a large murrina with tweezers to replace it with two smaller ones.
The finishing touch
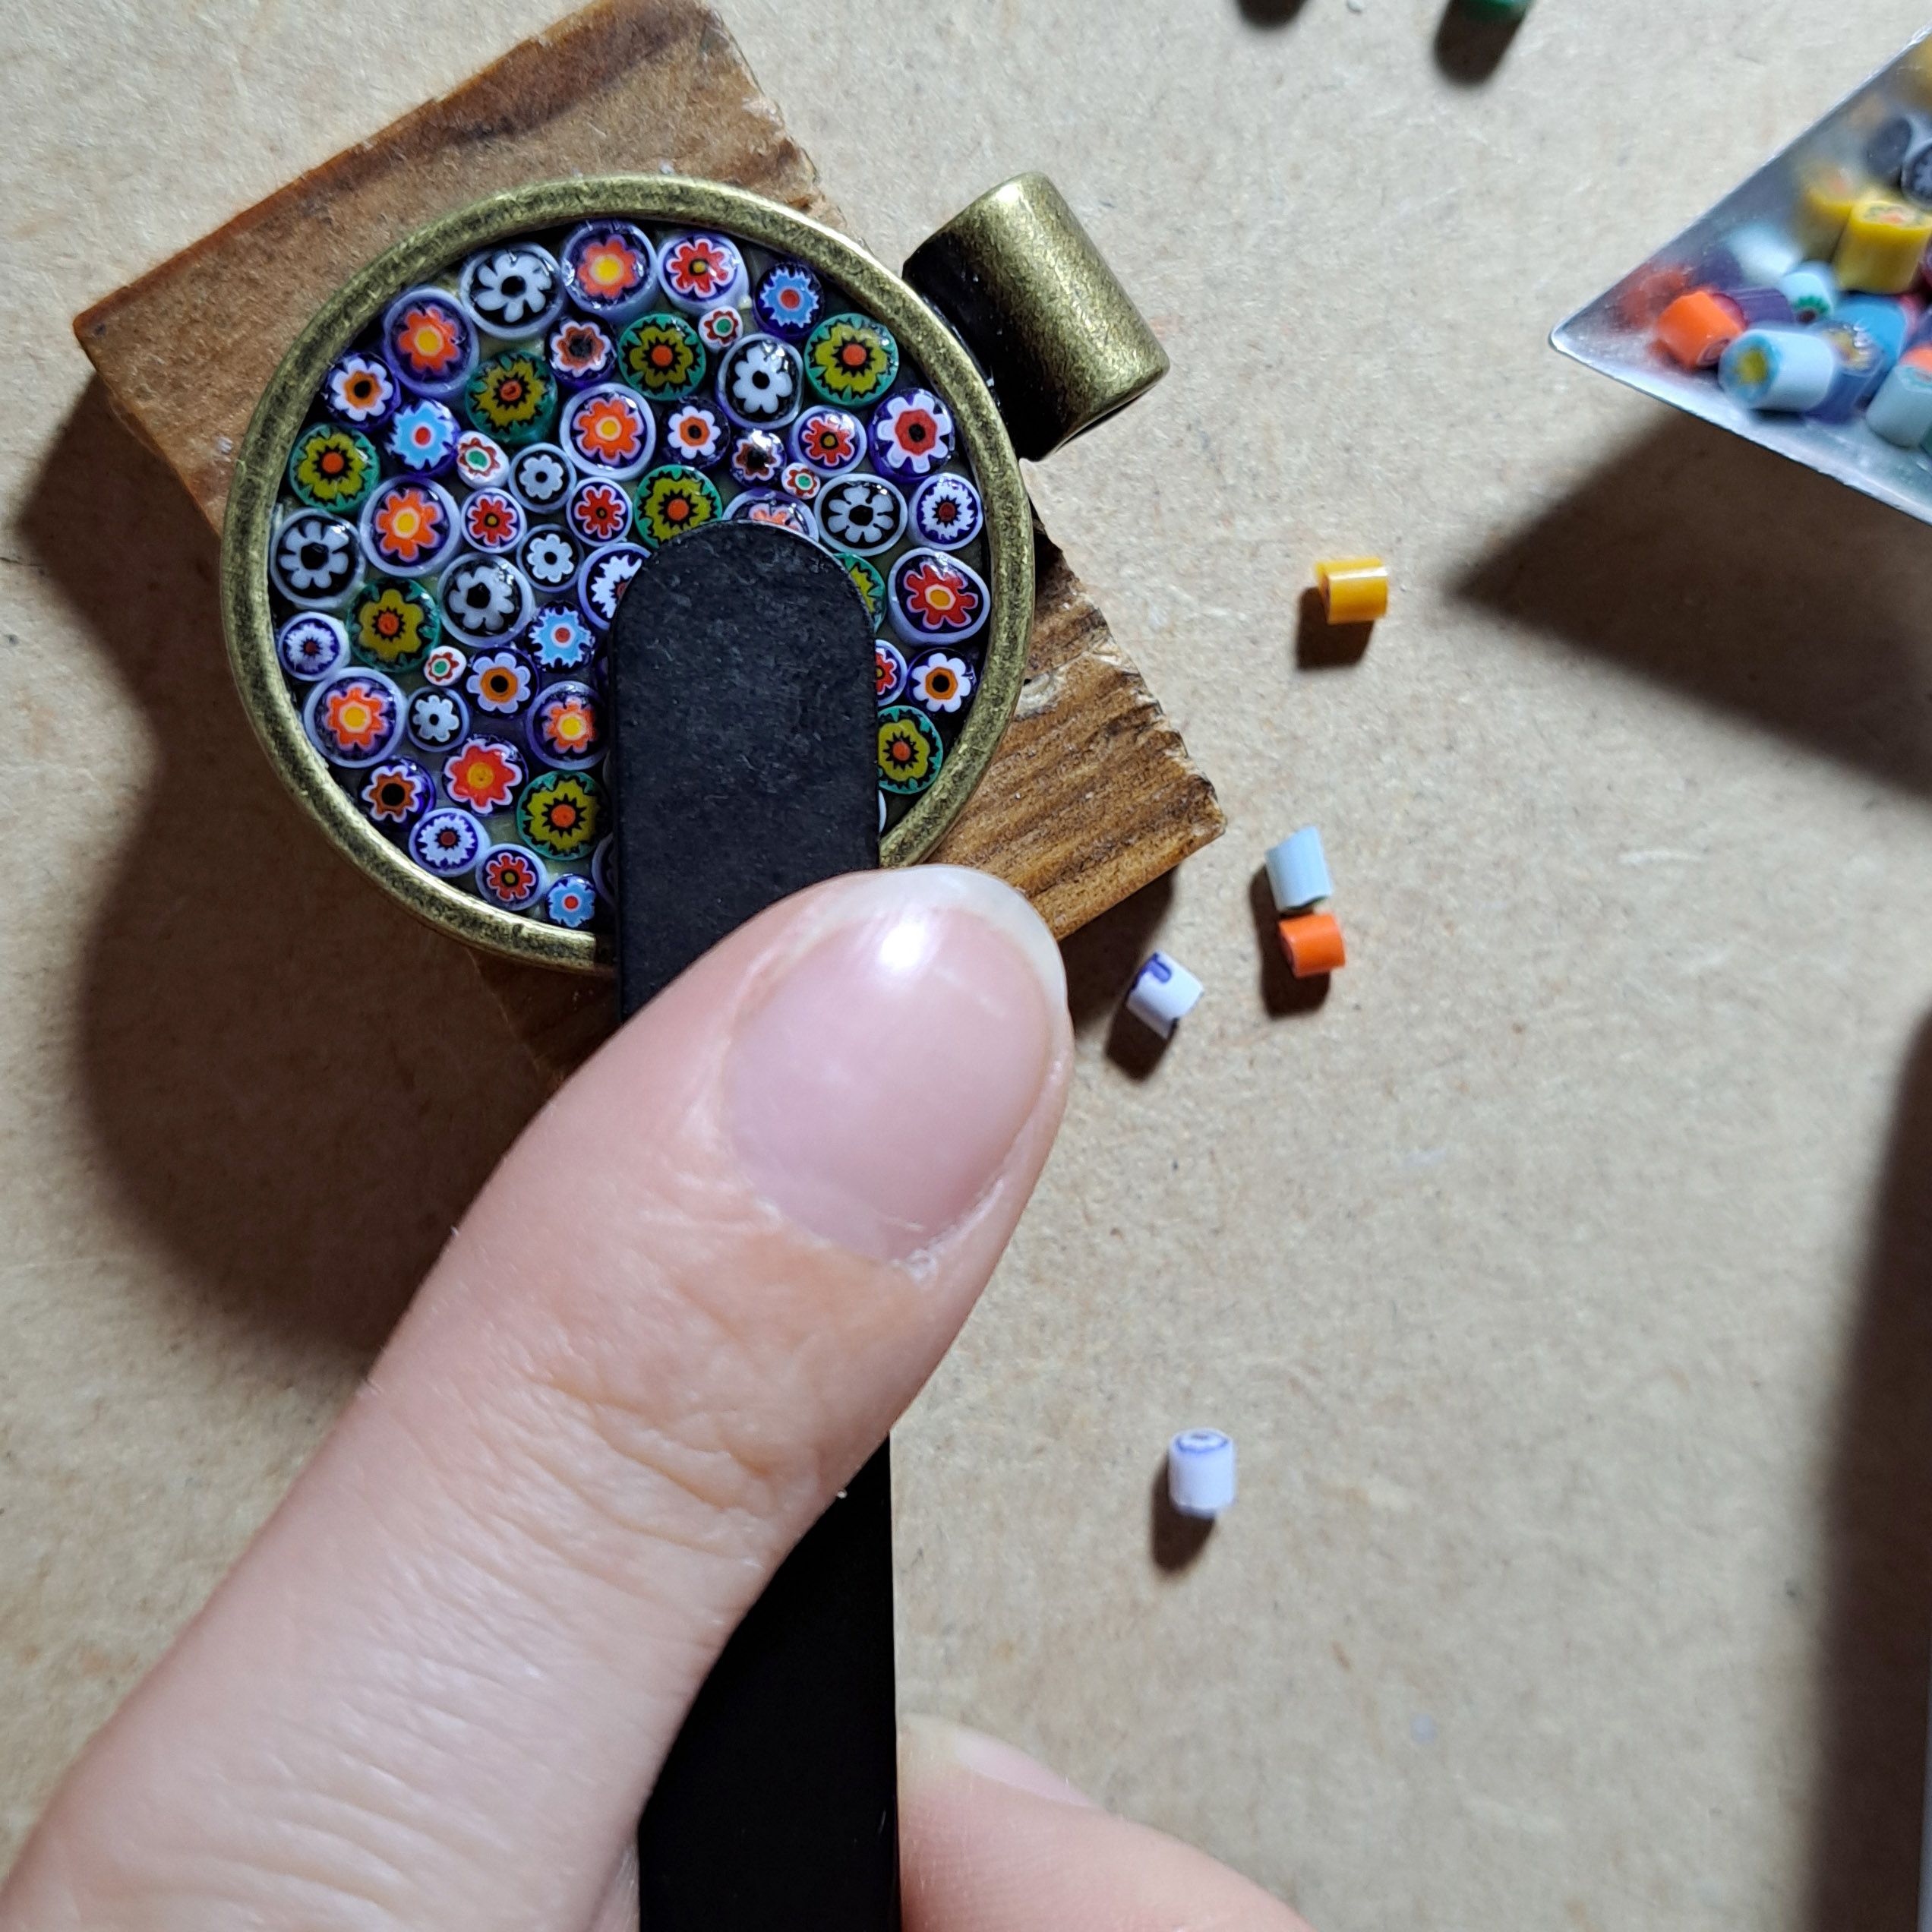
You have completed your pendant! Now gently press on the tiles using a piece of wood or the back of the tweezers, to level the murrine and push them well into the stucco. This way, they will be at the same level as the metal edge of the pendant.

But it doesn't end here...
I hope that with this tutorial, you are ready to take your first steps in creating a personalised pendant full of creativity and colour like the one we made together. But if you want to deepen and refine the technique, I look forward to seeing you at LK0 which will be held at Hobbyland at the end of September: you will learn to work with glass starting from the rods, from which you will cut tiles and murrine one by one; you will also learn to make Roman stucco and tiles of different sizes to place alongside the murrine, to fill the empty spaces well. You will become an expert and know how to create increasingly complex compositions. I look forward to seeing you!