It is referred to as glass fusing or kiln forming when glass is heated in a kiln at temperatures above 650°C. At this temperature, glass softens and becomes malleable, and as the temperature increases, it melts further until it reaches a consistency similar to that of honey.
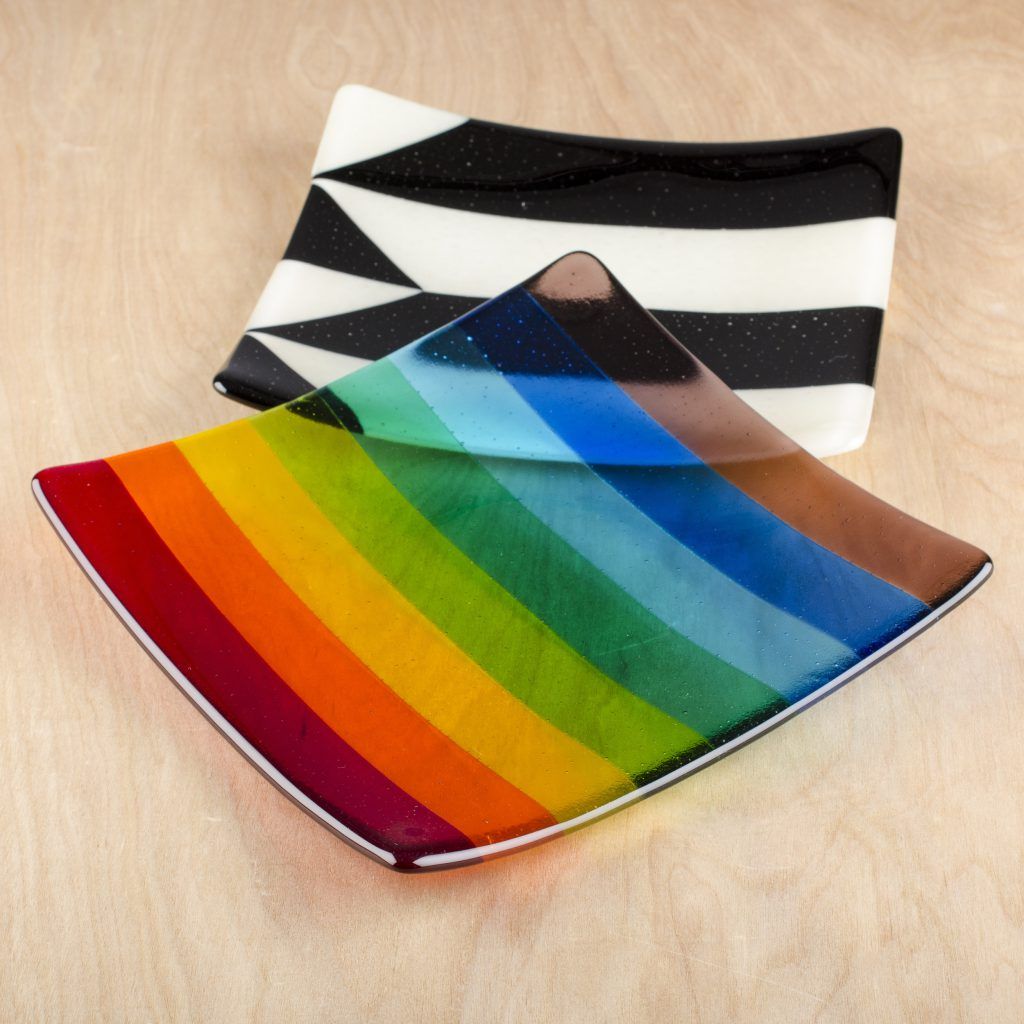
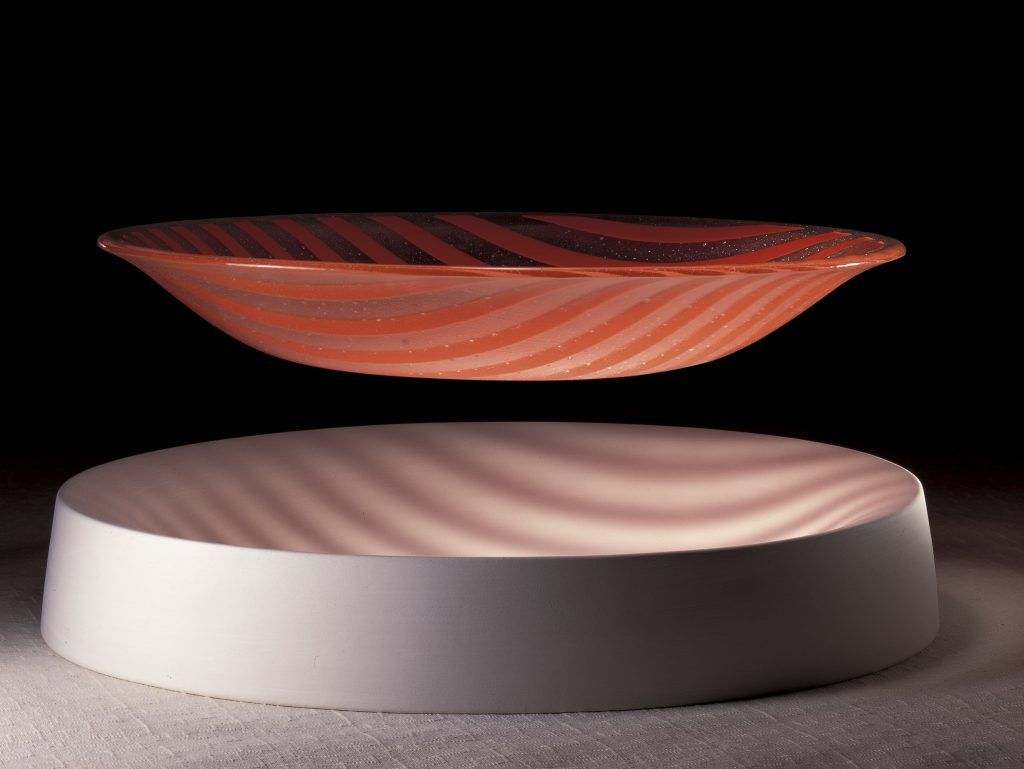
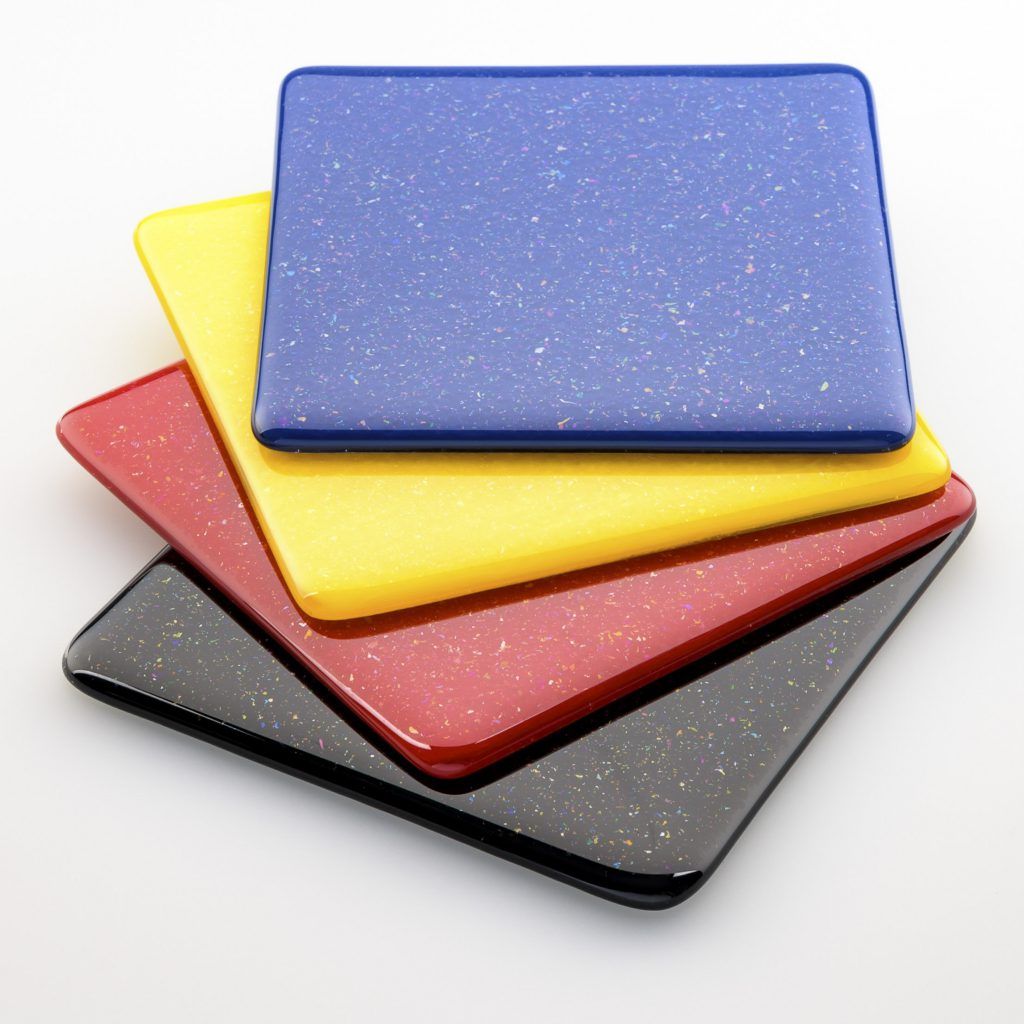
The technique of glass fusing has ancient origins, dating back to Egyptian times, and is still used today to create artistic stained glass, art objects, sculptures, or jewellery. The basic principle of glass fusing is the cold composition of different pieces of glass on a shelf or a mould that, once heated, will fuse together into a single composition.
It is not a very complicated technique, but it requires some basic knowledge, the right equipment, and plenty of practice. If you are interested in glassworking, it is definitely a great starting point, and this guide serves as an introduction to glass fusing with an overview of the necessary equipment and basic techniques to create beautiful glass objects.
Equipment and Tools
What do you need for glass fusing? It may seem trivial to mention, but the essential item is… the kiln! Any kiln that reaches a temperature of around 800° / 900° C can be used for glass fusing. In theory, a pottery kiln can serve this purpose. However, glass firing kilns have specific characteristics that ensure a better result: the heating elements for generating heat, for example, are placed only at the top and not on the sides of the kiln, as is commonly done in pottery kilns, allowing for more uniform heating and therefore less risk of breakage.
An electric kiln is preferable to a gas kiln, as it allows for greater control over the temperature and the entire process.
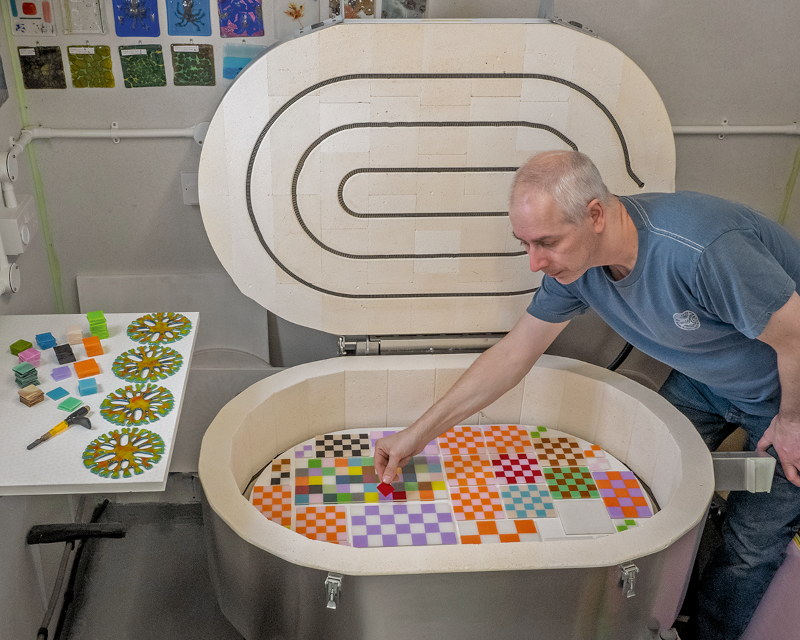
Regarding accessories, it is important that the kiln is equipped with a pyrometer to monitor the temperature during the process, and appropriate shelves or containers, such as bowls and moulds. Glass should never be placed directly on the bottom of the kiln.
Shelves are typically made of mullite, a complex clay with high resistance to high temperatures. There are also shelves made of stainless steel or marinite, but they can only be used for processes that do not exceed 800° C. It is useful to have posts to raise the shelf from the bottom of the kiln: this way, the firing will occur more evenly.
Among the other accessories you may need are the separator (also known as shelf primer) and ceramic paper: both are intended to facilitate the release of the glass from the shelf or container once firing is complete. Hot glass becomes viscous and may stick to the bottom, making it difficult, if not impossible, to detach. The separator comes in powder form and can be applied pure or diluted in water, using a special brush, the Chinese brush. If you intend to use the kiln at a temperature above 850°, our advice is to use a shelf primer specifically for high temperatures.
Finally, always ensure you wear high-temperature resistant gloves (there are also long ones up to the elbow) and protective goggles specifically designed for the infrared frequencies emitted by glowing glass.
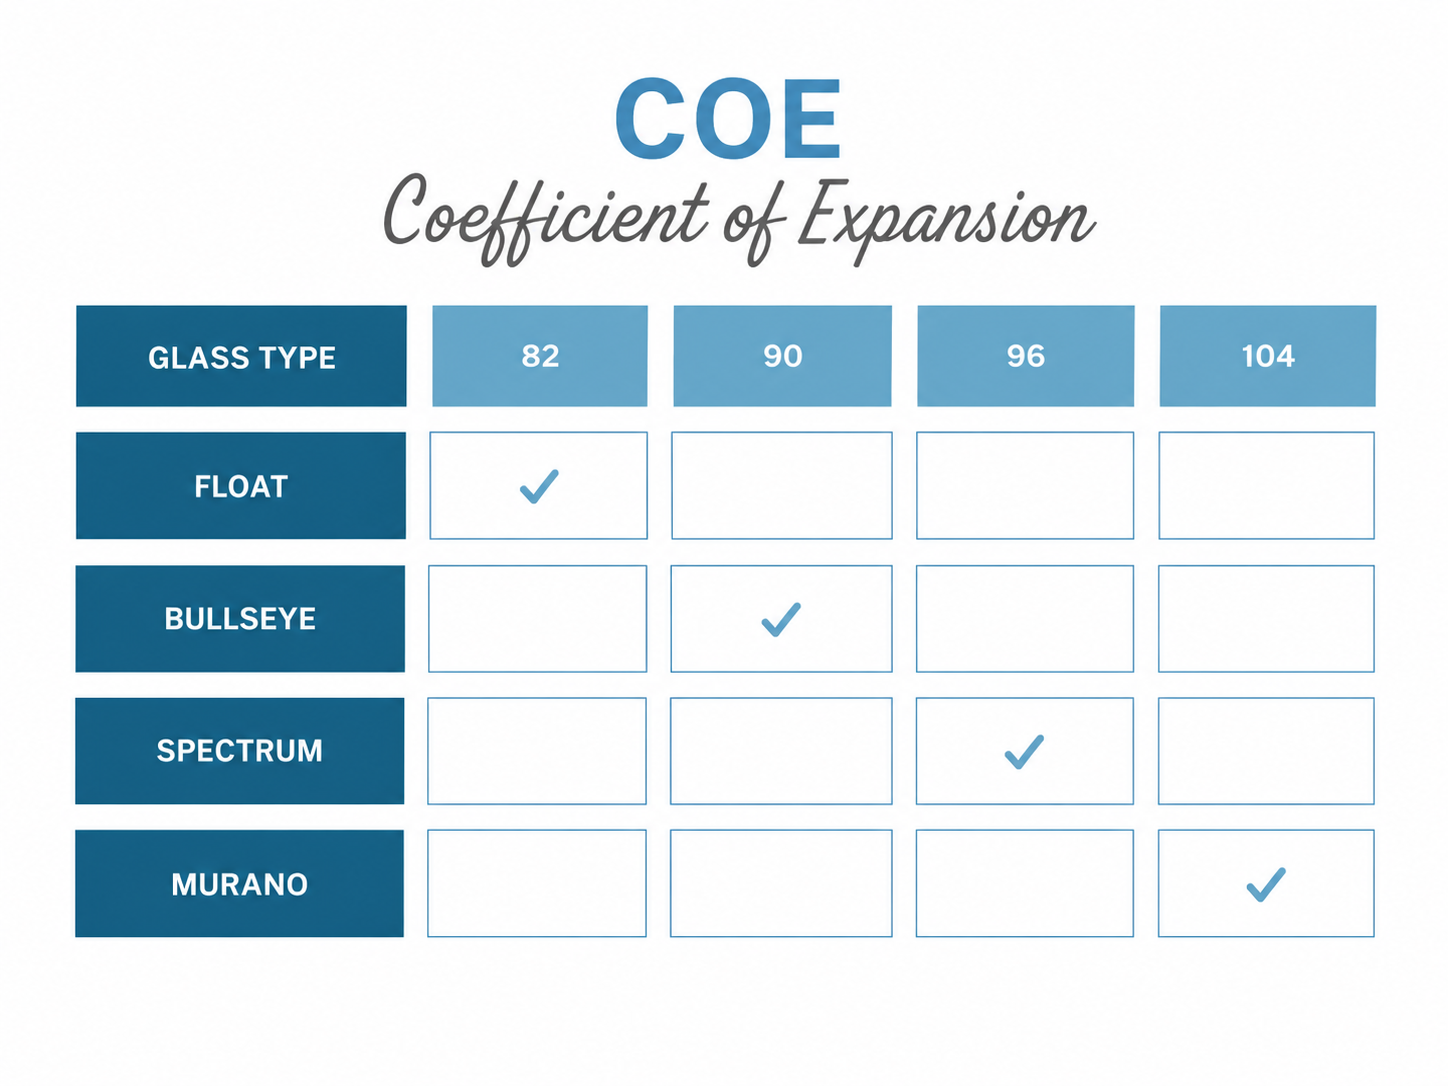
Choosing Glass and the Coefficient of Expansion
What type of glass can be used for glass fusing? The answer is: any type of glass. However, if you intend to mix different types, it is important to know the characteristics and compatibility level of each.
Each glass has a coefficient of expansion (COE) that measures its level of expansion and contraction when heated and cooled. Glasses with equal or very similar COEs (within a margin of +1 or -1) can be fused together without problems. Otherwise, you may encounter issues such as uneven melting or breakage during cooling. Generally, when you purchase glass, you can always find information regarding the COE, and it is not difficult to find compatible ones.
Preparing the Kiln
Before using the kiln, ensure with the help of a level that it is positioned perfectly horizontally. Once heated, glass becomes fluid and may slide from an inclined shelf. The kiln must also be perfectly clean, ideally with the help of a vacuum cleaner, to remove all particles and residues from previous firings that could ruin the glass.
Prepare the shelf by applying the separator, starting by scraping away any residues from previous applications. If you are using powder separator, once diluted, you should spread it evenly across the entire surface. Wait for it to be absorbed and then proceed with another layer, until you have applied about 8 or 10. The treated shelf should then be dried in the kiln at about 250° or in open air for at least one or two days. The shelf is now ready for firing, and you can use it multiple times until the separator begins to crumble. At that point, you will need to scrape away the residues and restart the preparation process.
If you are using ceramic paper, we recommend firing it in the kiln beforehand at about 700° C, as some of the components in the paper can darken the glass during firing. Ensure the room where the kiln is used is well-ventilated when firing the ceramic paper. Once fired, ceramic paper is very fragile, so be careful when laying it on the shelf.
Preparing the Glass and the Design
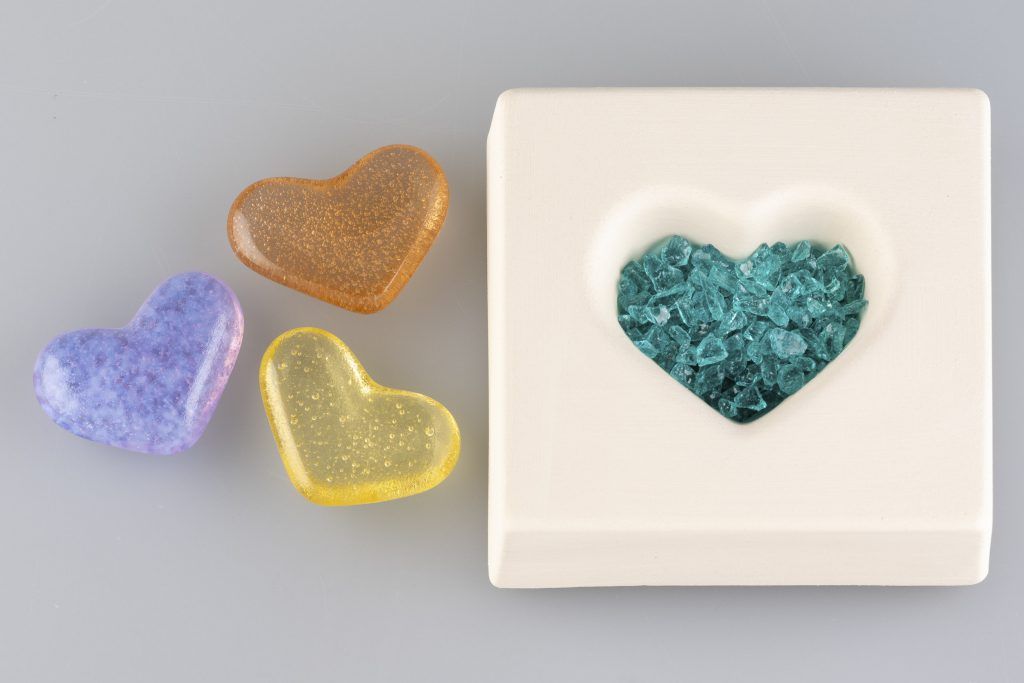
It is time to prepare the glass for your project. Cut the pieces into the shapes and sizes you need, using a grinder if necessary to define the edges. The glass must be perfectly clean of fingerprints or other substances that may cloud the glass during firing. Taking care to touch the glass only along the edges, arrange the pieces on the mould or the specially prepared shelf (we will explain how to do this later). If needed, you can secure the glass pieces together with fusing glue, but be careful to use only the bare minimum, as it can leave residues during firing.
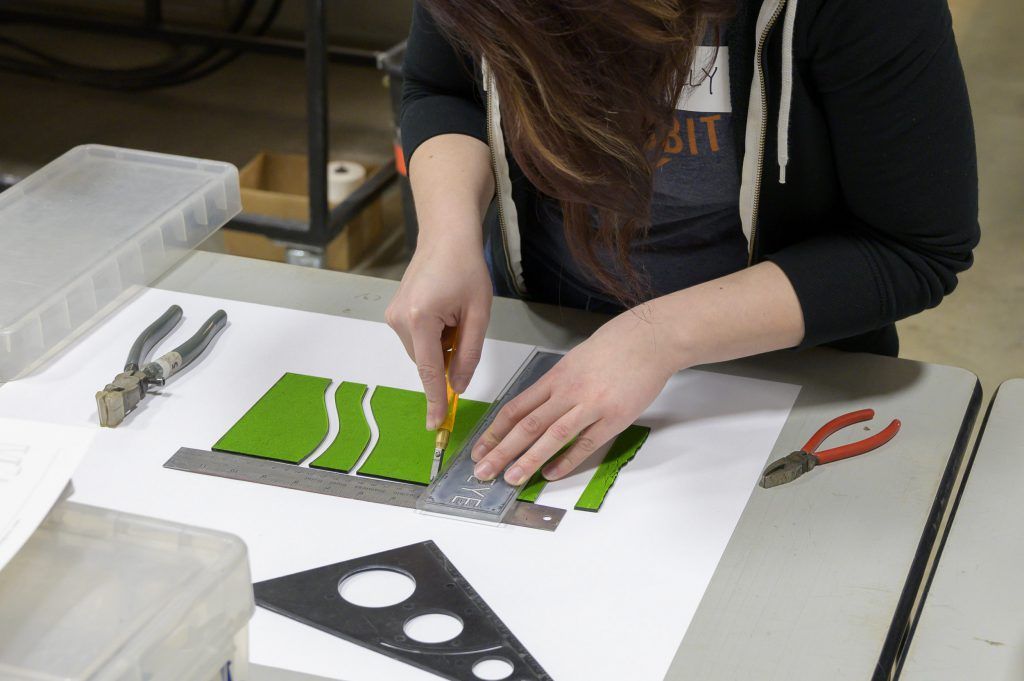
A useful tip during the preparation of the glass is to use a product to prevent devitrification. This term refers to the phenomenon of loss of brilliance that some glasses may undergo due to the crystals contained within them, which tend to rise to the surface during firing. If the glass you are using tends to devitrify (you can perform a firing test to verify this), you can apply the Ullsol anti-devitrification compound to the surface of the composition before firing.
Firing the Glass and Glass Fusing
The process of firing glass consists of several phases and is never a fixed and uniform process. Higher temperatures correspond to shorter times, and vice versa. Each glass also reacts differently to heat based on its Coefficient of Expansion, so there are no preset recipes, and much depends on the type of work you want to create: size, type and quantity of glass, thickness, size of the pieces, etc.
However, there are specific phases of glass firing that are important to know, and we will look at them shortly. A good practice for beginners in glass fusing is to fill out a firing sheet, a sort of diary that keeps track of all the data related to the various firings, such as the date, type of kiln, types of glass used and their thickness, dimensions of the project, type of separator used, as well as data on firing phases, time to reach various phases, arrival temperature, holding time, and so on.
Now let’s look at the phases of glass firing for glass fusing.
Fragile Zone - This is the first phase of firing, from the kiln's ignition until reaching about 350° C. In this phase, the glass is still rigid, and therefore fragile: if the heating occurs too abruptly, it may break. Pieces of glass of different sizes or types will tend to expand according to their COE, so it is important to ensure uniform firing, preferably from above, to minimise the risk of breakage.
Transition Zone - Between 360° and 600° C, the glass becomes "tempered". It is not yet soft, but it is less sensitive to thermal shock. The transition zone is particularly important during the cooling phase to ensure the stability and strength of the final product.
Bending Zone - The heated glass from about 550° to 700° becomes soft and flexible. The pieces begin to adhere to one another and to the surface on which they are placed.
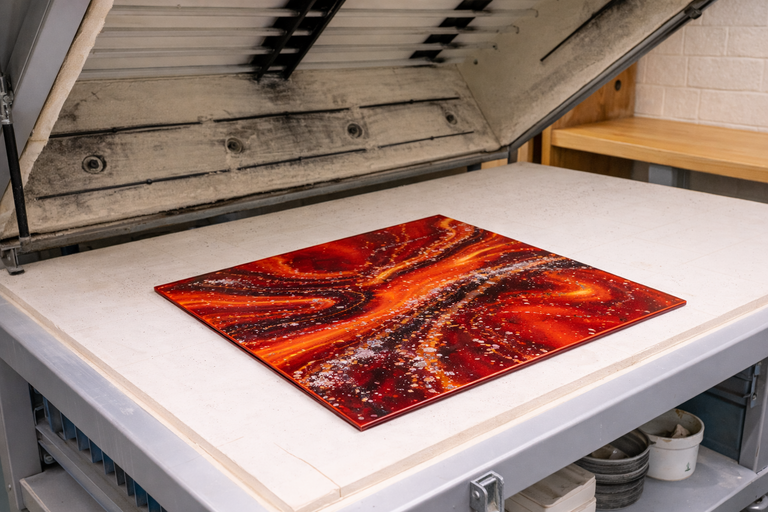
Fluid Zone - This is the final phase of firing. Once exceeding 700° C, the glass becomes fluid, with a viscosity similar to that of honey. It is in this phase that the actual fusing occurs.
Cooling
Once firing is complete, the cooling phase begins, which is equally important and delicate. Once the melting point is reached, turn off the kiln and fully open the door to halt the process and begin cooling.
You can keep the kiln open until the temperature drops to 600-550° C, as in the fluid and bending zones, the glass is not at risk of thermal shock.
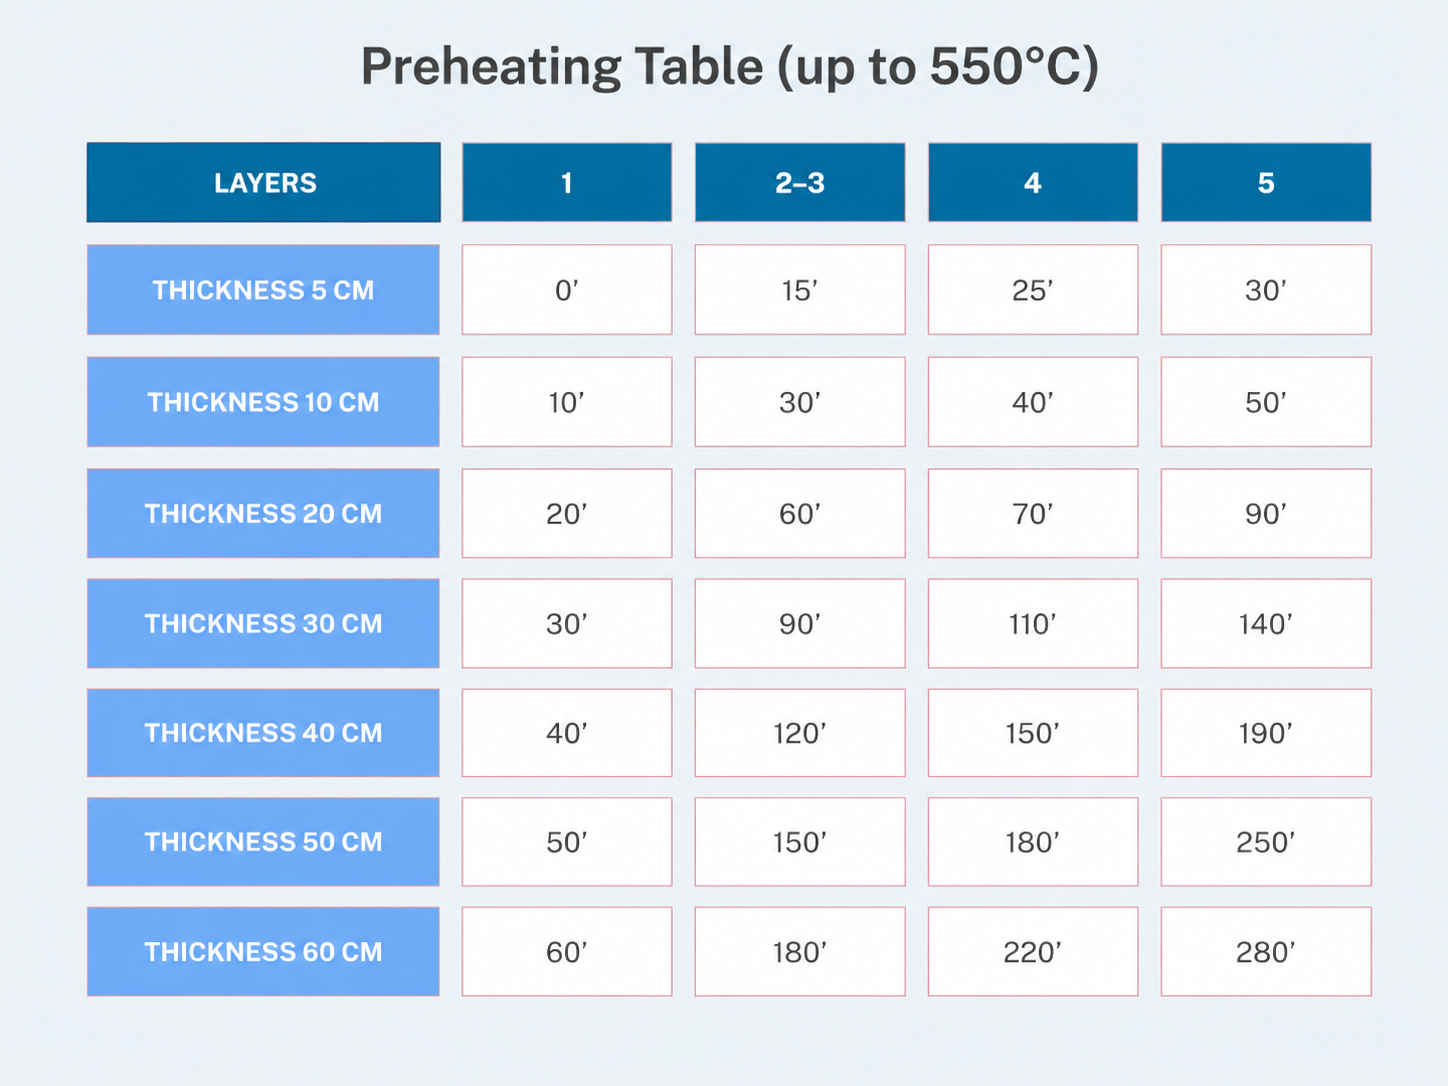
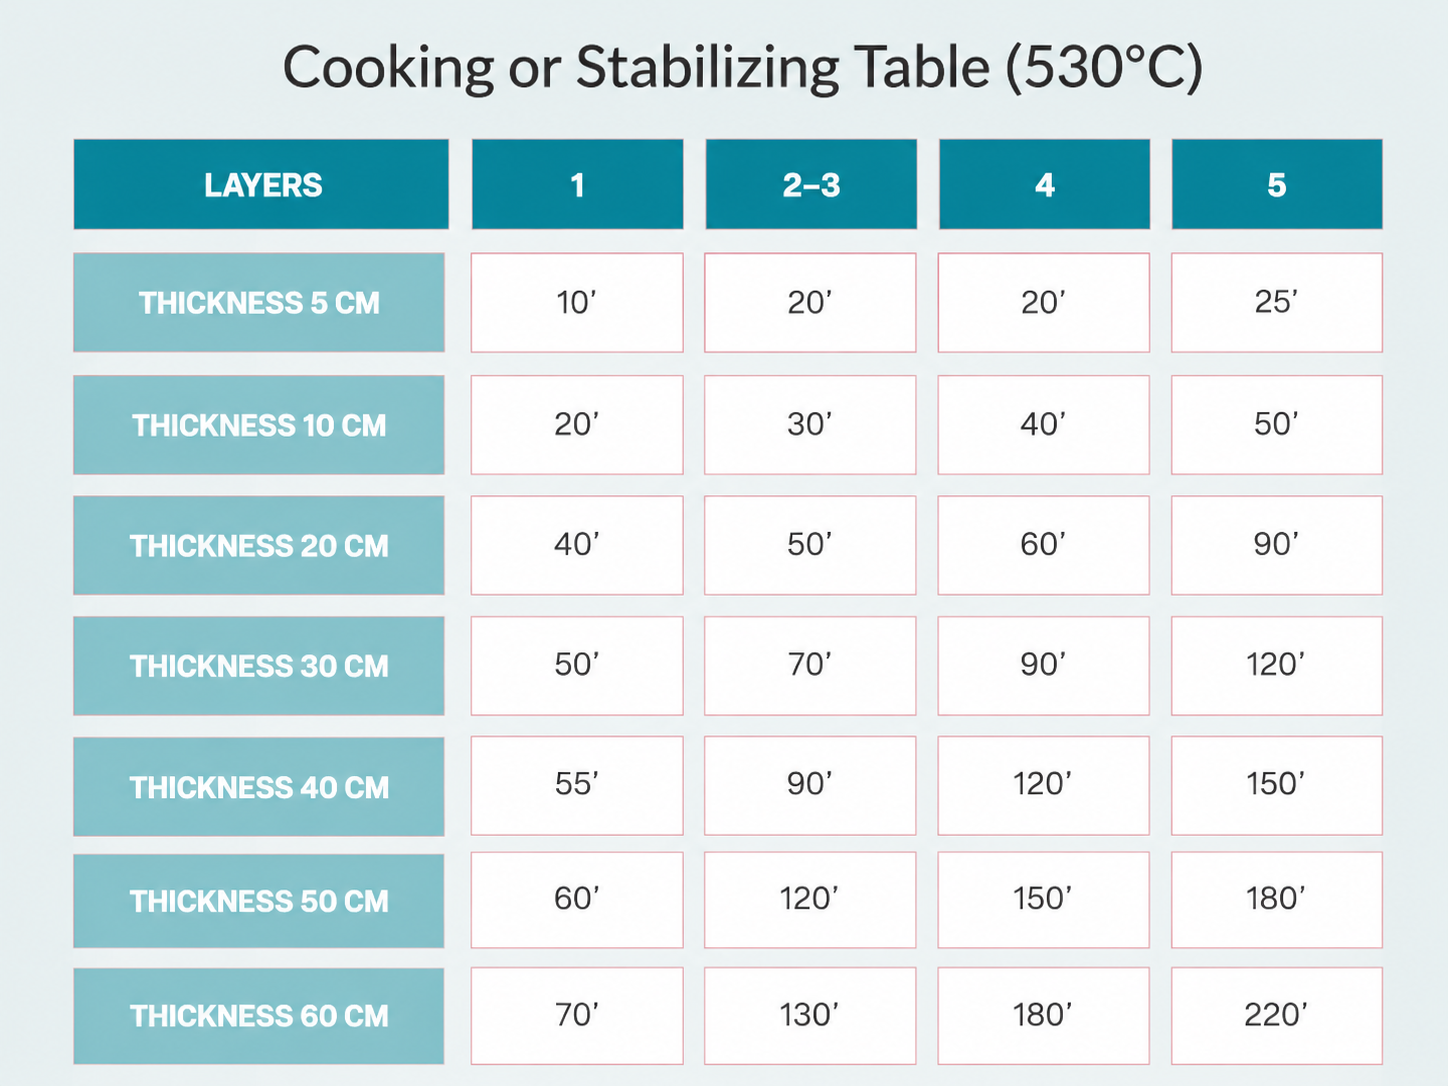
Once you reach the transition zone, however, the kiln should be closed to control the glass's "tempering". Cooling should be monitored, and the glass should generally be maintained at a stable temperature of about 530° C (this is called the annealing process). There are reference parameters you can use to calculate how long the annealing should last, based on the size of the glass used. Below are two indicative tables for preheating and stabilisation/annealing phases.
Extraction and Separation
Once cooling is complete, you can extract the shelf or mould and admire your creation!
There is a possibility that the glass has stuck to the separator applied to the shelf or to the ceramic paper. If it is ceramic paper, you can remove it by scraping the surface while holding the glass under running water. If the glass is stuck to the separator on the shelf, use a scouring pad or a metal brush to scrape the bottom, or sand the back of the glass to remove residues.