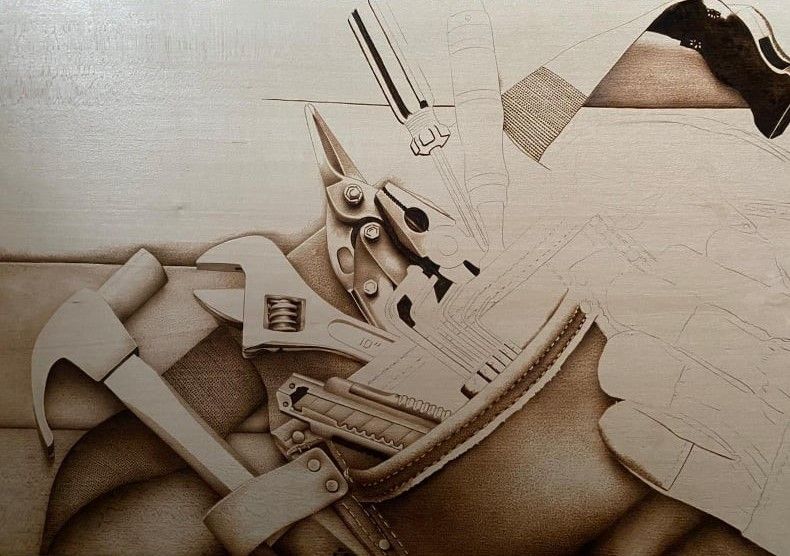
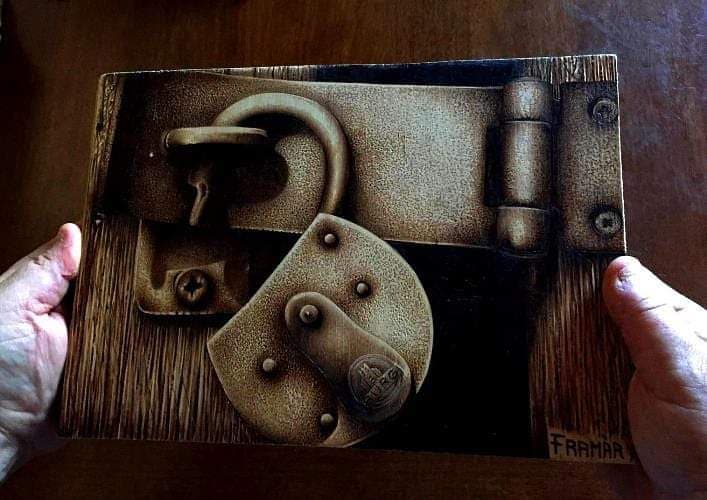
Roberto Frangioni, known as Framàr, is one of the most renowned and appreciated pyrographers in Italy. We asked him to take us into the world of pyrography, explaining the basic techniques and tools to practice it.
Pyrography is the technique that allows you to draw using heat. The word comes from ancient Greek and literally means "writing with fire." Throughout history, it has been practiced in many different ways, using incandescent irons or even lenses that harness solar heat. However, without a doubt, the most well-known and commonly used method today is the pyrograph: a kind of pen whose tip is heated through electric power, allowing you to draw on the chosen surface by burning its surface.
There are various types of pyrographs available on the market, and the right choice depends on many factors: the type of surface you intend to work on, your personal style, the effect you wish to achieve, and much more. We will return shortly to how to choose the ideal tool, but before discovering together the basics of pyrography, let’s take a look at the materials on which pyrography can be practiced, how to best prepare them, and what the basic techniques are that you should know.

Pyrography: which surfaces to choose?
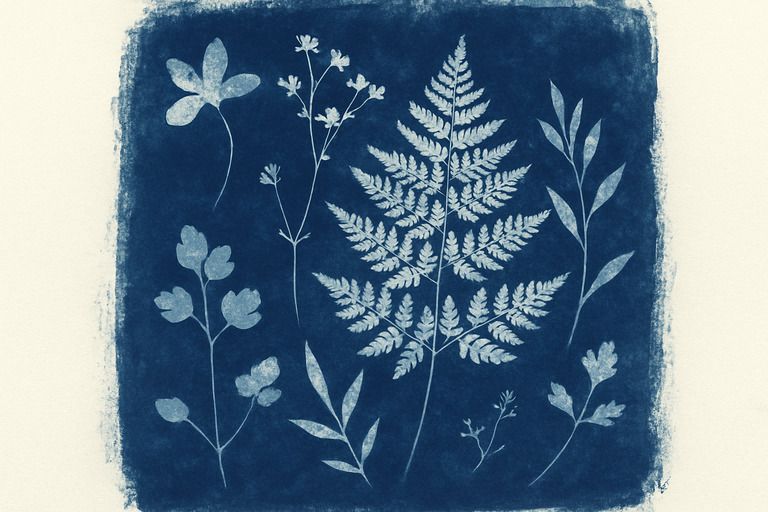
Pyrography can be practiced on any material that can withstand heat and retain the mark: leather, for example, but also paper or cardboard. However, the material of choice for those who love pyrography is undoubtedly wood, so in this article, we will focus more on wooden surfaces, although all the indications and suggestions we provide are still valid, regardless of the base you decide to use!
The first step, once you have chosen the surface, is to ensure that it has not been treated with protective materials or other industrial finishes. The base must be as free as possible from treatments, not only for the quality of the pyrography itself but also for our safety, to avoid combustion releasing substances that could be harmful. Therefore, before starting the work, the surface must be cleaned and smoothed: this way, we will also help the pyrograph to glide better on a smooth surface free from more or less obvious accumulations of dust or dirt.
The wooden surface: solid or plywood?
For pyrography on wood, both plywood and solid woods can be used. The most commonly used woods are typically poplar, birch, and maple, as well as lime, alder, and olive for solid woods. Compactness and resistance are the characteristics that most differentiate these two types of surfaces: solid woods, being more compact, withstand heat better and therefore can allow for slower hands, offering more time to achieve certain effects.
Another difference to consider is seasoning: commercially available plywood does not need it and is ready to use, while solid wood must go through a seasoning period. Otherwise, the risk is encountering cracks and other problems during processing. Therefore, ensure that your solid wood has undergone good drying, of at least 3 years.
How to draw with the pyrograph: some basic guidelines
There are many variables that can influence and personalise a pyrography work: not only the surface, but also the temperature at which we decide to heat the pyrograph, or the tip of the tool itself. And then, of course, there are personal and individual characteristics such as hand pressure and movement speed, which can contribute to creating profoundly different effects.
The pressure with which we use the pyrograph, for example, at the same temperature, speed, and surface, allows for deeper and sharper strokes. Conversely, a very fast hand allows for a lighter touch and a completely different effect. The more we progress with practice, the greater our control over these variables will be: every artist develops their style and "hand" through experience and creativity!
In the case of wood, moreover, the material will influence the range of effects that can be derived: the principle of pyrography, in fact, is the chiaroscuro created by more or less impactful burns on the surface. Therefore, the lighter the wooden base, the greater the range of effects we can achieve!

How to choose the pyrograph
It’s time to choose your ideal pyrograph! The models available on the market are truly numerous and accessible to all budgets, but there are some parameters that are good to know to make the right choice. Safety is obviously the first concern, so it’s important to purchase from specialised centres and choose tools with a European mark, ensuring good quality.
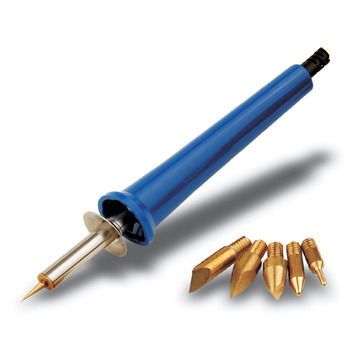
Soldering pyrograph
If you intend to work mainly on leather or soft wood, a good way to start can be a soldering pyrograph. These tools are generally very inexpensive, making them ideal for beginners, and they work just like a soldering iron, with an internal resistance that heats the tip. This means that the tip, usually made of brass, heats up in a few minutes and is ready for work, but it also means that the pyrograph risks becoming very hot and uncomfortable in a short time, forcing you to take breaks during work. Soldering pyrographs, in fact, do not allow for temperature adjustment of the tip.
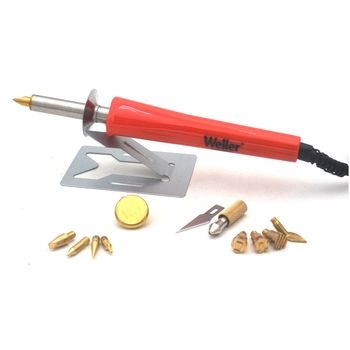
Weller pyrograph
Stilo 30w pyrograph
Full tip pyrograph
Very popular and available on the market for many years, these are reliable and versatile tools. Unlike soldering ones, full tip pyrographs have the resistance embedded directly in the tip, thus only heating that. Additionally, they come with a transformer that allows you to adjust the temperature: a very important function from a stylistic point of view, because at different temperatures we can achieve very different strokes and effects.
Full tip pyrographs come with numerous different tips, making them particularly suitable for those who wish to create detailed drawings and repeated patterns, especially on materials like soft wood and leather, for which they are particularly indicated. The flat tip, for example, is ideal for working on large areas and creating uniform gradients. The decorative tips allow for greater detail and offer great creative freedom even to those who are not particularly skilled in freehand drawing.
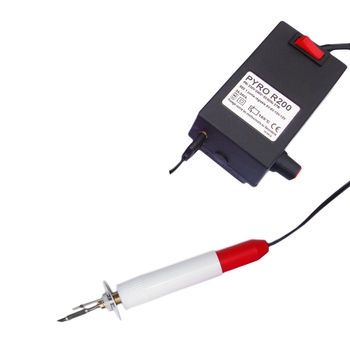
R200 pyrograph
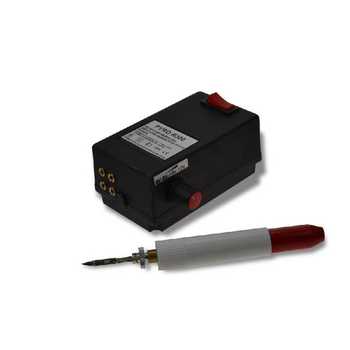
R300 pyrograph
Remember that there are no perfect tips, only tips that are more or less suitable for the hand and intentions of the pyrographer. Most pyrographs on the market always come with various types of interchangeable tips, so our advice is to try and experiment until you find your style and the tips you feel most comfortable with.
Filament tip pyrograph
This is the most professional and advanced level, suitable if you already have a fair amount of experience, and especially if you intend to work on any type of material, including harder and seasoned woods.
The main differences between pyrographs like those from the Brenn Peter series or the ST171 pyrograph and the other types we have just seen are two: they consist of two separate units - transformer and tip - and have a tip made with high-temperature wire (such as Kanthal or Nickel Chrome) and fixed to the handle via two brass fittings. The "wire" tip is therefore more flexible and manageable, providing the artist with greater control and sensitivity when writing or drawing.
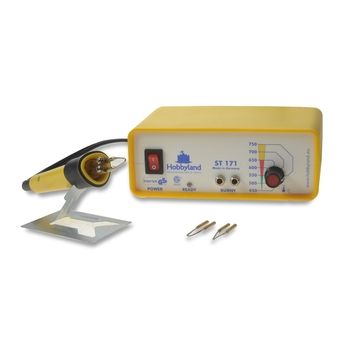
St171 30w pyrograph
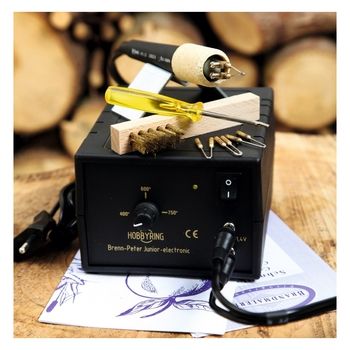
30w Brenn-Peter Junior pyrograph
The filament tip pyrograph, not by chance, is also the type of pyrograph that Framàr uses: the tool that has accompanied him since the beginning of his adventure as a pyrographer is a Brenn Peter Junior, and we definitely feel like recommending it to anyone who wants to develop this technique.
With this overview, we hope to have provided you with information, inspiration, and useful suggestions to guide you into the world of pyrography: an ancient, fascinating, and creative discipline that, above all, as Framàr reminds us, offers enormous expressive freedom: all you need is a support base, a piece of wood, and our trusty pyrograph to unleash imagination, creativity, and fun!
The author
Roberto Frangioni, known as Framàr, is an Italian designer, portrait artist, and pyrographer. He believes in the value of sharing and is always happy to pass on his experiences and skills to all enthusiasts of this discipline. You can contact him through his website Framàr Pyrography or on Facebook and Instagram.