Tools, statuettes, bas-reliefs, signs… the art of carving makes it possible to create these and many other works, with the simple use of a few tools and a good hand. Woodworking with a knife or chisel is a very old practice, almost as old as human civilization: on the other hand, it requires a really easy-to-find raw material and the use of extremely simple tools, so it is not surprising that primitive humans were already trying their hand at this practice to make tools and decorative objects.
If you have decided to take this path yourself, or if you need some tips to perfect your skills, this guide is for you. We will look together at what techniques are most commonly used for wood carving, the most suitable materials for each, and, most importantly, what tools are essential for carving wood and how to use them.
The art of wood carving: the main techniques
Let’s start from the beginning: wood carving means removing-with the help of one or more tools-portions of wood from a starting block, in order to derive the desired design or figure. Whether carving in the round or in relief, the basic process is exactly the same. Of course, depending on the desired object and style there are more or less appropriate techniques and tools. Your level of experience will also guide your choice toward the most suitable style, as will your choice of wood: very hard ones, for example, are not suitable for beginners! But we will see this later.
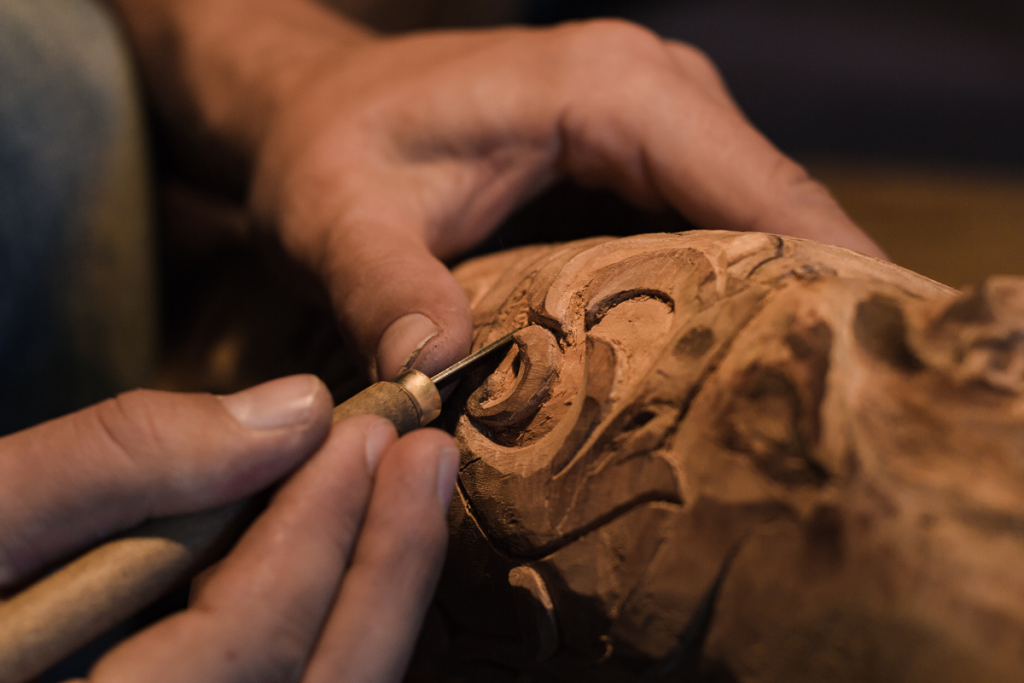
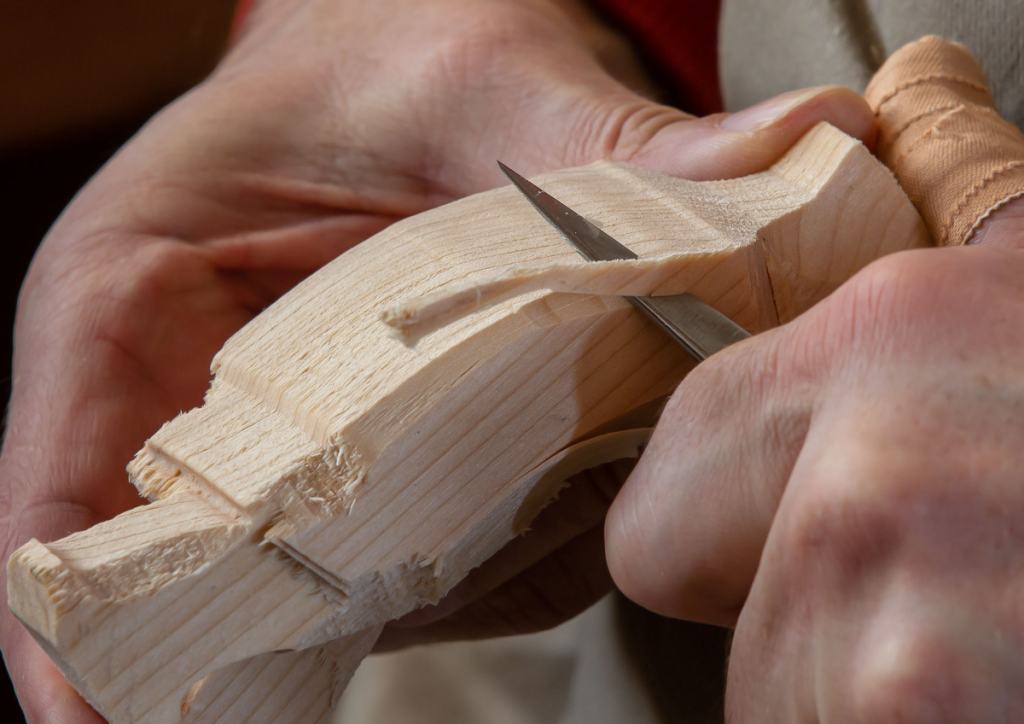
The simplest and most straightforward technique is preciselyknife carving, in which you work directly with the blade on the wood, using different styles of cutting. The “pull” cut is similar to the act of peeling a fruit: you will pull the knife toward you in a slow, controlled motion, using your thumb to stop the blade. This cut is shallow, so the blade always stays fairly parallel to the wood. The same goes for the “push” cut, in which instead the blade is pushed outward. “Stop cuts,” or V-cuts, are those in which the blade penetrates the wood vertically or obliquely to make grooves and angles. The aesthetic effect given by this type of carving is of very faceted surfaces, thus rich in angles and chiaroscuro.
Relief carving is another popular type of workmanship. Here a flat, wide surface is used, from which the design is allowed to “emerge,” which will then appear as framed. It is often used to make landscapes or regular decorative patterns, or for plaques and lettering. Somewhat more complex because it requires greater precision, it is usually the preserve of those with a little more experience. Our advice is to start by drawing: draw lines directly on the wood with a hard pencil and use them as a guide. Depending on the type of work, drawing and wood, the operations may be different, but as a rule start with “stop cuts,” straight or V-shaped, along the lines of the drawing, or rough out the lines with chisel and mallet and then redefine edges and figures with precision work.
Full-round carving is the one that will give you a result that comes closest to sculpture, with whole figures and smooth, finished surfaces. The process, again, is roughing, to remove excess wood parts, sketching the shape using carving or chisel strokes, also depending on the type of subject and size of the wood, and then proceeding with the actual carving work.
Hardwood or softwood? How to choose the raw material
As you can easily imagine, not all types of wood lend themselves to all styles of carving. Once you decide which artistic and technical direction you want to go in, you will know whether to lean toward hard or soft wood. The natural color of the wood can also be a discriminating factor, because if you intend to paint your work, it will be better to choose a light, porous one rather than a very dark one. Let’s look at some tips on choosing lumber for your work.
Softwood is characterized by a straight grain and smooth texture. Woods such as pine, birch, basswood, or willow are affordable and reliable, a good choice for those just starting out. They are, of course, particularly good for knife carving, unlike harder woods that do best in carving and embossing. Mahogany, for example, is among the most beloved and sought-after not only because of its intermediate texture, which makes it really easy to work with, but also because of its appearance: its splendid red, in fact, requires no polishing or staining.
Other hardwoods, thus suitable for mallet and chisel work, include black walnut, cherry, and white oak. For very elaborate work with rich detail and decoration, fruit trees such as pear, apple, Italian walnut, and sycamore are often preferred.
Let’s talk about tools: knives and woodcarving tools
We began by saying that all you need for carving are your hands, a piece of wood and a knife. But the knife has to be the right one! Not only that, depending on the type of carving you have decided to practice you will need not only knives, but also chisels and other useful tools, without ever forgetting the safety precautions!
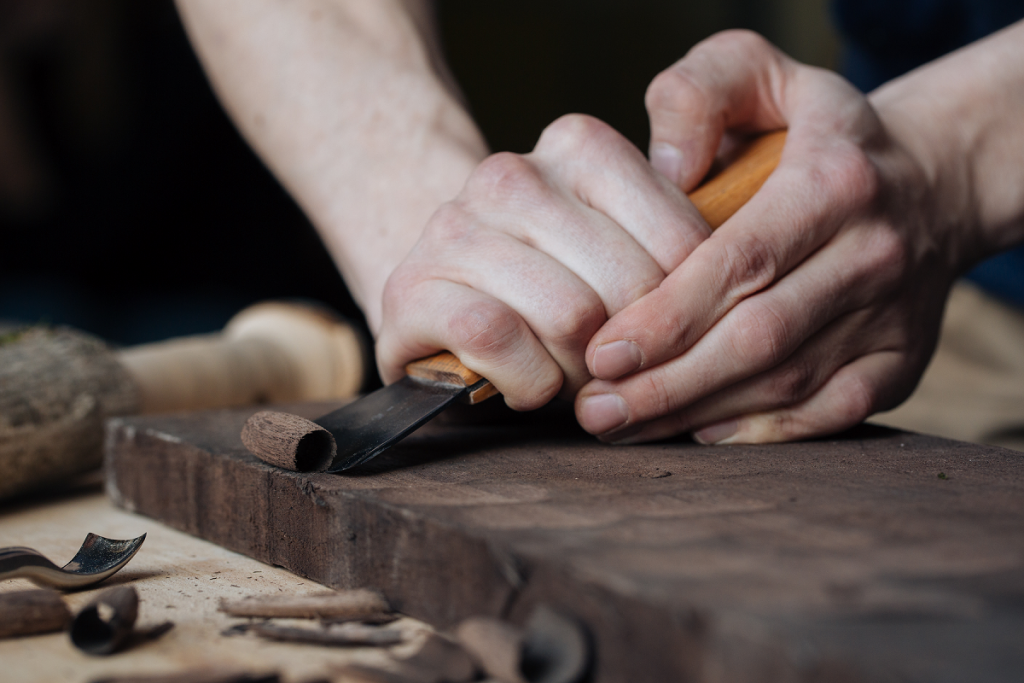
Carving knife


The good thing is that there are really a lot of them on the market and they are definitely affordable. A carving knife looks roughly like a regular kitchen knife, but with a shorter blade and a wide wooden handle for excellent grip and comfortable workmanship. The knife allows for all major carving operations, from shallow carving to deep cuts. It is ideal for soft woods such as walnut or basswood, but if you have the right experience and practice you can use it with excellent results on harder woods as well.
Chisel

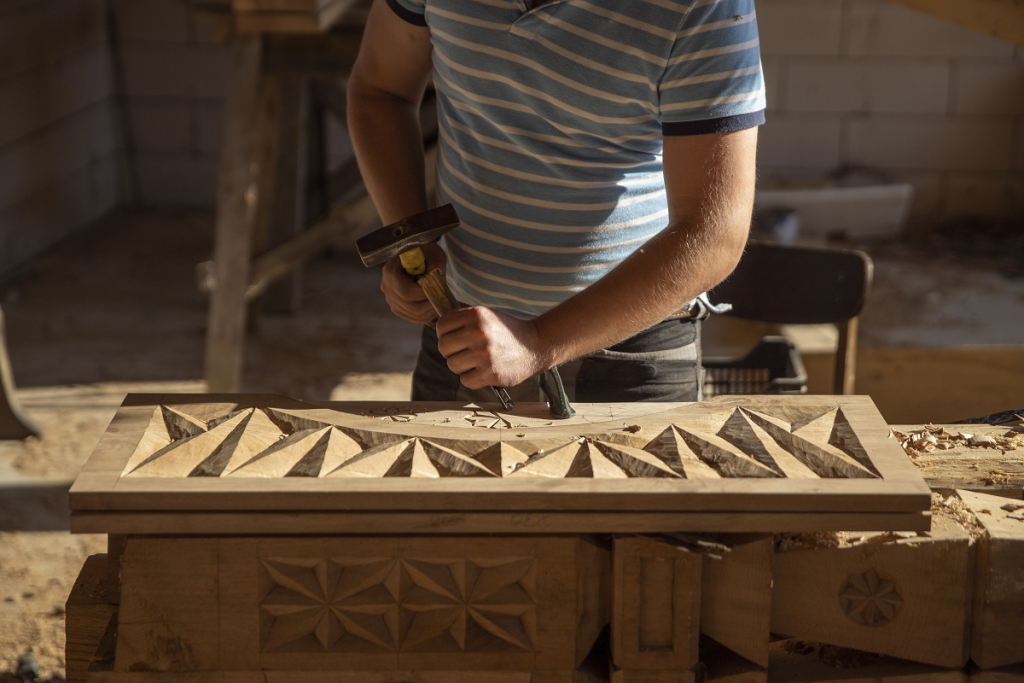
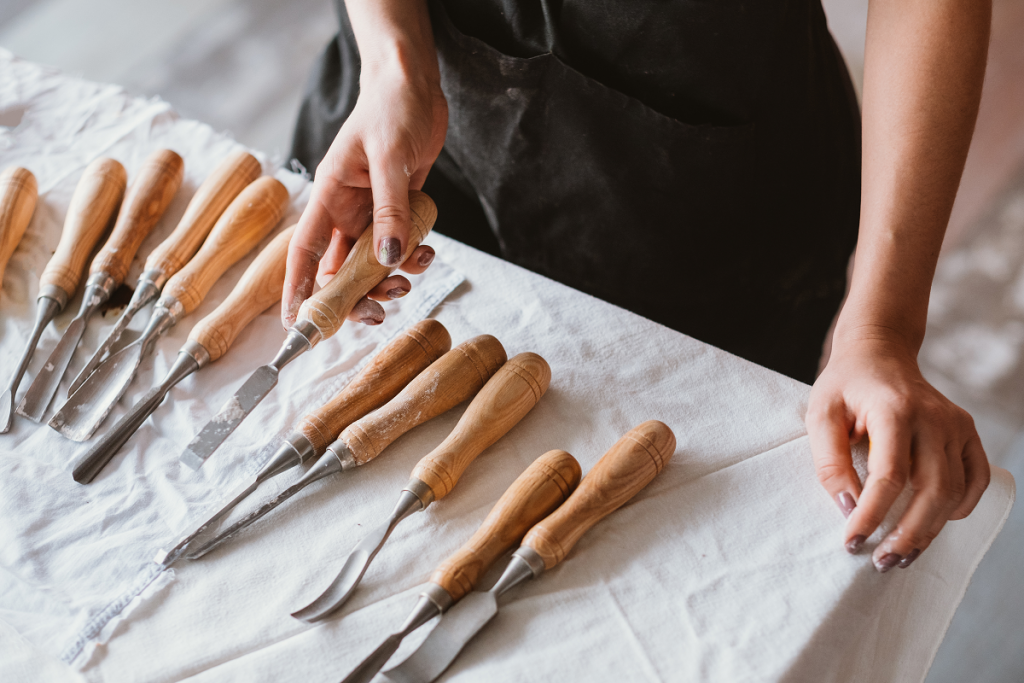
Another of the quintessential tools for wood carving is the chisel. It normally has a flat blade inserted in a tubular wooden handle, which facilitates the grip and is shaped to receive and absorb the blows of the mallet. There are really a great many types of chisels on the market, with different sizes and characteristics, and they are almost always used in combination with the mallet, which allows you to direct and control the blow for carving.
Gouge
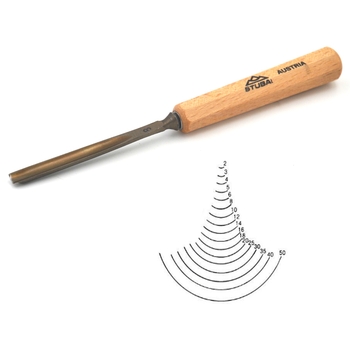
The gouge is a chisel with a circular or curved blade, the cutting edge of which can be U-shaped, V-shaped, or spoon-shaped. The first type is mainly used on surfaces, while the others allow digging by reaching even difficult places. Ideal for working on small surfaces, but also for roughing wood by sketching out lines that will later be perfected.
Mallet, or mallet

The mallet is the rounded hammer you will use to strike blows on the chisel. It can be made of beech or maple, but there are also very good ones with the head made of urethane, a very durable material. The important thing is that the hammer is comfortable, because you will be using it a lot!
Do you find it difficult to choose from so many tools and don’t know where to start? One solution is to start with a ready-made kit, in which you will find everything you need to work.
The 6 Stubai Gouge Kit, for example, brings together the essential gouges for taking your first steps into the world of carving, while the BeaverCraft sets, such as Comfort Bird or Love Spoon, are ideal for those who want to familiarize themselves with the carving technique: they include a wood block included and a guide to accompany you as you carry out your project.
The Deluxe Woodcarving Kit, on the other hand, is for those who want to start woodcarving on their own, but with the confidence that they have all the best tools in hand.
Other useful accessories
Finally, among the tools to have on hand, especially if your business involves large pieces of wood, is the vise, which will be used to hold the wood in place as you work. The sharpening table on the other hand, is essential to keep the blades sharp-otherwise they will struggle to slide and carve wood smoothly.
And don’t forget safety! Whether your work is for hobby and fun or carving is your profession, safety can never be overlooked. So make sure you always have protective gloves on hand, as well as goggles and a face mask, to avoid chips and dust in your eyes and throat.
Consigli pratici sull’intaglio del legno
Now is the time to get started! Unless you are using a vise or table-mounted stand, you will have wood in your hands. Hold it firmly and make sure the tools you use have an ergonomic and comfortable grip, to avoid fatigue but also to give your hand maximum control as you work. If you’re carving with the knife use quick, firm strokes, without hesitation in the middle of the cut. If you’re using the chisel, on the other hand, remove one portion at a time, trying to avoid pieces that are too large: the risk is to ruin your base or even break it.
Always try to follow the natural grain of the wood, especially if it is very hard, high-density material. If you use softer timbers you can also proceed in the opposite direction.
Finishing: repairing, sanding and painting the carved wood
One of the most beautiful things about wood is that even in the natural state it looks warm and fascinating: not only because of the color, but also because of the grains, knots and circles of growth that make each piece unique. Sometimes, however, there is a need to paint the wood, for aesthetic reasons but also to correct flaws and minor repairs.
It may happen, in fact, that the wood is damaged during carving: in this case you can use wood putty to be covered then with a pass of varnish, after carefully sanding the surface. In general a pass with sandpaper is always recommended, unless you have chosen a faceted and rough effect carving, to remove roughness and leave the surface smooth and shiny. This operation is also excellent foreplay in case you intend to paint the wood later, because it will allow the paint to penetrate deeper into the pores and grain of the wood.
Now all you have to do is choose your tools, find the wood that suits you, and let your imagination run wild to create objects, tools, and beautiful decorations!