
The lead came is one of the oldest techniques for glass decoration, and certainly one of the most striking in terms of results. Along with the Tiffany technique, for which we have already created a guide, it is referred to as the “cathedral technique”, due to one of its most famous and spectacular uses.
But you don't need to decorate a cathedral to have fun with lead came! With this technique, you can create decorative elements for your home, artistic works, and gifts that will definitely leave a mark. In this brief guide, we will explain step by step how to create leaded glass windows.
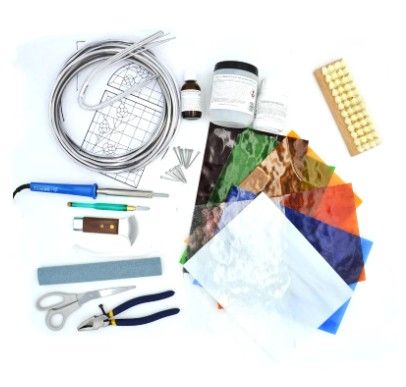
Let's start with the shopping list: all the tools and materials you will need. We will go through the preparation stages before moving on to the lead came technique and the finishing touches.

What you need to create a leaded glass window
Here is an essential but complete list of the tools and materials you will need.
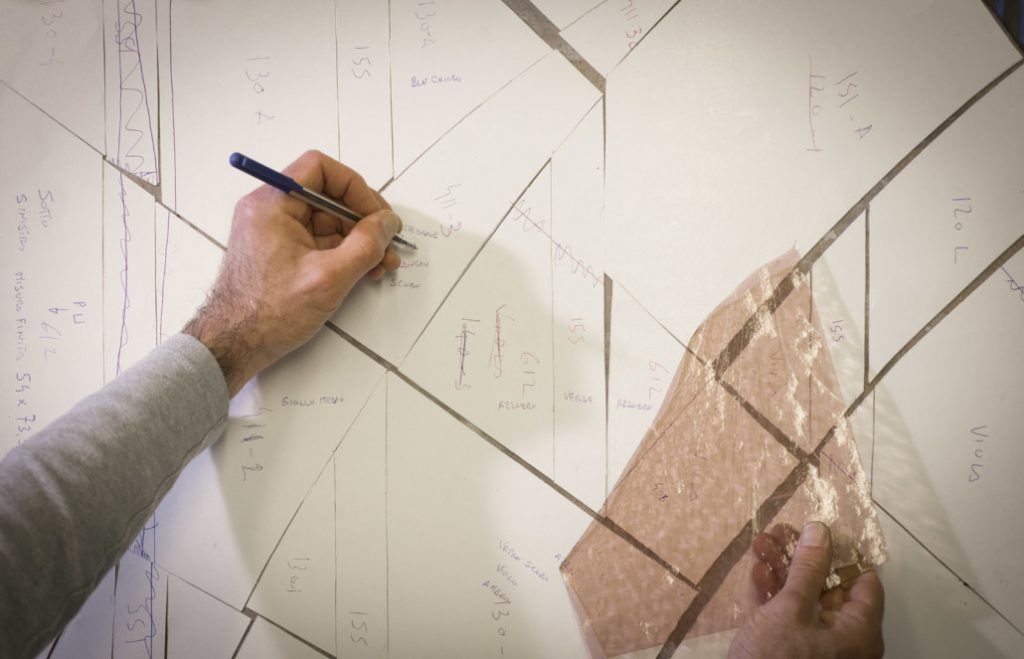
First, a work surface large enough to mount a wooden panel that will be the base on which to build the stained glass. Make sure it is larger than your design, at least 75mm on each side. Of course, you will need your design, printed on sturdy cardstock in a 1:1 scale.
You will also need:
- lead came
- pieces of glass cut and shaped according to the pattern
- lead nails
- glass cutter
- lead knife
- reamer
- pliers
- four wooden boards or rulers
- adhesive tape, square, hammer, and standard nails

Preparation: design, glass, and work surface
The actual work of lead came will only begin after you have set everything up on your work surface.
What does this mean? As we mentioned, you need to have your design to use as a guide, as well as all the necessary pieces of glass, already cut and perfectly shaped to match the pattern. For these stages, we invite you to consult the guide for preparing Tiffany stained glass that we created some time ago.
Fix the design onto the work surface and then nail the rulers or wooden boards at one of the corners: this is where you will start creating the panel. Pay attention not only to fix the rulers perfectly perpendicular, using the square, but also to leave the necessary space to insert the lead came that will form the outer edge of the panel.
Preparation: the lead came
Now let's move on to the true protagonist of this technique, the lead. The lead came is literally the backbone of your stained glass: it is what holds the pieces together, allowing you to create designs and patterns, from the simplest to the most intricate.
Lead came profiles are available in different thicknesses, which naturally also have different levels of flexibility. If you are a beginner, a malleable lead will be more comfortable to use. The lead came can have an H-shaped or U-shaped section, and it may be necessary to “open” the section if it is flattened, and adapt it to fit well with the glass. In that case, you can use the reamer to open the profile as needed.
Leaded glass assembly: the procedure
At this point, you can start working! As we said, you always start from the corners. The first step, therefore, will be to place two lead came profiles at the two sides that form the starting corner.
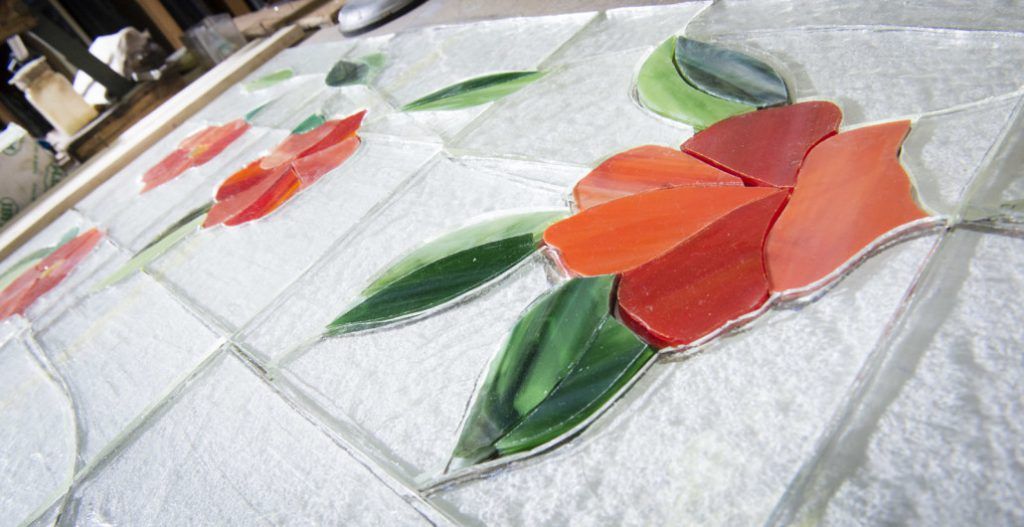
Then, place the first piece of glass against the corner and make sure the margin line of the underlying design is visible: this means you have cut the pieces of glass correctly, leaving enough margin for the lead came!

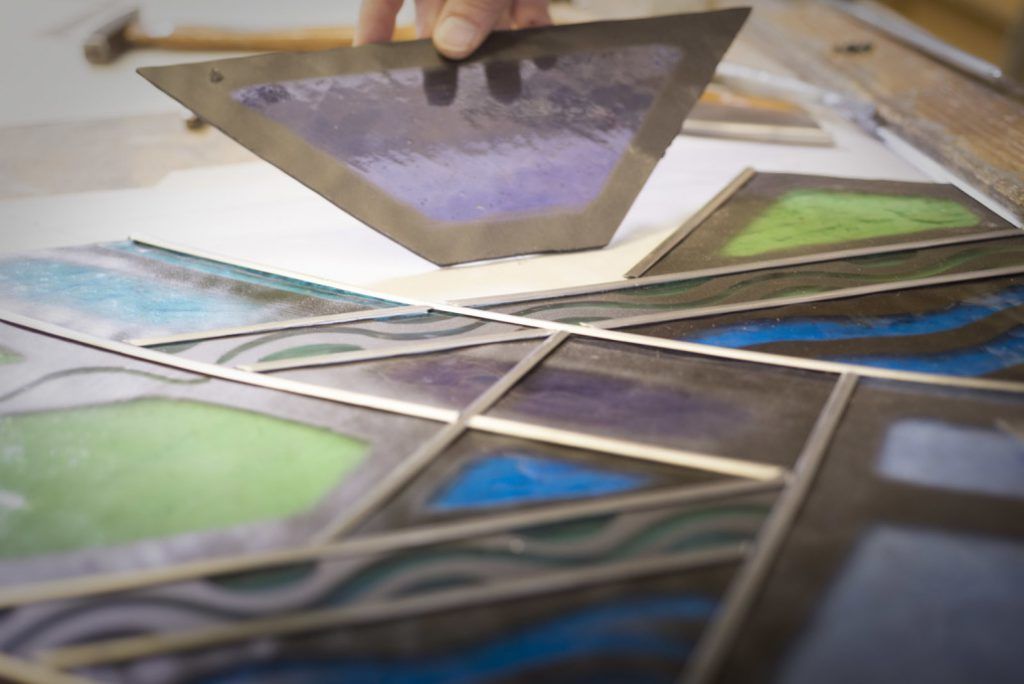
At this point, take a lead came profile and measure it along the side of the glass that you need to cover: use a glass cutter to mark the exact points where the guide needs to be cut and proceed to cut it with cutter pliers.
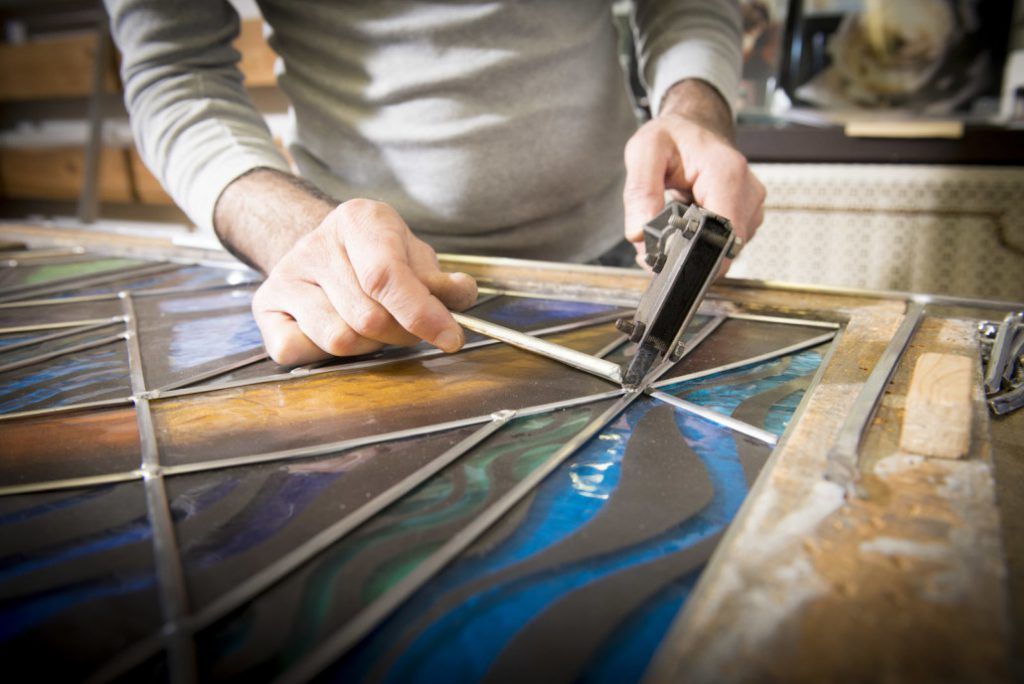
Cut the profile so that it is just shorter than the glass, to leave a margin at the intersections. Now apply the guide along the edge of the glass, ensuring it adheres well, and remove any excess parts with the pliers. As you fix a piece onto the panel, you will need to ensure that your work does not move: use lead nails to keep everything in place.
Proceed slowly and carefully on each piece, always checking that your work matches the pattern you have drawn. You may find, especially if you are a beginner, that your panel becomes larger or “goes off track.” If your pieces of glass have been cut correctly, this usually depends on errors in cutting and placing the lead. You may need to disassemble some of the already worked pieces, recut the lead, and reposition them: but don't be discouraged if this happens, it's normal, especially if these are your first attempts!
At the end of the work, you will only need to “close” your panel on the sides opposite to where you started. Carefully measure the length of the lead came profile you need for one side, and when you cut it, consider the necessary margin for the meeting between the two profiles at the corner. Repeat the operation for the other side. At this point, you can nail the other two wooden boards or rulers to the panel to check, using the square, the regularity of all the corners.
Finishing and soldering
The panel, at this point, is finished. But to ensure that the lead joints are solid and durable, it is necessary to proceed with soldering.
For this phase, you will need:
- soldering iron
- tin bars, which is the material that allows you to bond the lead came profiles together
- flux, also known as soldering water, a chemical agent that helps the soldering material adhere.
Apply the flux to all the joints and then, carefully, proceed holding the tin bar in one hand and the soldering iron in the other, melting a small amount of tin on each joint, being careful to create an even layer. For more details and information on soldering tin for stained glass, we invite you to read our article dedicated to the Tiffany technique.
Ready to get started?
The Hobbyland leaded glass kit contains everything you need to start creating small leaded glass windows with the right tools.
Good luck with your artistic stained glass!