 Italiano
 English
 Français
 Español
 Deutsch

Learning to work with ceramics requires time, practice, and the right tools. But, above all, it requires knowledge of its raw material: the purpose of this article is precisely to introduce you to the different types of clay you can choose from, depending on the type of processing and the product you wish to obtain. Not all clays are the same, and knowing their characteristics and processing methods is the first step to starting your journey with ceramics.

Clay, simply put, is nothing more than...earth: a compound of sediments that, when mixed with water, can be manipulated and transformed in an infinite variety of ways. Depending on the type of sediment and its characteristics, clay is divided into four macro-categories.
Red Clay (Earthenware)
As the name suggests, the main characteristic of red clay is the colour it takes on after firing. Not surprisingly, it is also referred to as terracotta, and its colour ranges from brown to deep red depending on the firing temperature, which for this type of clay is between 1000 and 1020° C.

Very plastic, easy to work with, and also more economical compared to other varieties, terracotta is certainly the most suitable for beginners. Like any porous material, it must be glazed to become waterproof. We will see some basic information about glazing later, but if you want to know more, we recommend reading our guide to glazes, engobes, and crystalline glazes!

The Hobbyland red earthenware is ideal for sculpture and pottery wheel work. Without grog, it has a firing temperature of 980°C.
It is the perfect solution for students or hobbyists who are just starting out, thanks to its excellent plasticity and low cost.

The sepia-coloured earthenware, on the other hand, is more suitable for artistic ceramics and has a firing temperature between 980 and 1000°C, with a shrinkage of about 8% during firing.
White Clay (Earthenware)
In this case, the name directly refers to its colour. White clay, also known as earthenware, is often used to create items such as saucers, plates, ashtrays, or frames. There are few differences from red clay, apart from the colour: white clay is also quite easy to work with and relatively inexpensive compared to the other types we will see below. Regarding the firing temperature, it can range from 1000° to 1130°C. Like red clay, white clay also requires glazing to become waterproof.
Among the white clays you can find at Hobbyland are the Hobbyland white earthenware and Colorobbia white earthenware, with a firing temperature between 1000 and 1020°C.

Among the white clays you can find at Hobbyland, there is the Hobbyland white earthenware, which has great plasticity and a relatively low cost.
Stoneware or Stoneware Clays
Due to its hardness and resistance, stoneware is a type of clay particularly common in the production of flooring and domestic coverings, but it can also be used in other ways. In this case, we are talking about high-temperature firing clay, as stoneware requires firing between 1200° and 1300°C. Stoneware has lower permeability compared to other clays, but if we want to make it waterproof, glazing will still be necessary.

The PRAF clay is a white chamotte refractory stoneware designed for artistic ceramics and is ideal for sculpture, constructions, and Raku pieces.
Porcelain
Perhaps the most well-known type, alongside red clay, porcelain is also the most precious. The raw material it is made from, kaolin, is indeed free of impurities, unlike the sediments that make up other clays. Famous for its white and smooth surface, porcelain is used to create art objects and figurines, as well as fine vases and tableware. Porcelain is the hardest and least porous of the clays and requires high firing temperatures, between 1260 and 1300°C.


The UPSALA porcelain paste stands out for its exclusive cobalt blue colour and is suitable for pottery wheel work and modelling.

ANETO is a translucent white porcelain characterised by great plasticity, making it exceptional for pottery wheel work and modelling.
The different types of clay can be with or without grog.
Grog is a preparation obtained from grinding fired clay and is mixed with the clay body to add consistency. Grog also promotes more even drying and provides greater strength to the ceramics.
Among the chamotte clays you can find at Hobbyland are the black semi-refractory clay or the red semi-refractory clay, particularly suitable for sculptures, even large ones. Both have firing temperatures between 980 and 1020°C.
Note: if you wish to create items for food use, such as plates, dishes, or cups, the clay used must be without grog. For more information on food-safe ceramics, you can read our article on the MOCA directive.
Ceramic Processing Techniques
Once kneaded, clay can be worked in various ways. The choice will depend on your preferences, but above all on your level of experience in ceramic processing, the tools you have, and the type of product you wish to obtain. Before diving into the techniques, however, a warning regarding the clay body: clay must be combined with water to reach the right degree of malleability for the corresponding type of processing, and whatever the desired density, ensure that the mixture is well compacted and free of air bubbles that could ruin the work during firing!
Pottery Wheel Work
Fascinating and evocative, pottery wheel work is probably the most well-known of the ceramic techniques. It is also one of the most difficult to master. Mechanically, the wheel is nothing more than a rotating plate on which the lump of clay is placed, and shaping is done with the hands, applying pressure during rotation. But to achieve quality results, and especially to replicate them, years of practice and experience are necessary. If you are thinking of embarking on this path, our advice is to find a workshop where you can start getting familiar with the tool and techniques before purchasing a wheel. But when the time comes, here is the information you need to buy a pottery wheel!

Coil or Pinching
This technique is very simple and effective, among the most suitable for those starting to create simple ceramic objects. To create an object using the coil technique, roll out the clay into an even sheet, cut strips, and roll them with your hands until they become cylinders of the desired length: at this point, you can create the base of your object by placing the first cylinder (or coil) on the work surface. Proceed by applying a second cylinder of clay next to or on top of the first, and work the edges with your hands to join them together. Continue with the other cylinders: in this way, for example, you can create a cup or a glass by proceeding with concentric circles first (to create the base) and then overlapping (to create the edges). Once the object is finished, you can smooth the surface and hide the joints until you achieve the desired appearance.
Pouring
This technique is particularly suitable for creating figurines and three-dimensional objects. To use the pouring technique, you need to have a plaster mould available, into which the clay, which has been appropriately diluted to create a liquid mixture called "slip," is poured. To make the slip, water is generally used along with substances specifically created to increase the fluidity of the mixture. Once dried, the clay can be removed from the mould and finished by removing any burrs or marks left by the mould. Drying times naturally depend on various factors: the size of the object, environmental conditions, and the density of the slip.

If you are looking for moulds for pouring liquid clay or slip, check out the Moulds section of Hobbyland: you will find many moulds ideal for your next creations!
Drying and Firing
Once the processing is complete, it is time for firing. However, before being placed in the kiln, the clay must be left to dry, and the drying times will obviously depend on the type of clay body used, as well as the type of object and its size. In general, it is best to let the clay dry in a cool, not too humid place.
Firing takes place immediately after the drying phase, and normally, ceramics are fired twice. Decoration and glazing are done between the first and second firing, unless it is an engobe, which should be applied to the raw clay.
Firing is a very delicate moment: if the temperature is not correct or if the heating is not uniform and gradual, the ceramics can fire too quickly or unevenly, shrink, or crack. Our advice, therefore, is to always follow the manufacturers' guidelines regarding temperature, but above all, to use a kiln suitable for the type of firing you need. The quality of the kiln used is also essential for cooling, which must be gradual just like firing.
If you do not yet have a pottery kiln but are thinking of purchasing one, read our guide to choosing a pottery kiln right away!

Self-Hardening Clays

For those who do not have a kiln, there is the option of using self-hardening clays: it is an excellent solution for beginners who need to get familiar with clay modelling without having to worry about the investment in a kiln. Available in natural white, extra white, and in terracotta colour, self-hardening clays are also ideal for children!
Decoration and Glazing
Once the first firing is complete, and what is called bisque is obtained, you can proceed with decoration and subsequently glazing, which in the second firing will make the product waterproof. Colours, glazes, crystalline glazes, and underglazes are all types of products used in this phase, and if you want to discover how, we invite you to uncover all the secrets of ceramic decoration in our guide!
At Hobbyland, you can find a rich selection of high-quality, easy-to-use colours, glazes, and crystalline glazes. Everything you need to create fantastic decorations for your ceramics!
Here are some ideas:
The Colorobbia Terra Bella Reactive Glazes, with warm and natural tones, allow for optimal results even with low-temperature firings.
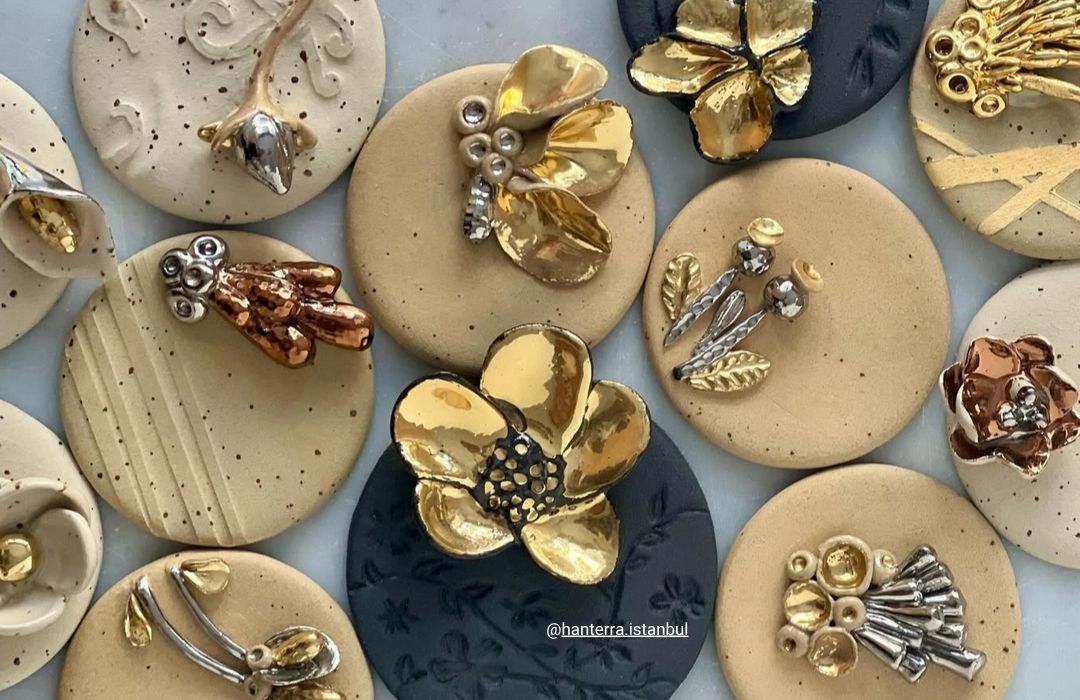
The Colorobbia Fairy Dust Glazes give a metallic glazed effect without the need for crystalline application.
The colours from Bellissimo Glaze are suitable for all types of decoration: brush, drops, sponge, hand printing. Ideal for those taking their first steps in ceramic decoration.

Terra Bella Glazes

Colorobbia Fairy Dust Glazes

Colorobbia Bellissimo Glaze Glazes
In our overview of the use of clays and ceramic processing, only the second firing remains: the phase that concludes the work, fixing the colour and glazing on the surfaces.
One important thing to know about the second firing is that while low-temperature clays require a second firing at a lower temperature (about 30% lower than the first), for high-temperature clays, the process is the opposite: stoneware, for example, should be fired in the first firing at 1000° and at 1200° in the second.
At this point, all that is left is to get to work. If you are looking for inspiration for your first ceramic creation, we suggest you check out this tutorial on how to create ceramic vases and saucers.
Happy crafting!