Working with leather and hide is a creative and rewarding hobby that can easily become a true passion or even a profession.
If you are considering this path, this article is for you! After our guide to choosing materials for leatherworking,
which we encourage you to read, in this article we present the essential kit: the main tools and equipment you’ll need to take your first steps in leatherworking, with some helpful tips even for those with a little more experience.
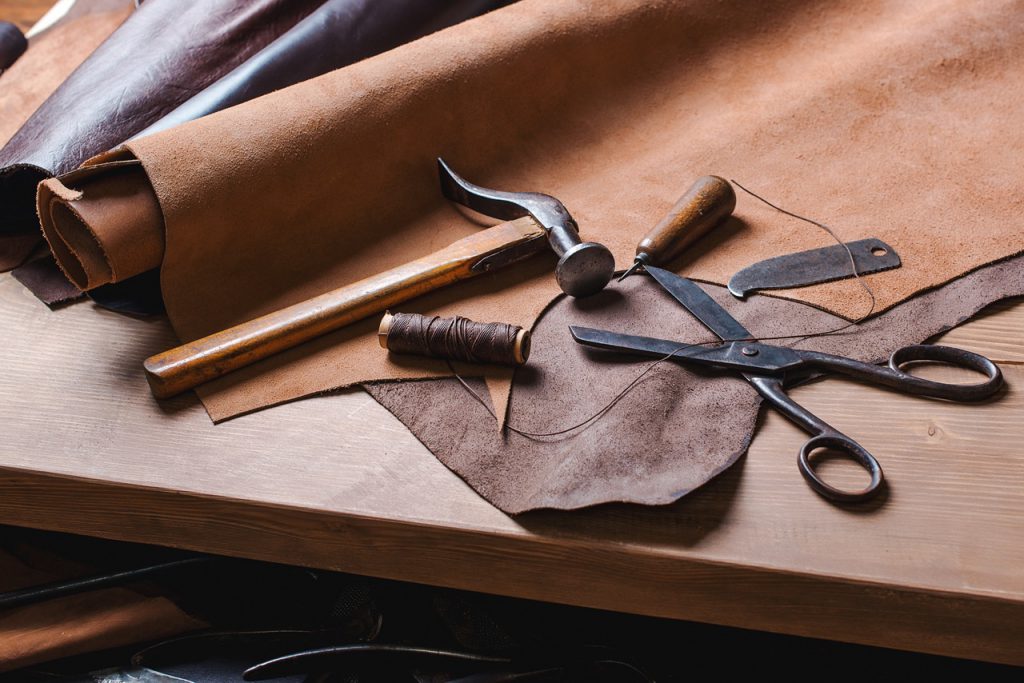
Working with leather requires tools in at least four essential categories: cutting, piercing, sewing/fixing, and finishing. For each you will find below descriptions of the most important tools, some pointers on their use, and useful links to purchasing your first tools!
Cutting the leather
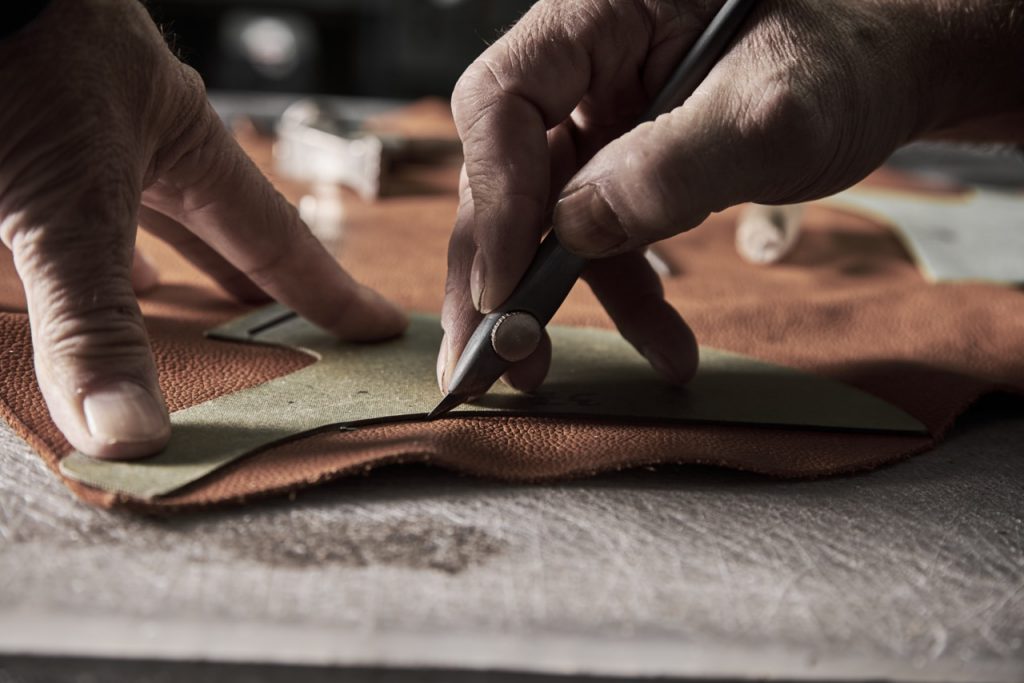
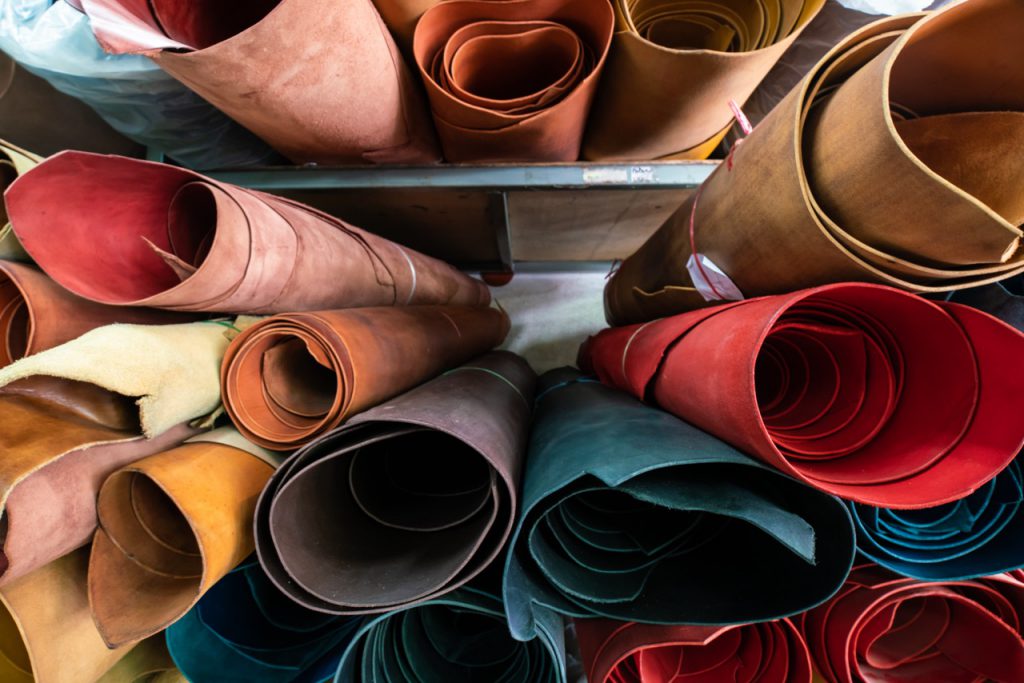
Whatever project you wish to work on, your first step is to cut the raw material into the pieces, quantities, and sizes you need. There is most likely already at least one knife in your toolbox that can do the trick, especially if the leather is not very thick, but if you want to get a specific one, here are some tips.
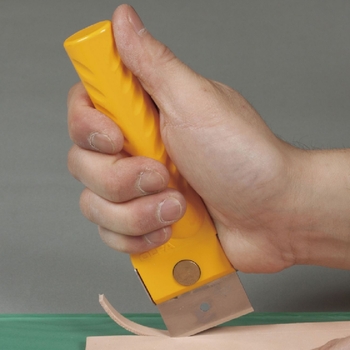
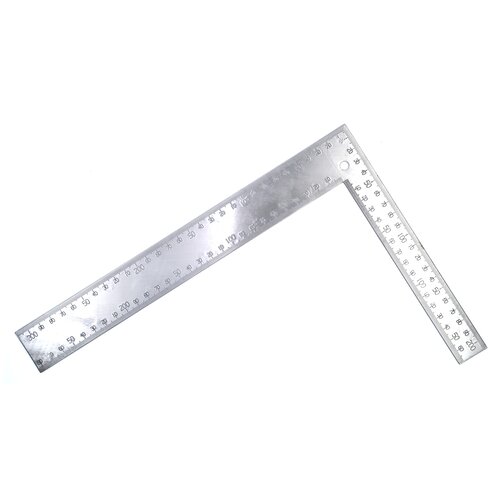
A fixed- or retractable-blade utility knife with a sturdy handle is essential. For long, straight cuts, the ideal is a
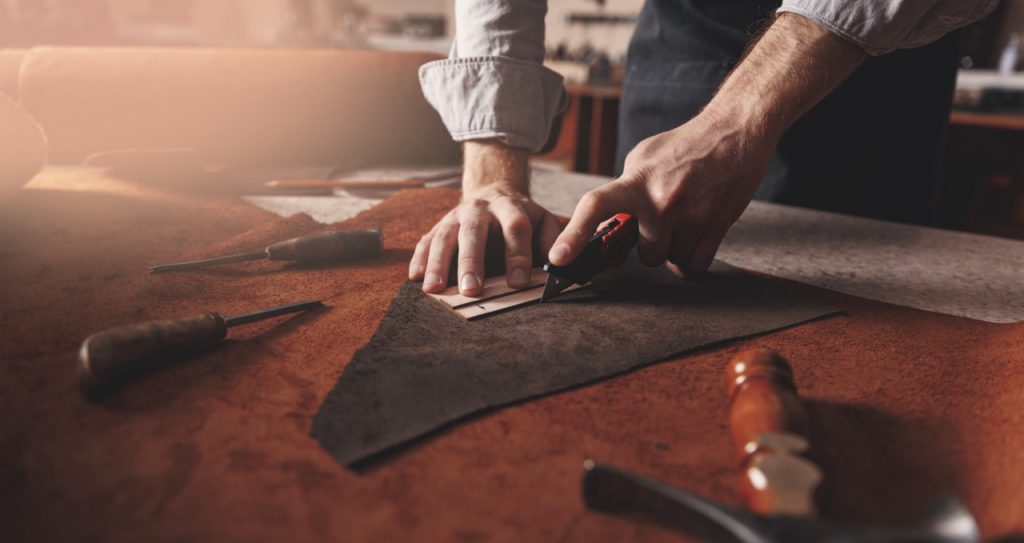
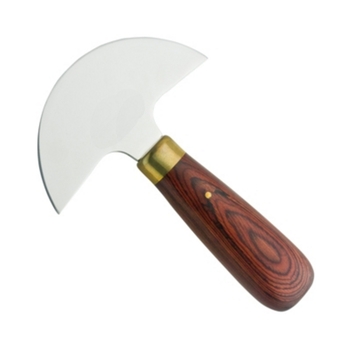
For precise or freehand cuts, especially if you have already had some experience with leather working, we definitely recommend a Japanese-type knife or alternatively a classic crescent knife.
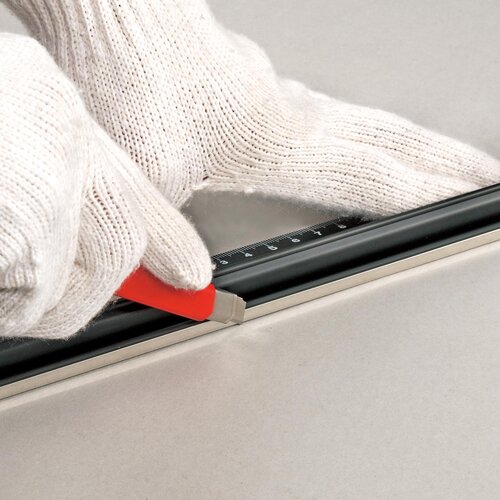
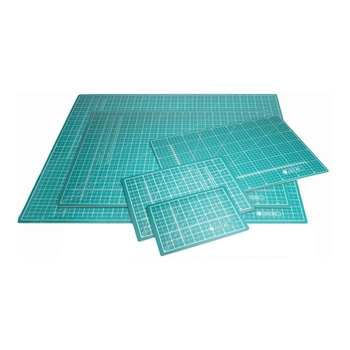
For your safety, always wear protective gloves whenever you are handling a blade. We also recommend getting a cutting mat: self-healing ones are an excellent work surface, long-lasting, and gentle on your blade edges. Many are also pre-printed with rulers and grids that can serve as a guide while cutting.
Punches, awls and markers: perforating the leather
Whether you’re punching holes in a belt, decorating or creating tracks for stitching, the operation of punching is one of the most important when it comes to working with leather. Depending on the goal, you’ll need different tools. Here are a few of them!
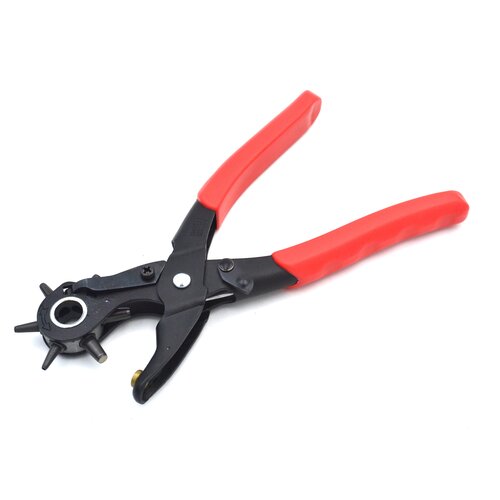
Hole-punch pliers: an essential tool for punching defined, regular holes for attaching snaps or rivets, for belt buckles or shoulder straps, and for shoe laces. You can also use hammers and individual punches for this type of hole making, but we recommend starting with a tool like the hole punch, which is more handy and versatile. There are several models on the market, some cheaper with fixed punches and others, more expensive, with interchangeable punches. The low-effort die cutter, on the other hand, thanks to a system of levers, allows you to punch holes without tiring your hand.
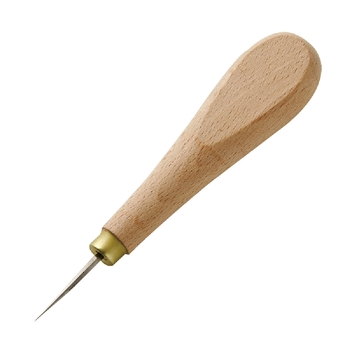
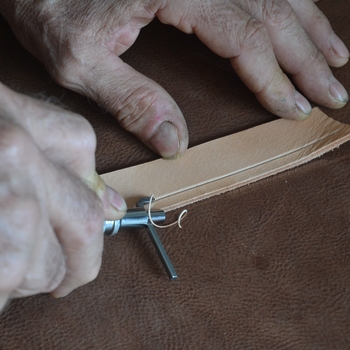
The awl is a tool that may seem trivial, but it plays an essential role in leatherworking. The awl has a sturdy wooden handle and a blade with a thin, sharp tip that widens as it approaches the handle. This allows you not only to pierce the leather easily but also, by inserting the blade, to widen the hole as needed. Awls can have round or diamond-shaped blades and come in various thicknesses, so before purchasing one, think about the type of project you want to complete and choose the tool accordingly.
Hammer markers are used to mark stitching holes. They resemble forks, with a varying number of tines that allow you to create sequences of evenly spaced holes. Depending on the type of leather and the stitching you need, you will need to use different sized markers. The awl, as we have already seen, can be useful at this stage to open and widen the holes and make it easier for the needle to pass through.
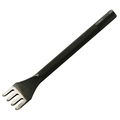
Hammer markers are used to mark stitching holes. They resemble forks, with a variable number of teeth that allow you to create sequences of holes at regular intervals. Depending on the type of leather and the stitching you need, you’ll need to use different sized markers. The awl, as we’ve already seen, can be useful at this stage to open and widen the holes and facilitate the needle’s insertion.
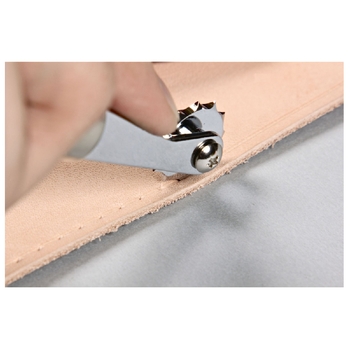
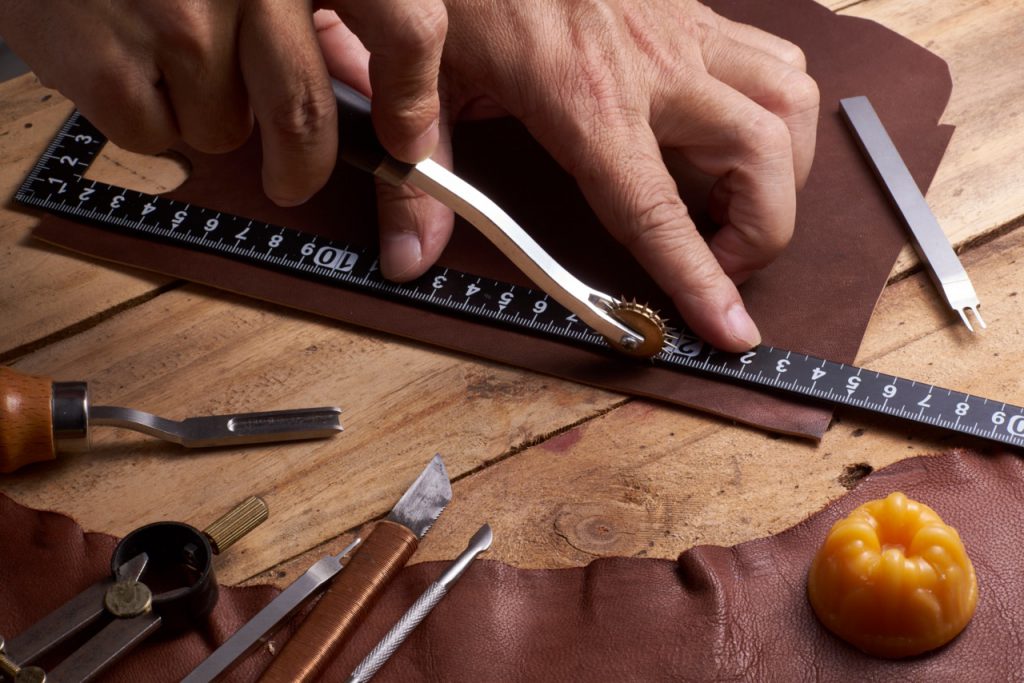
An alternative to hammer markers is the marking wheel, which, just like a pasta wheel, creates equidistant holes in the leather. This makes marking quicker, but the holes will need to be opened or widened using an awl.
The stitching groover is another essential tool when your project includes stitching. With this tool, you can carve grooves into the leather, into which you’ll then punch the holes for sewing. This will protect the stitches from chafing and wear.
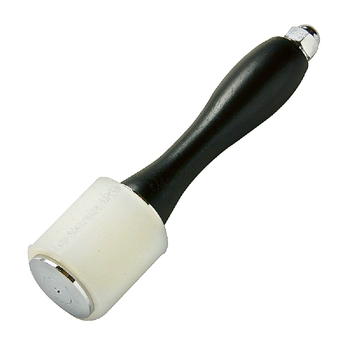
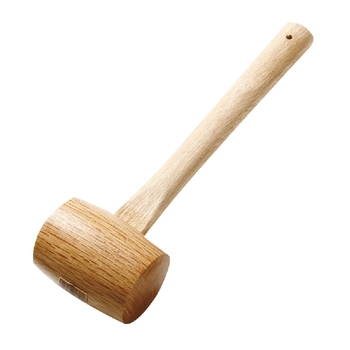
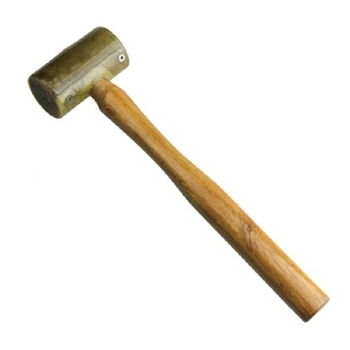
We also include in this category the traditional hammer, although its main use does not have to do with punching. Besides being used with punches, a hammer is essential when installing snaps, rivets, or hardware. We recommend using a nylon, wood, or raw-leather headed hammer; a steel hammer is often too heavy and may damage tools.
Leather stitching
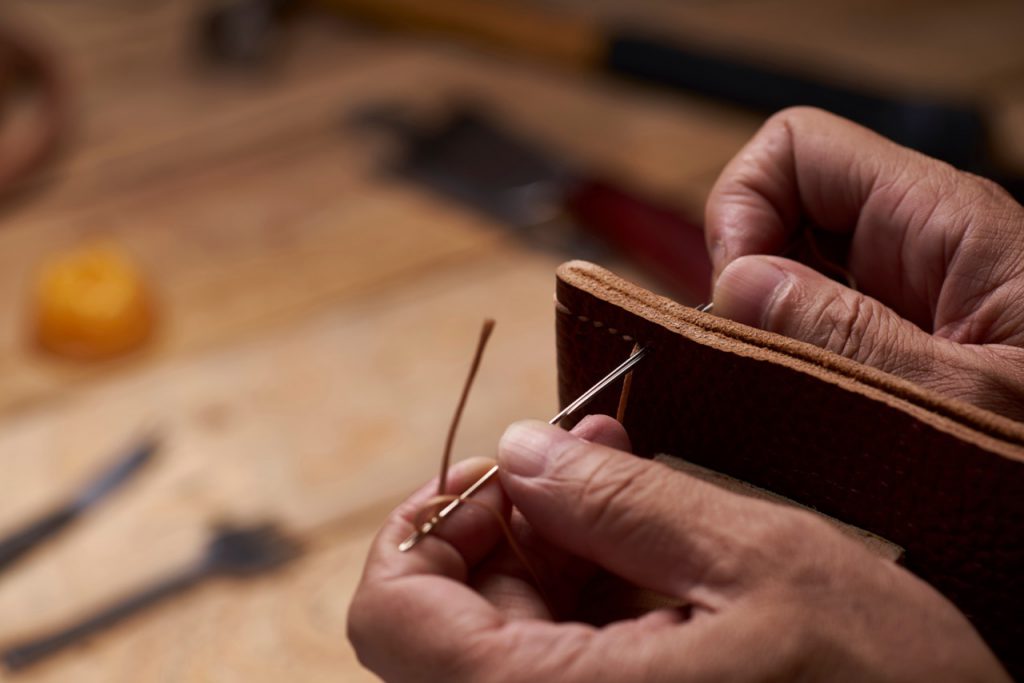
Once grooves are cut and holes punched, it’s time to sew. For this operation, the essential tools are very simple: needle and thread! But both have quite different characteristics from those we are used to for textiles. The leather needle, for example, is usually thick and blunt-pointed, because the holes have already been drilled with awls or serrated markers.
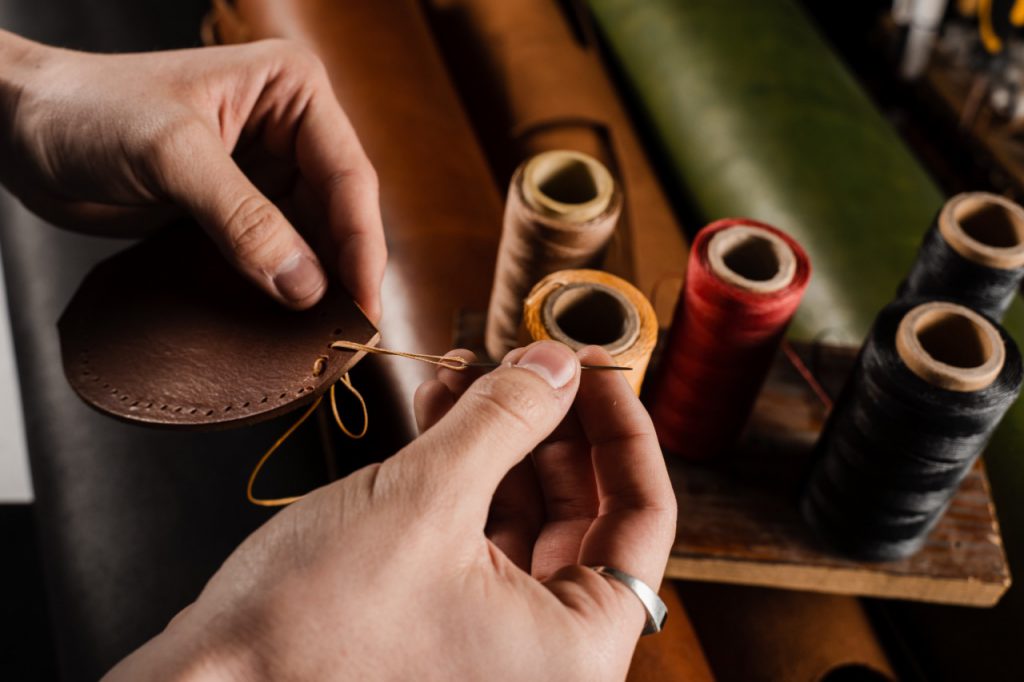
As for the threads, those in waxed nylon specifically made for leather are highly valued because they flow easily through the leather without too much resistance. Cotton and linen are chosen by those seeking a more natural and traditional finish. These threads, by the way, create less friction and do not damage the fibers as plastic can. Our advice? Experiment and try different types and effects to find your ideal thread!
Applying wax to the thread before stitching is useful not only for protecting the thread itself, but also to ensure that, with each pass of the thread, the wax is deposited in the holes, creating a protective barrier for the exposed fibers and thus increasing the longevity of the stitching and the product.
Another protective measure is to lightly burn the thread ends after stitching. Lightly burn the ends of the thread with a lighter in order to seal the thread fibers and prevent fraying.
Finally, glues and adhesives may be a viable alternative to stitching if your project is small in size or does not have to bear significant weight. For those new to stitching, moreover, glue can serve to hold the two leather flaps in place while working.
Finish and preservation
Leather is an organic, fibrous material, naturally subject to wear and tear. The edges and seams, in particular, can fray over time and use, so the finishing process is crucial to ensuring the longevity of your project.
To seal and polish leather edges, you can use a canvas cloth dampened with water and rubbed along the edges. For larger jobs or more professional finishes, there are also electric tools with rotating heads that perform this operation, but this is probably an investment worth considering later.
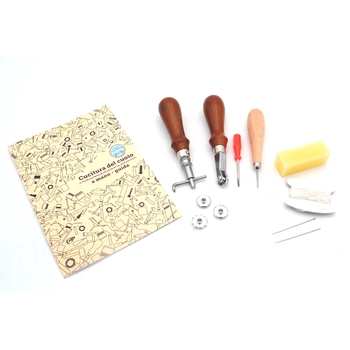
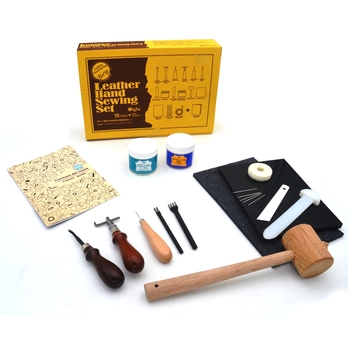
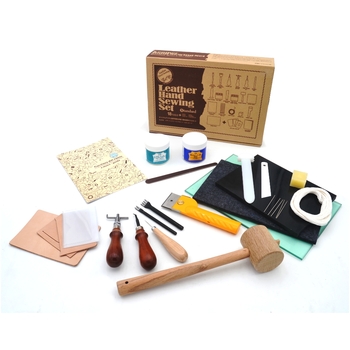
As you can see, to take your first steps in leatherworking you don’t need many tools or a large financial investment: in most cases, these are items and accessories that are absolutely affordable. If you want to optimize even further and make sure you have all the essentials, we recommend taking a look at our Hand Sewing Kits , which include the basic tools needed for artisanal leatherworking and stitching. Different prices and assortments are available, but all are designed to help you start your journey into leathercraft.